How to Open Windows Terminal as Admin Automatically

Opening Windows Terminal automatically as administrator lets you run commands that need special permission without having to click extra steps each time. Windows Terminal is a modern command-line app that brings together Command Prompt, PowerShell, and Windows Subsystem for Linux (WSL) in one place. It’s available for Windows 10 version 1903 and newer, and Windows 11.
Manually running Terminal as admin means right-clicking its icon and choosing “Run as administrator.” This new setup lets you skip that every time. When you start Terminal this way, you’ll still see the User Account Control (UAC) screen to confirm, but the program will then open with the administrator rights you need.
Open Windows Terminal, go to Settings, select a profile, and toggle “Run this profile as Administrator” to On. Save the changes. This will prompt a User Account Control (UAC) confirmation each time you launch that profile.
Method 1Use the Settings Menu
Opening Windows Terminal as admin is possible using the **Settings** menu to configure specific profiles, like PowerShell, to always start with administrator rights. This setting ensures your chosen command-line tools run with the permissions they need.
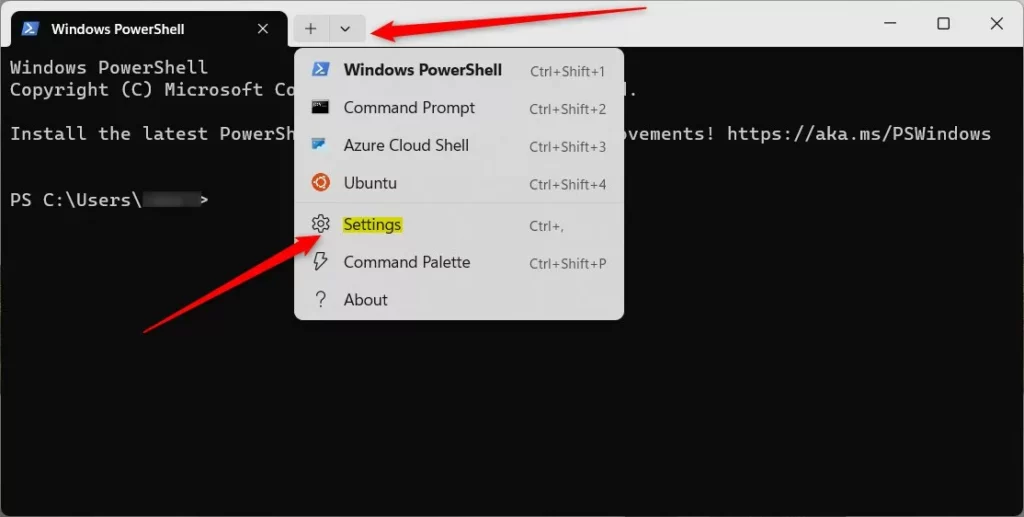
- Open Windows Terminal.
- Click the down arrow in the top bar and select Settings.
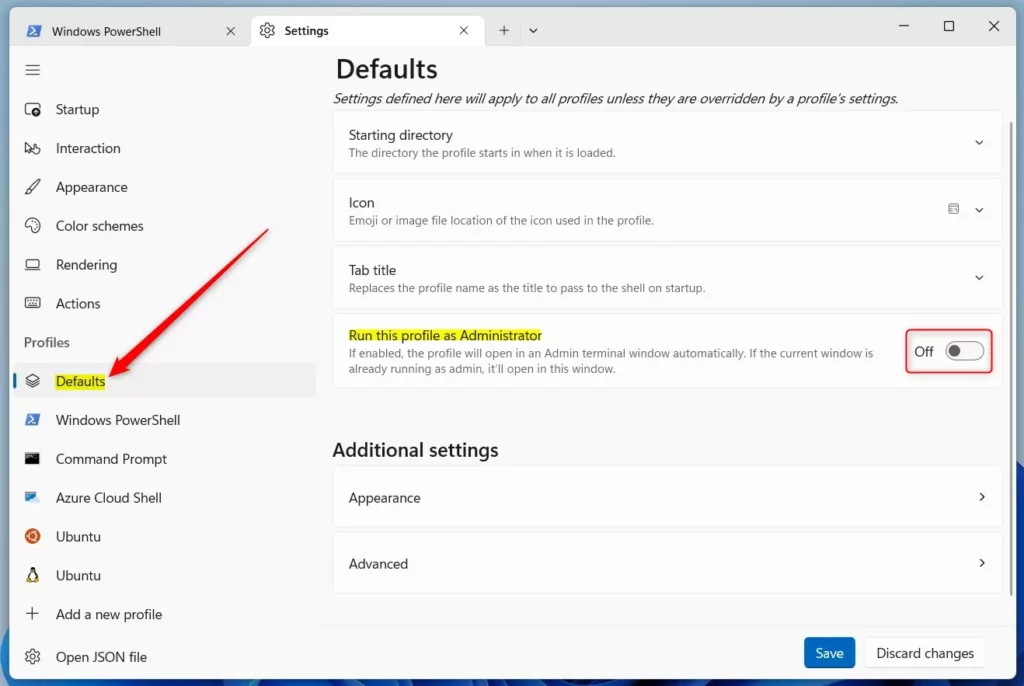
- ⚠️ ADMIN REQUIRED: In the sidebar, select the specific profile (e.g., PowerShell or Command Prompt) or Defaults to apply it to all.
- Toggle the Run this profile as Administrator switch to On.
- Click Save.

Method 2Edit the JSON Settings File
Editing the Windows Terminal JSON settings file (a configuration file written in JSON format) offers more control to open it as admin, letting you set specific profiles to always run with administrator privileges. This method provides a deeper level of customization for how your Terminal profiles launch.
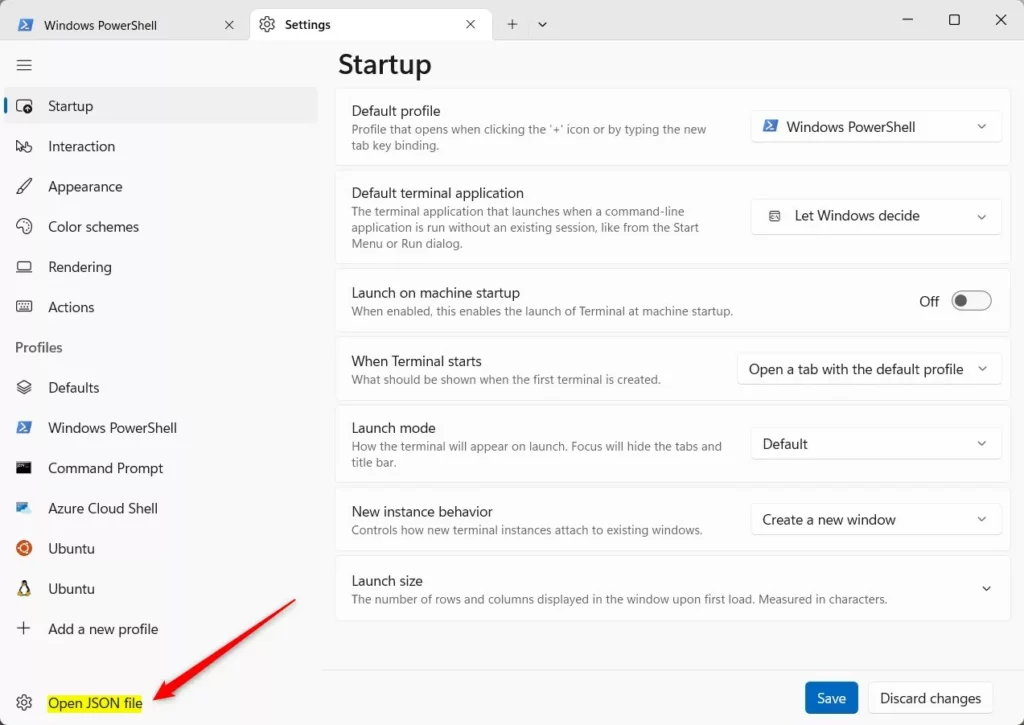
- Open Settings in Windows Terminal.
- Click Open JSON file at the bottom left.
- Locate the
"profiles"or"defaults"section. - Add the line
"elevate": true,to the desired profile block.
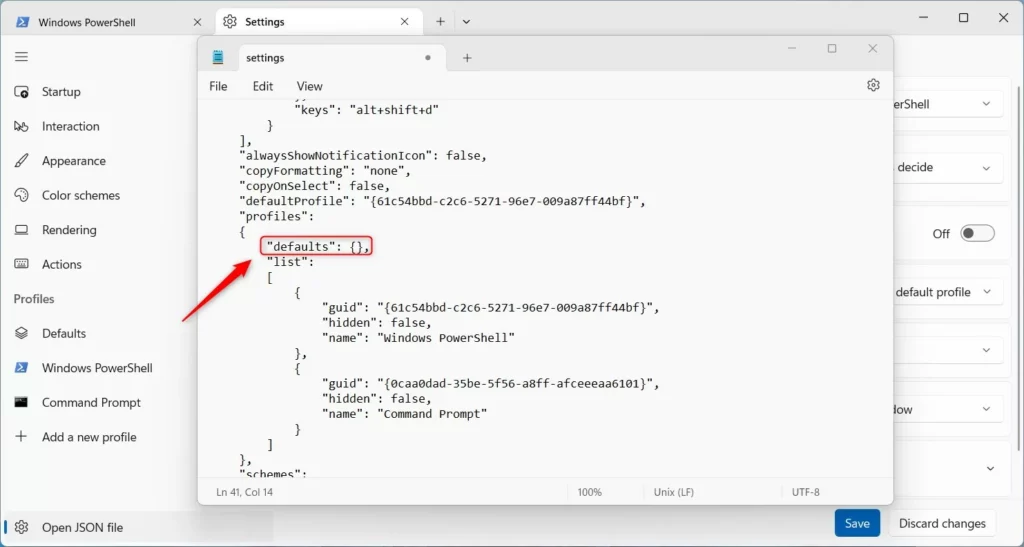
"defaults":
{
    "elevate": true
},
Creating a Desktop Shortcut for Admin Access
Creating a desktop shortcut is a quick way to open Windows Terminal as admin every time, giving you a dedicated icon that launches Terminal with the necessary permissions. This shortcut allows you to launch Terminal directly with administrator rights without needing to go through the usual steps.
- Right-click on your desktop and select New > Shortcut.
- Type
wt.exein the location box. - Click Next and name the shortcut.
- Right-click the new shortcut and select Properties.
- Click the Advanced button.
- Check the box Run as administrator and click OK.
Command-Line Execution and wt.exe
Windows Terminal can be launched using specific commands called arguments. For instance, to force an elevated window via the Run dialog (Win+R), type wt.exe -w 0 nt --elevated. This is useful for scripts or quick access.
Summary
You can open Windows Terminal as admin by toggling the setting in the graphical interface or by adding "elevate": true to your JSON configuration. For custom needs, use a desktop shortcut with elevated properties enabled. For more advanced configuration, refer to the official Microsoft documentation.
Can I mix admin and non-admin tabs in the same window?
No, Windows Terminal currently requires a new window for elevated sessions. Because elevation changes the security context of the process, you cannot mix standard and administrator tabs within a single window instance. Each elevated tab will spawn its own separate, high-privilege window process.
Why does Ctrl+Shift+Enter not work for Windows Terminal?
The Ctrl+Shift+Enter shortcut is a standard Windows feature for launching apps from the Start menu. It does not work inside the Terminal application itself to elevate a new tab. You must configure the profile settings or use the command line to trigger elevation.
Was this guide helpful?

About the Author
Richard
Tech Writer, IT Professional
Richard, a writer for Geek Rewind, is a tech enthusiast who loves breaking down complex IT topics into simple, easy-to-understand ideas. With years of hands-on experience in system administration and enterprise IT operations, he’s developed a knack for offering practical tips and solutions. Richard aims to make technology more accessible and actionable. He's deeply committed to the Geek Rewind community, always ready to answer questions and engage in discussions.


[…] open Windows Terminal and select the PowerShell […]
[…] open the Windows Terminal app as […]
[…] First, open the Windows Terminal app as administrator. […]
[…] open the Windows Terminal app as administrator and select the PowerShell […]
[…] the Windows Terminal app can reset WSL Ubuntu […]
[…] do that, first, open the Windows Terminal app as an administrator. Then, you can use either the Windows PowerShell or Command Prompt […]
[…] open Windows Terminal as administrator, and select Windows PowerShell or Command […]
[…] open the Windows Terminal app and select the PowerShell […]
[…] do that, first, open the Windows Terminal as administrator and select the PowerShell […]
[…] open the Windows Terminal app as administrator. Then, run the command below using either the Command Prompt or Windows PowerShell […]
[…] open the Windows Terminal app as administrator or learn how to create a shortcut on your […]
[…] Make sure you run the Windows Terminal app as administrator. […]
[…] the language, adjust the launch size, set the default profile, change the startup behavior, open the admin window, open Terminal automatically at startup, add copy selection to the clipboard […]
[…] the command line [Windows Terminal], run the command below to start and stop all […]
[…] Open the Windows Terminal app as administrator. […]
[…] you can turn autoSwitch on or off using the Windows Terminal […]
[…] open the Windows Terminal as an administrator, and select Windows PowerShell or Command […]
[…] Learn more about opening Windows Terminal as admin […]
[…] Open Terminal as Administrator. […]
[…] For help opening Windows Terminal, see this guide. […]
[…] you want, you can also open Windows Terminal with admin rights by following this […]
[…] Windows Terminal as an Administrator: Click here to learn how if you’re not […]
[…] Open Windows Terminal as an administrator. Click the Start button, type Windows Terminal, right-click it, and select Run as administrator. Learn more about opening Windows Terminal as admin […]
[…] Open Windows Terminal. […]
[…] Open Windows Terminal as Administrator. You can do this by searching “Windows Terminal” in the Start menu, right-clicking it, and choosing Run as administrator. […]
[…] Windows Terminal (Admin). Choose either PowerShell or Command […]
[…] Right-click the Start button and choose Windows Terminal (Admin). […]
[…] Windows Terminal: Right-click the Start button and select Windows Terminal (Admin) or search for “Windows Terminal” and open it as […]
[…] the Start button and choose Windows Terminal (Admin). If prompted by User Account Control, click […]
[…] Right-click the Start button and select Windows Terminal (Admin). […]
[…] Right-click the Start button and select Windows Terminal (Admin). […]
[…] FLAG: Admin privileges required. Open Windows Terminal as an Administrator. You can read how to open Windows Terminal as admin here. […]
[…] Right-click the Start button and select Windows Terminal (Admin). […]
[…] Tip: You can also set Windows Terminal to always open as administrator. Learn how here. […]
[…] 🔒 ADMIN REQUIRED: Open the Windows Terminal app as an administrator. Click the Start button and type “Windows Terminal.” Right-click the result and choose Run as administrator. Need help? Check here: Open Windows Terminal as admin […]
[…] Open PowerShell as administrator. open Windows Terminal ad administrator […]
[…] change the language, adjust the launch size, set the default profile, change the startup behavior, open the admin window, open Terminal automatically at startup, add copy selection to the clipboard automatically, and […]
[…] can use these commands in the Windows Terminal app or the Windows Terminal app. If you are not sure how to open these, learn how to create a shortcut […]
[…] the Windows Terminal app as an […]
[…] the Windows Terminal app. Note: This step requires admin […]
[…] First, open the Windows Terminal app. […]
[…] open the Terminal app. Then, type the following command to see a list of your installed speech […]
[…] Click the Start button and type “Terminal.” […]