How to Uninstall Voice Access Languages in Windows 11
Uninstalling Voice Access languages in Windows 11 removes specific language packs from your PC’s settings.
Voice Access is a Windows 11 feature that lets you control your computer using only your voice, acting as a full alternative to a keyboard and mouse.
Removing unneeded language packs frees up storage space on your hard drive, as these packs can take up significant room. This process also helps your PC run a bit smoother by not managing as many speech recognition options.
For example, a single language pack can easily be hundreds of megabytes.
Go to Settings, then Apps, and Installed apps. Find the Speech Pack you want to remove, click the three dots, and select Uninstall. Confirm the action to remove the language.
Using the Windows Settings App
You can uninstall a Voice Access language in Windows 11 using the Settings app. First, open Settings and navigate to Apps, then Installed apps. Find the Speech Pack for the language you want to remove, click the three dots next to it, and select uninstall to complete the process.
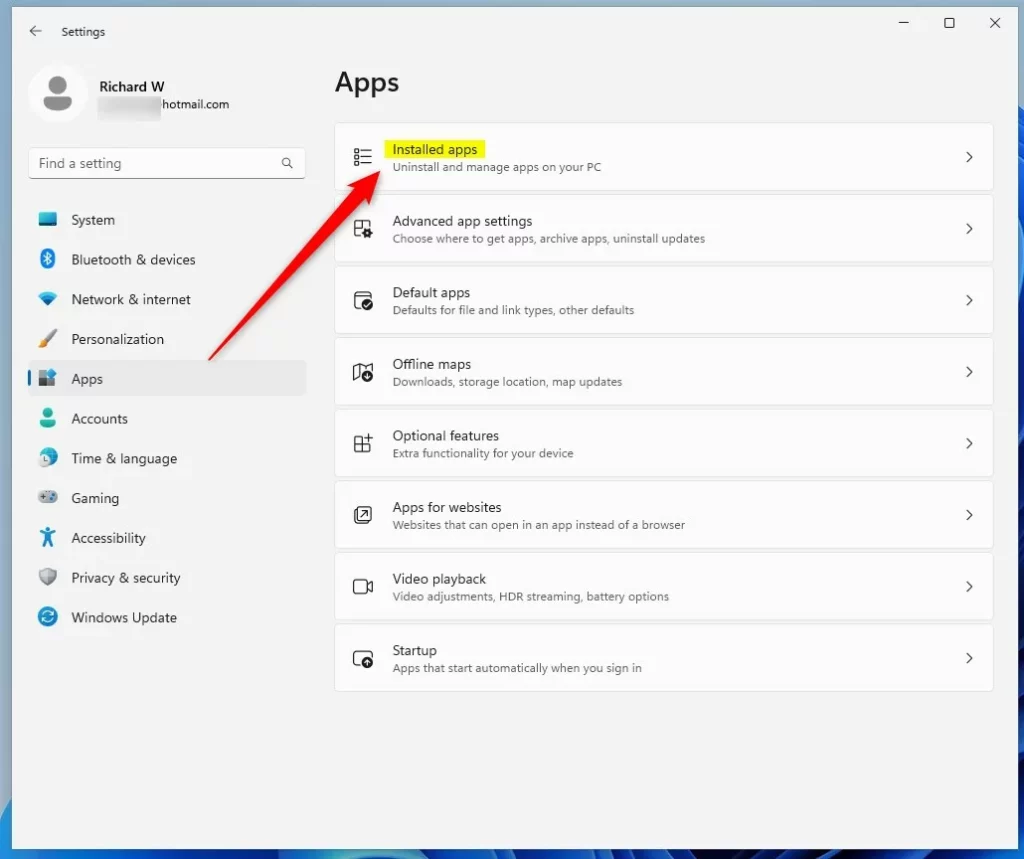
- Click Start and select Settings.
- Go to Apps then Installed apps.
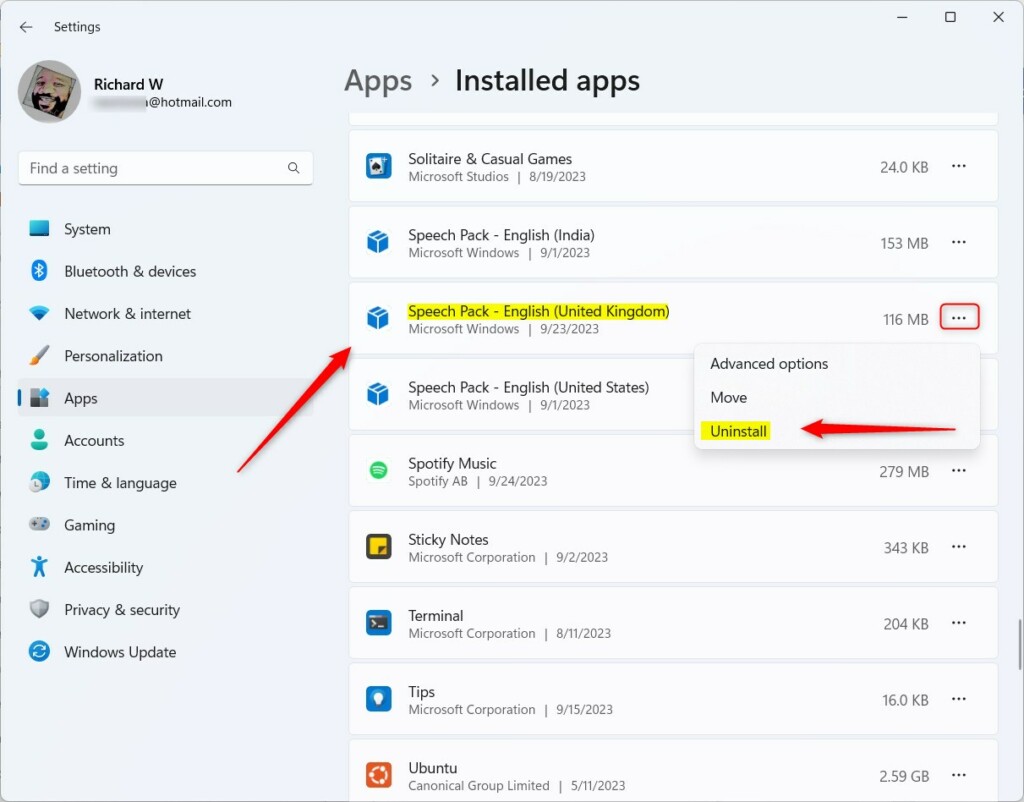
- Find the Speech Pack you want to remove in the list.
- Click the three dots (…) next to the item.
- Select Uninstall.
- Click Uninstall again to confirm.
Using Windows Terminal (Advanced)
For a faster, more technical approach, you can uninstall a Voice Access language using Windows Terminal. You’ll need to open Windows Terminal with administrator privileges and use specific commands. First, locate the PackageFullName for the language you want to remove. Then, use that name in the provided command to remove the speech pack from your system.
To uninstall a Voice Access language in Windows 11, you first locate the PackageFullName for the specific language you wish to remove. You then use this PackageFullName in the command line to remove the unwanted language package.
Get-AppxPackage *MicrosoftWindows.Speech* | Select Name, PackageFullName
Remove-AppxPackage -Package 'MicrosoftWindows.Speech.en-GB.1_1.0.7.0_x64__cw5n1h2txyewy'
Troubleshooting Greyed-Out Options
If the uninstall button for a Voice Access language appears greyed out, it usually indicates that the language is set as your primary display language or is required for Windows Update. In this case, you'll need to change your primary language first.
Verification of Removal
After uninstalling a Voice Access language, you can verify its removal to ensure success. One way is to open PowerShell with administrator rights and run a specific command to see if the language package name is no longer listed. You can also check your system's storage space in Settings to confirm that the space previously used by the language pack has been freed up.
Get-AppxPackage -Name *Speech*
If the package name no longer appears in the output, the removal was successful. You can also check your disk space in Settings System Storage to confirm the space has been reclaimed.
Summary
Managing Voice Access languages in Windows 11 offers flexibility, using either the Settings menu for a visual approach or Windows Terminal for a faster, command-based method to keep your system organized.
Why can't I find the language pack in the Installed Apps list?
If you can't find a Voice Access language pack in the Installed Apps list, it's likely an optional feature. You can remove it by navigating to Settings Time & language > Language & region and looking under Speech options.
Does removing a Voice Access language affect other Windows features?
Removing a Voice Access language only impacts the speech-to-text capabilities for that specific language. It does not affect your display language, keyboard layout, or other core Windows features. However, ensure you do not remove the language currently set as your primary system language to avoid potential interface issues.
Can I reinstall a Voice Access language after removal?
Yes, you can reinstall any language pack at any time. Navigate to Settings Time & language Language & region, click Add a language, and ensure the Speech recognition box is checked during the installation process. This will restore full Voice Access functionality for that language.
Was this guide helpful?

About the Author
Richard
Tech Writer, IT Professional
Richard, a writer for Geek Rewind, is a tech enthusiast who loves breaking down complex IT topics into simple, easy-to-understand ideas. With years of hands-on experience in system administration and enterprise IT operations, he’s developed a knack for offering practical tips and solutions. Richard aims to make technology more accessible and actionable. He's deeply committed to the Geek Rewind community, always ready to answer questions and engage in discussions.


No comments yet — be the first to share your thoughts!