How to Share a Local Printer in Windows 11
Sharing a local printer in Windows 11 lets other computers on your network print through it.
This means everyone can print from one printer, saving you money and setup headaches.
You can share a printer connected to your Windows 11 PC, like a USB printer, with up to 20 other devices on your network.
To get started, you need administrator rights on the computer with the printer and make sure “File and Printer Sharing” is turned on in your network settings.
Just remember, the computer sharing the printer needs to stay on and connected to the network for others to print.
Share your printer through Settings > Bluetooth & devices > Printers & scanners. Select your printer, then click Printer properties and the Sharing tab. Check "Share this printer" and click OK. The host computer must remain powered on and accessible.
Method 1Share Your Printer Using Windows Settings
You can easily share your printer in Windows 11 using the main Settings app. This lets other computers on your home or office network print to your printer without needing complicated steps. Just open Settings and follow a few simple choices to get your printer shared.
- Open Settings by clicking the Start menu and choosing Settings, or press
Windows key + Ion your keyboard. - Click Bluetooth & devices on the left side.
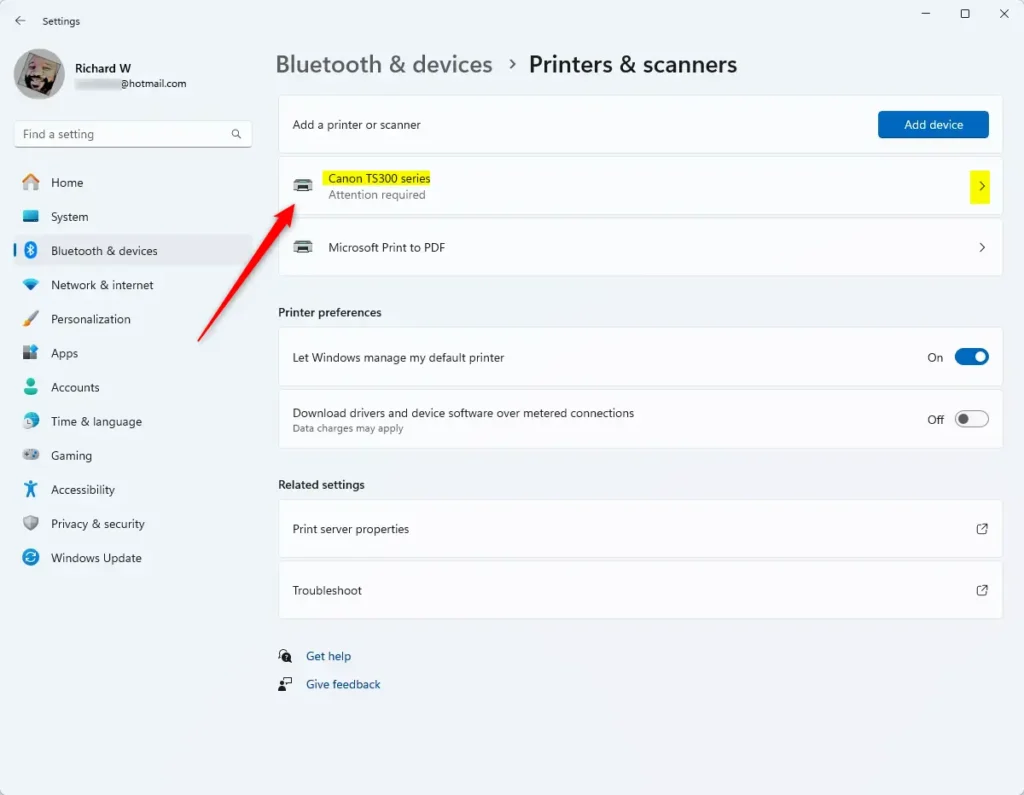
- On the right, click Printers & scanners.

- Click on the printer you want to share.
- Click Printer properties.
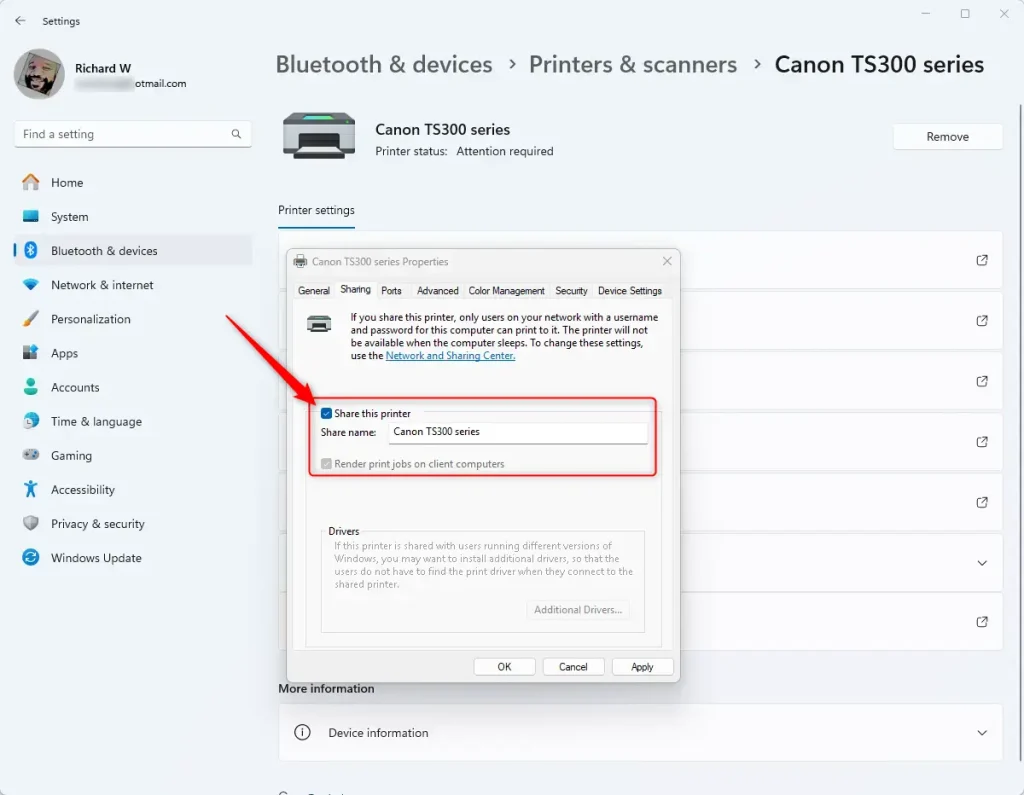
- Select the Sharing tab in the new window.
- Click the Change Sharing Options button.

- Check the box that says Share this printer.
- Give it a share name if you want—this is what others will see when they look for your printer.
- Click OK to save your settings.
Your local printer is now successfully shared across your network. This means that any other computer connected to the same network can discover and print documents using your printer. Sharing a printer makes it easy for multiple users in a home or small office to access a single printing device without needing individual printers.
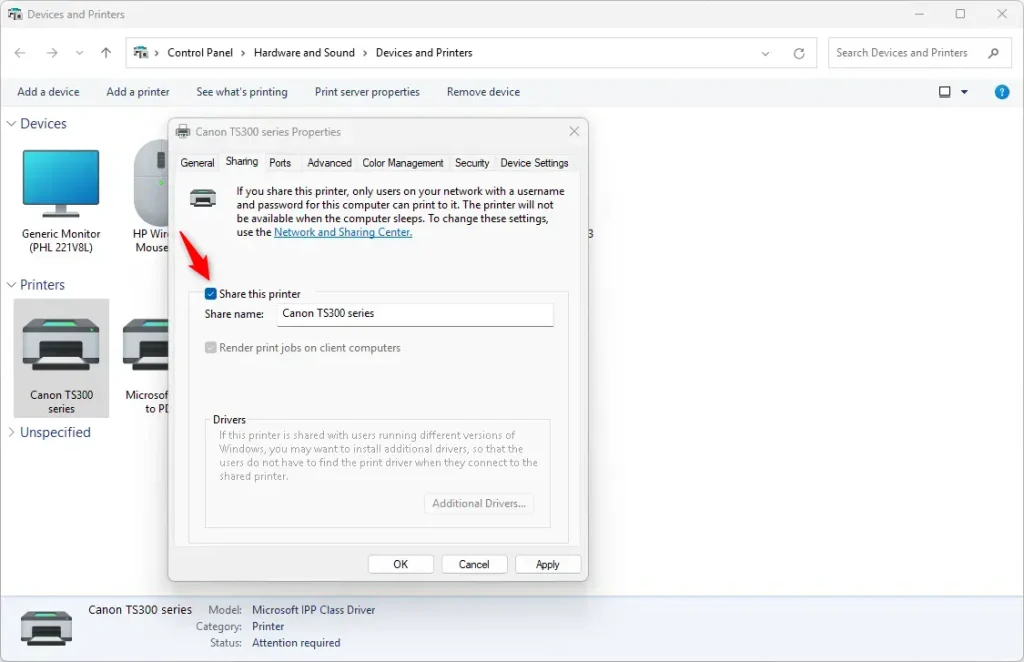
Method 2Share Your Printer Using Devices and Printers
Sharing your printer through the 'Devices and Printers' window is a common and reliable way to make it available on your network. This older but still useful method, found in the Control Panel, lets you easily set up your printer for others to use. It's a straightforward process that many are already familiar with.
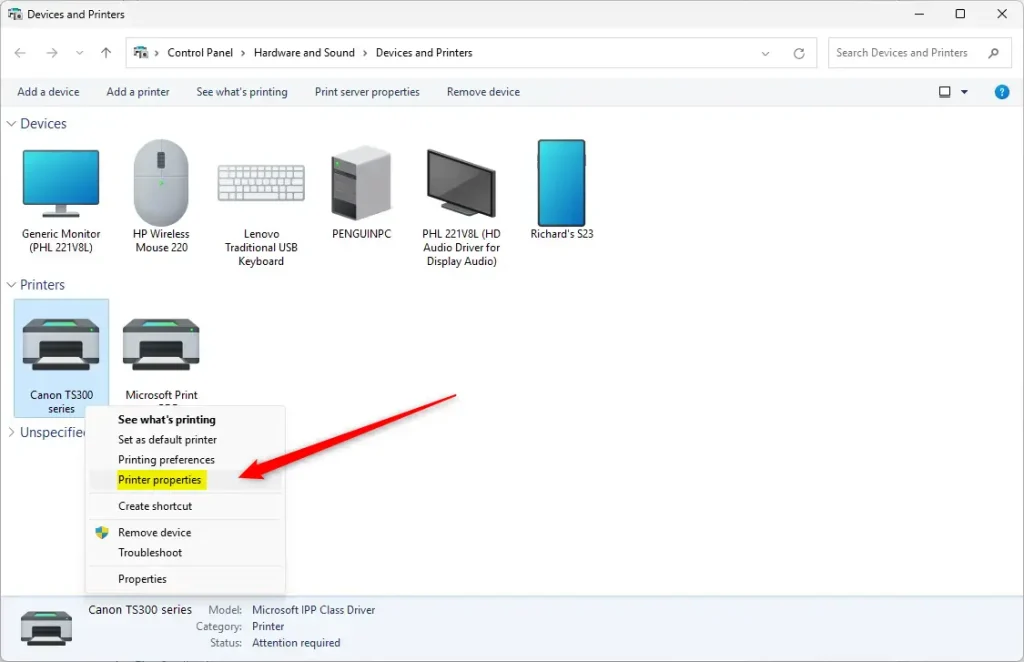
- Open Open Devices and Printers from the Control Panel or Start menu.
- Right-click the printer you want to share and select Printer properties.
- Go to the Sharing tab.
- Click Change Sharing Options.
- Check the box Share this printer.
- Click OK to save.
Method 3Share Your Printer Using PowerShell (Advanced)
If you're comfortable with command lines, you can share your printer in Windows 11 using PowerShell. This advanced method requires administrator rights and uses specific commands to set up sharing. You'll need to open PowerShell as an administrator and type in the correct commands to share your printer.
- ⚠️ Requires admin privileges: Open Windows PowerShell as an administrator.
- Type this command to see all printers on your PC:PowerShell
Get-Printer | Format-List Name,ShareName,Shared - Find the exact name of the printer you want to share. Then run this command:PowerShell
Set-Printer -Name "Your Printer Name" -Shared $TrueReplace
Your Printer Namewith your printer's actual name. - If you want to set a custom share name, use this command instead:PowerShell
Set-Printer -Name "Your Printer Name" -Shared $True -ShareName "New Share Name"
Your printer will now be shared on the network!
Summary
Sharing your printer in Windows 11 lets everyone on your network print without needing separate devices. To do this, ensure your PC is on, you have admin rights, and file and printer sharing is enabled, then use Settings, Devices and Printers, or PowerShell.Does 🪟 Windows 11 allow printer sharing?
Printers installed on a Windows device can be shared with other Windows devices on the same network, allowing multiple users to print without installing the printer on each PC. To share a printer in Windows, the printer must be: Connected to a primary Windows device.
Was this guide helpful?

About the Author
Richard
Tech Writer, IT Professional
Richard, a writer for Geek Rewind, is a tech enthusiast who loves breaking down complex IT topics into simple, easy-to-understand ideas. With years of hands-on experience in system administration and enterprise IT operations, he’s developed a knack for offering practical tips and solutions. Richard aims to make technology more accessible and actionable. He's deeply committed to the Geek Rewind community, always ready to answer questions and engage in discussions.

No comments yet — be the first to share your thoughts!