How to Find Shared Printer Name in Windows 11
The shared printer name in Windows 11 is the unique label other computers use to find and connect to your printer over the network.
This name is essential for sharing a printer, especially when setting it up from a Windows 11 Pro machine for another device to use.
You can easily find this name by checking the printer’s properties directly within Windows settings, without needing complicated steps.
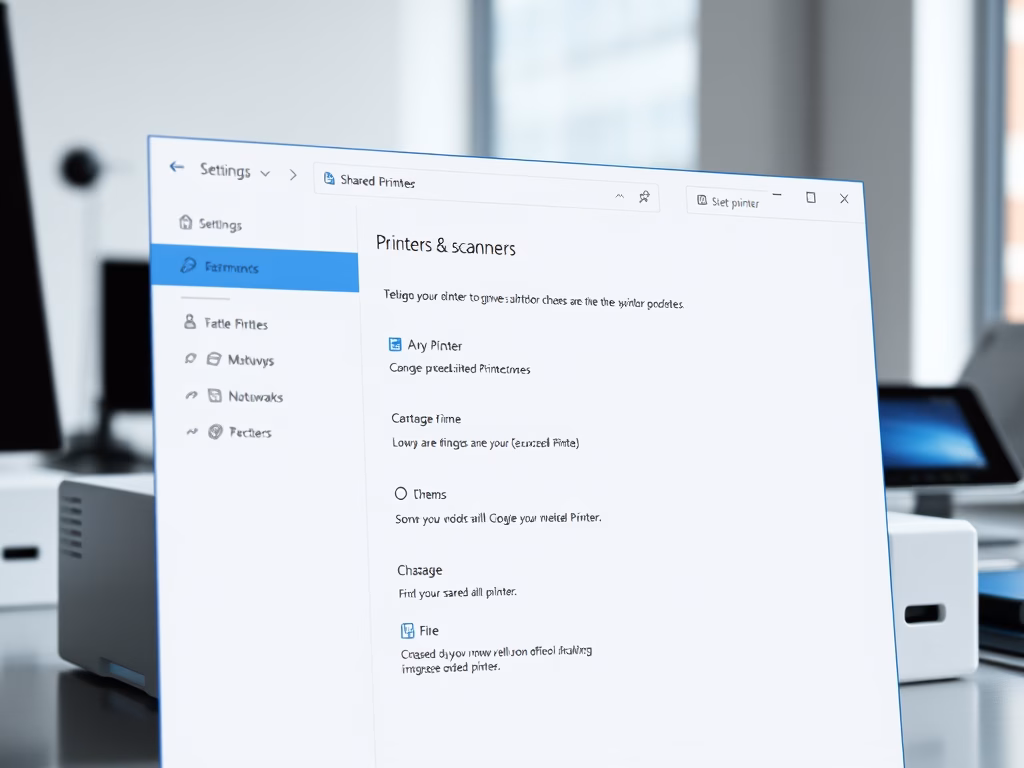
Access the printer’s properties via Settings > Bluetooth & devices > Printers & scanners, then click Printer properties. The shared name is listed on the Sharing tab. Alternatively, use the command Get-Printer | Format-List Name,ShareName,Shared in PowerShell.
Why Do You Need the Shared Printer Name?
- It helps other devices locate and connect to your printer on the network.
- You save money by not buying multiple printers.
- It makes troubleshooting printing problems much easier.
Method 1Using the Settings App
- Open the Settings app. Click the Start button and select Settings, or press Windows key + I on your keyboard.
- Click Bluetooth & devices in the left menu.
- Click Printers & scanners on the right side.
- Find your printer in the list and click it to open its details.
- Click Printer properties.
- Go to the Sharing tab. You will see the Shared name of the printer here.
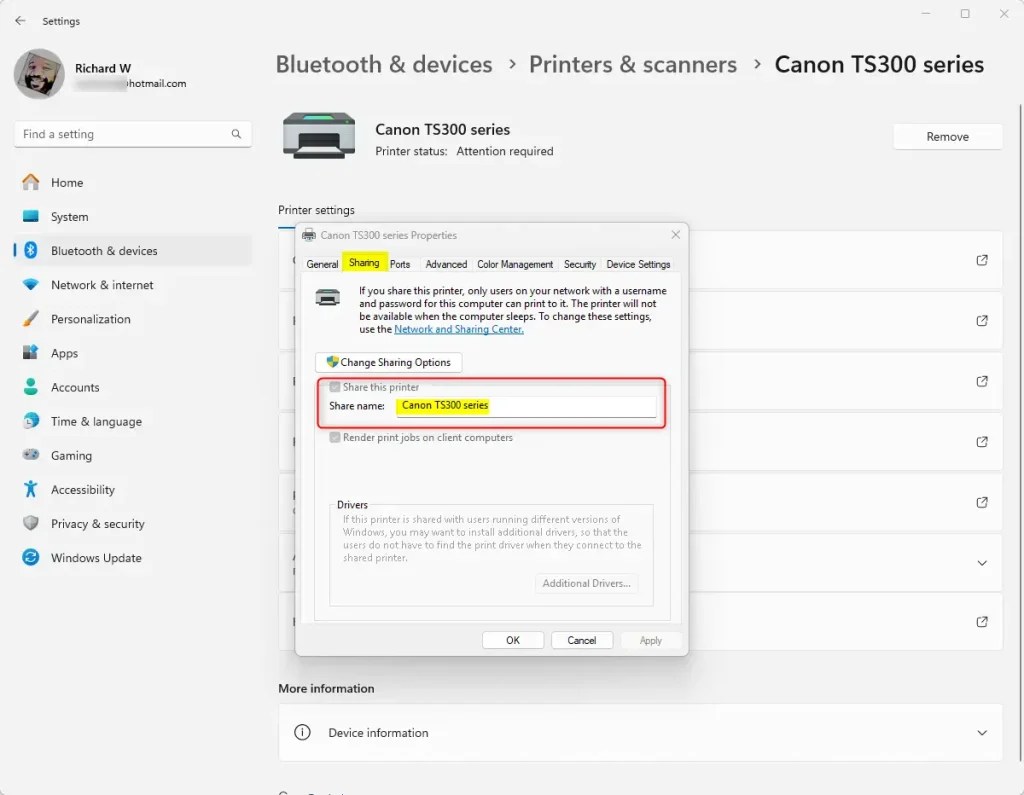
You can find the shared printer name in Windows 11 using the Settings app. Start by opening Settings – click the Start button, select Settings, or press Windows key + I. Next, go to Bluetooth & devices, then Printers & scanners to view your printer list.
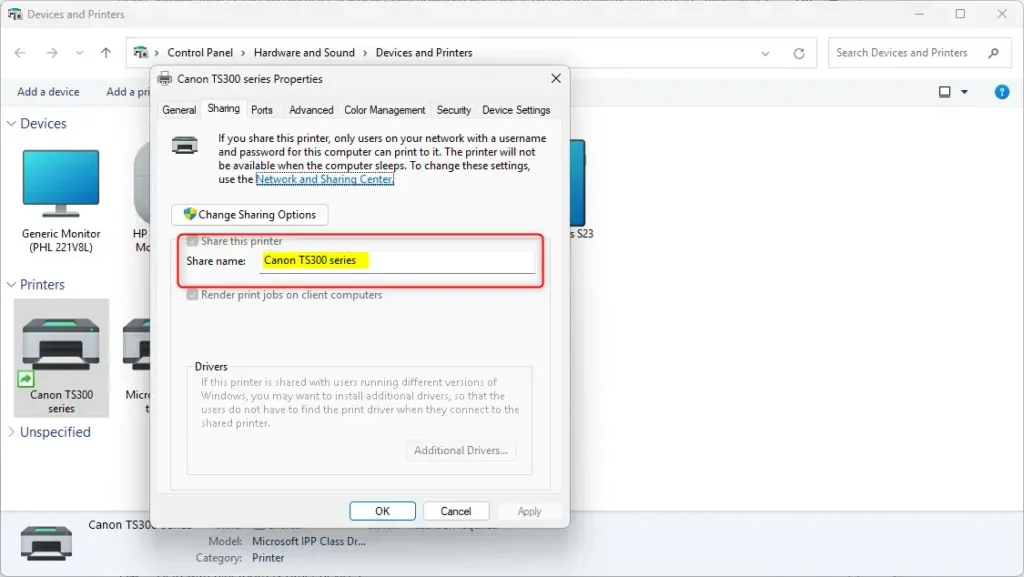
Method 2Using Devices and Printers
- Open the Devices and Printers window. Press Windows key + R, type
control printers, and press Enter. - Right-click your printer and choose Printer properties.
- Click the Sharing tab.
- Look for the Shared name listed on this tab.
Method 3Using PowerShell
For those comfortable with command-line tools, PowerShell offers a swift method to discover the shared printer name in Windows 11. You’ll need to open PowerShell as an administrator and then run a specific command to list all your printers and their shared names.
- ⚠️ Requires admin privileges: Right-click the Start button and select Windows Terminal (Admin).
- Make sure the tab shows PowerShell. You can select it from the dropdown menu if needed.
- Type this command and press Enter:
Get-Printer | Format-List Name,ShareName,Shared - Look at the results. Find the ShareName value. This is your printer’s shared name.

Summary
Discovering your shared printer name in Windows 11 can be achieved using methods like the Settings app, Devices and Printers, or PowerShell commands.
What is 0x00000709 shared printer 🪟 Windows 11?
Error 0x00000709 in Windows 11 often arises from a corrupted default printer setting within the registry (Windows’ internal configuration database). To resolve it, open regedit, navigate to 🗝️HKEY_CURRENT_USER\Software\Microsoft\Windows NT\CurrentVersion\Windows, and then clear or correct the ‘Device’ value to match your shared printer name.
How do I change the name of a shared printer?
Modifying the name of a shared printer in Windows 11 is a simple process done through the ‘Devices and Printers’ window by adjusting the printer properties.
How to add printer by shared name?
Choose the printer you wish to add, then select the ‘Add Device’ button. If your desired printer does not appear, select ‘The printer that I want isn’t listed.’ In the Add printer window that opens, choose ‘Select a shared printer by name.’
Was this guide helpful?

About the Author
Richard
Tech Writer, IT Professional
Richard, a writer for Geek Rewind, is a tech enthusiast who loves breaking down complex IT topics into simple, easy-to-understand ideas. With years of hands-on experience in system administration and enterprise IT operations, he’s developed a knack for offering practical tips and solutions. Richard aims to make technology more accessible and actionable. He's deeply committed to the Geek Rewind community, always ready to answer questions and engage in discussions.


No comments yet — be the first to share your thoughts!