How to Clear Windows Update History in Windows 11

You can clear update history in Windows 11 by running a short command in Windows Terminal, a tool for running text commands. The command wipes the list of past updates shown in Settings. It does not remove the security patches or updates already installed on your PC. You need an administrator account, and the steps are the same on Home and Pro.
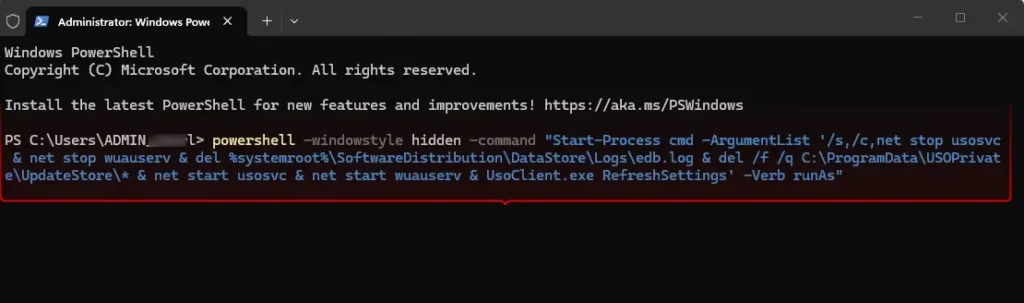
Open Windows Terminal as administrator, paste the command powershell -windowstyle hidden -command “Start-Process cmd -ArgumentList ‘/s,/c,net stop usosvc & net stop wuauserv & del 📂%systemroot%\
How to clear your update history
- Click the Start button and type “Terminal.” Terminal should appear at the top of the search results.
- Right-click Terminal and select Run as administrator. If you are not signed in as an admin, Windows asks for an administrator password.
- Click Yes if the User Account Control prompt appears. An administrator Terminal window opens, and its title bar should say Administrator.
- Copy the command shown below this list and paste it into the Terminal window. Right-click or press Ctrl+V to paste.
- Press Enter to run it. Let the command finish before you close the window.
Close it and repeat steps 1 and 2.
powershell -windowstyle hidden -command "Start-Process cmd -ArgumentList '/s,/c,net stop usosvc & net stop wuauserv & del %systemroot%\SoftwareDistribution\DataStore\Logs\edb.log & del /f /q C:\ProgramData\USOPrivate\UpdateStore\* & net start usosvc & net start wuauserv & UsoClient.exe RefreshSettings' -Verb runAs"
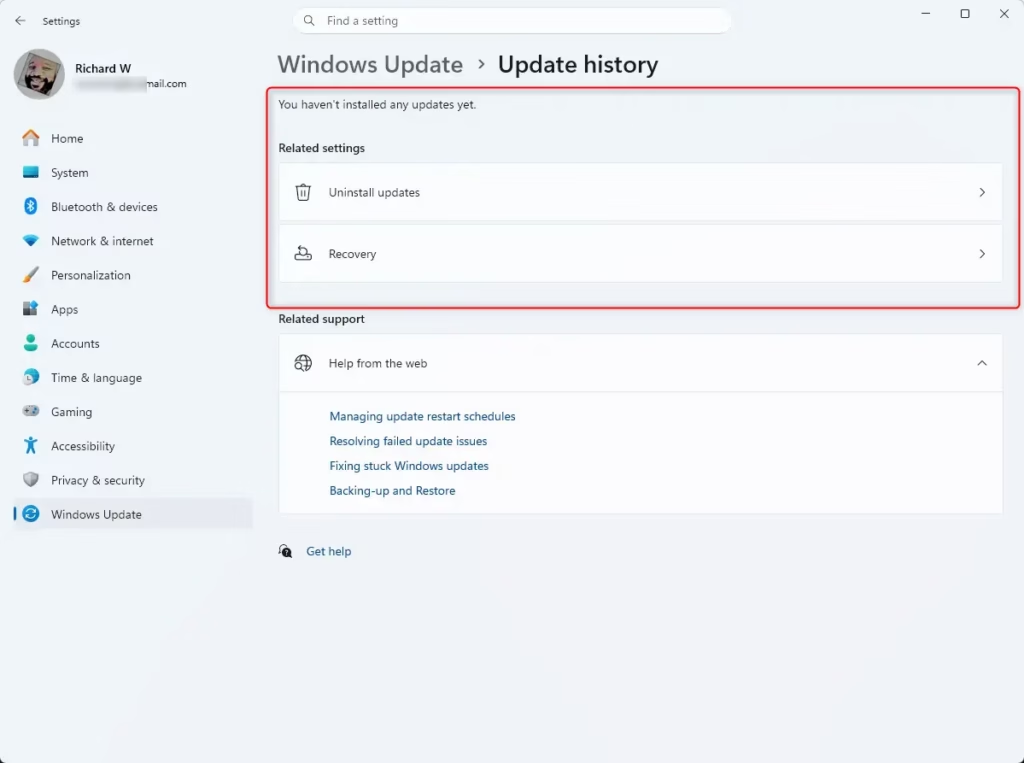
Now check the result. Open Settings Windows Update Update history The list should be empty or much shorter, and Settings picks up the change automatically. If the old entries are still there, close Settings and open it again. If they still show, restart the PC and check once more.
Summary
Installed patches stay in place and keep working, even though their entries are gone from the list. To see what is still installed, go to Settings Windows Update Update history Uninstall updates You cannot bring the cleared list back, so note down anything you need, such as a failed update’s KB number, before you run the command.
Was this guide helpful?
67% of readers found this helpful (3 votes)

About the Author
Richard
Tech Writer, IT Professional
Richard is a writer at Geek Rewind who turns complex IT tasks into clear, step-by-step guides. He draws on years of hands-on experience in system administration and enterprise IT operations, focusing on Windows, Linux and WordPress: the problems people actually run into, and the fixes that work. His server and WordPress guides come from systems he runs himself. Richard builds and maintains the platform behind Geek Rewind, from its Ubuntu servers and Nginx configuration to its custom WordPress plugins. Many new tutorials start with readers' questions, and he's always glad to answer them in the comments.



No comments yet — be the first to share your thoughts!