How to Enable or Disable Clipboard History in Windows 11

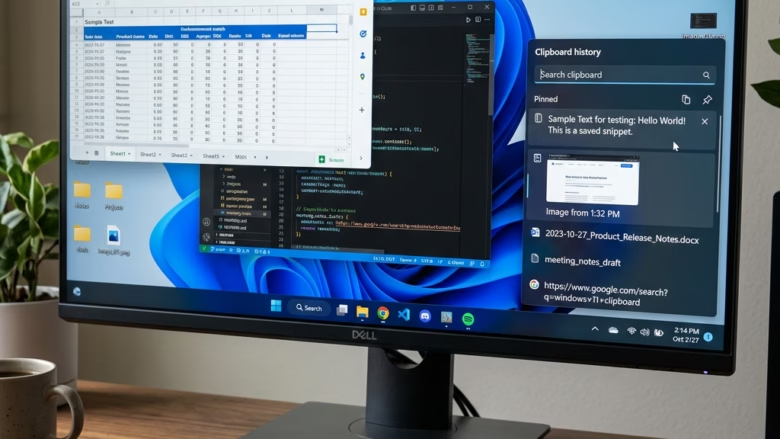
Clipboard history in Windows 11 keeps a list of the text snippets and images you copy, instead of only the last item. Press Win+V to open the panel and paste any of the older items. The list holds up to 25 entries, and each item can be up to 4 MB.
Microsoft first added this feature in Windows 10 version 1809. It saves a lot of time when you move text between documents, and a copied snippet no longer disappears when you copy something else.
Press Win+V to open clipboard history panel and verify it is enabled; if not, go to Settings System Clipboard and turn on the Clipboard history switch. The feature then saves your copied text and images for up to 25 items.
How to Pin and Clear Items
Items in the history are cleared when you restart the PC. Pinning keeps the ones you reuse often, such as an email signature, a server address or a standard reply.
- Press Win+V to open the clipboard history panel.
- Find the item you want to keep. Click the Pin icon on it, or open its More options (three dots) menu and choose Pin, depending on your build. A pinned item stays in the list after a restart.
- To remove one item, click the X next to it (or Delete in the same menu). The item disappears from the list straight away.
- To remove everything, click Clear all at the top of the panel. Pinned items are not removed by this, so unpin and delete those separately.
Syncing Across Devices
You can sync your clipboard history to your other computers through your Microsoft account. You can then copy text on one PC and paste it on another. You need to be signed in with the same Microsoft account on both machines, and a local account will not work.
- Open Settings System Clipboard
- Find Sync across your devices and turn it On. If the option is missing or asks you to sign in, you are probably using a local account.
- Choose how to sync. Automatically sync text that I copy sends every copied item. The manual option only syncs an item when you choose to.
Anything you copy, including passwords, goes to your other devices. To undo it, turn the same switch Off.
Troubleshooting Common Issues
| Issue | Solution |
|---|---|
| History not showing | Ensure the feature is enabled in Settings. |
| Sync not working | Verify you are signed in with the same Microsoft account on both PCs. |
| Items disappearing | Pin the items you want to keep; unpinned items are cleared on restart. |
Use the Keyboard Shortcut
- Press the Win+V keys on your keyboard. The clipboard history panel opens near your text cursor, or on the desktop if no text field has focus.
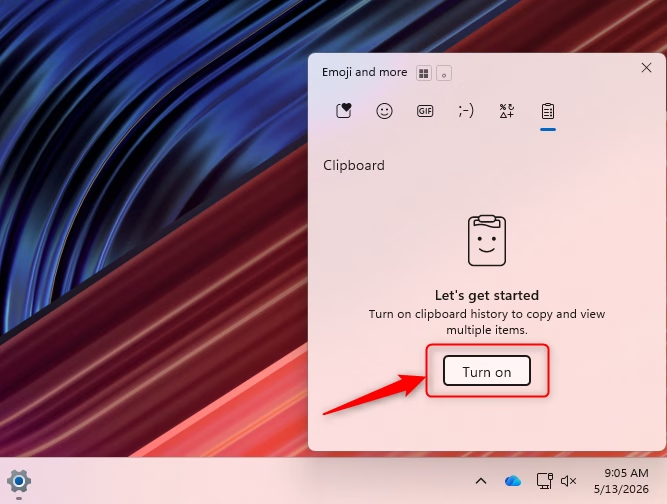
- If the feature is off, the panel shows a short message saying so. Click the Turn on button. The panel then starts to record what you copy from that point on. Items copied before you turned it on are not saved.
How to Enable Clipboard History via Settings
- Press Win+I to open Settings.
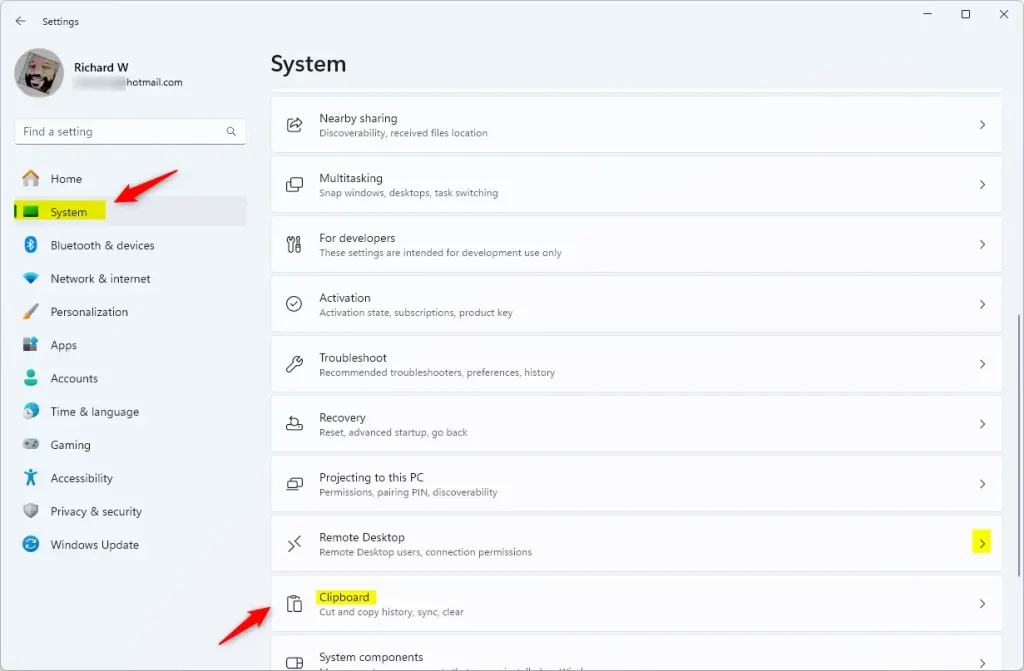
- Click System in the left pane, then scroll down and select Clipboard.
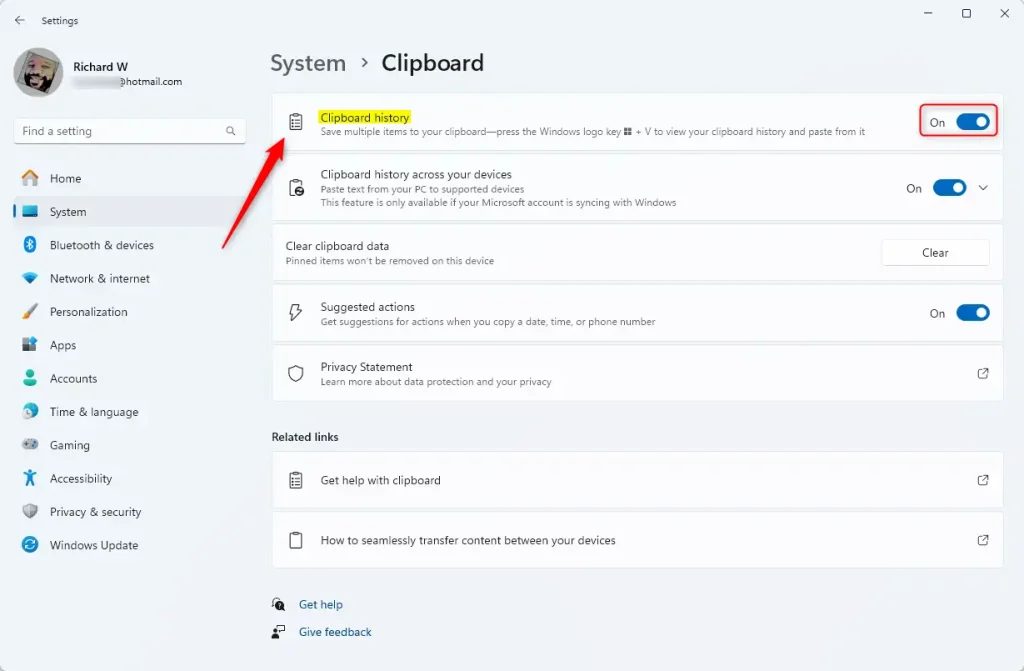
- Set the Clipboard history switch to On. The switch turns blue. Set it to Off to disable the feature again.
If the switch is greyed out and you see a message that some settings are managed by your organization, a Group Policy or registry setting is controlling it. Use the methods below to change that setting. On a work PC, ask your administrator first. No restart is needed for this method.
How to Enable Clipboard History via Registry (User Level)
You can turn on clipboard history in Windows 11 for a single user account by editing the registry. This saves multiple items to the clipboard without changing the settings for other people who use the same computer. You use the Registry Editor, a tool for changing advanced system settings, to update the key for your own user profile.
Be careful in the Registry Editor. A wrong change can cause problems, so export the key or create a restore point before you start.
- Press Win + R to open the Run dialog box. Type regedit and press Enter. Click Yes if User Account Control asks for permission. The Registry Editor opens.
- Go to this key:
HKEY_CURRENT_USER\Software\Microsoft\Clipboard. You can paste the path into the address bar at the top of the Registry Editor. - Look in the right pane for an entry named EnableClipboardHistory. If it exists, double-click it and go to the next step. If not, right-click an empty space in the right pane, select New, then DWORD (32-bit) Value, and name it EnableClipboardHistory.
- Double-click EnableClipboardHistory and set Value data to 1 to enable the feature or 0 to disable it. Click OK.
- Close the Registry Editor. Sign out and back in, or restart the PC, if the change does not show up right away. Then press Win + V to check.
To undo the change, set the value back to 0, or delete the entry.
How to Enable Clipboard History for All Users (Admin Required)
The Local Group Policy Editor is only included in Windows 11 Pro, Enterprise and Education. Windows 11 Home does not have it, so use the Settings or registry method instead.
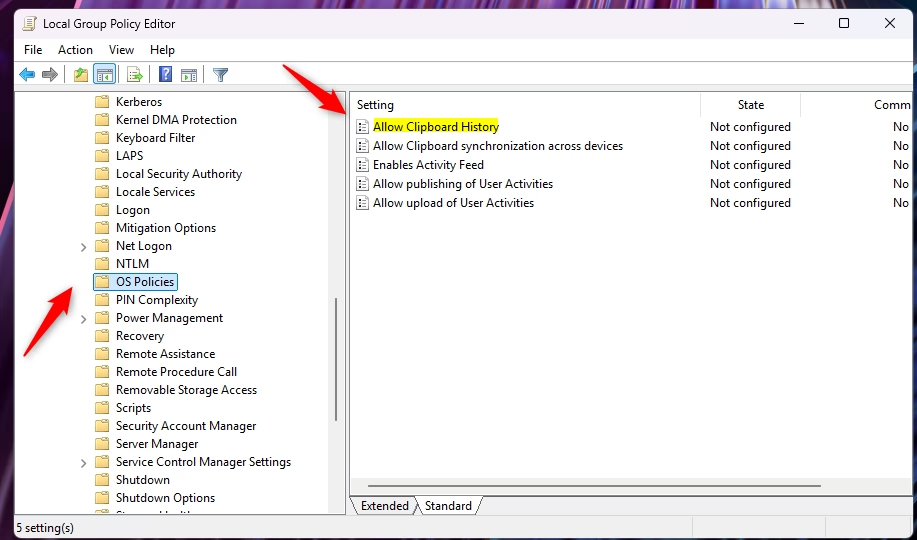
- Press Win + R, type gpedit.msc, and press Enter. The Local Group Policy Editor opens.
- Go to Computer Configuration Administrative Templates System OS Policies
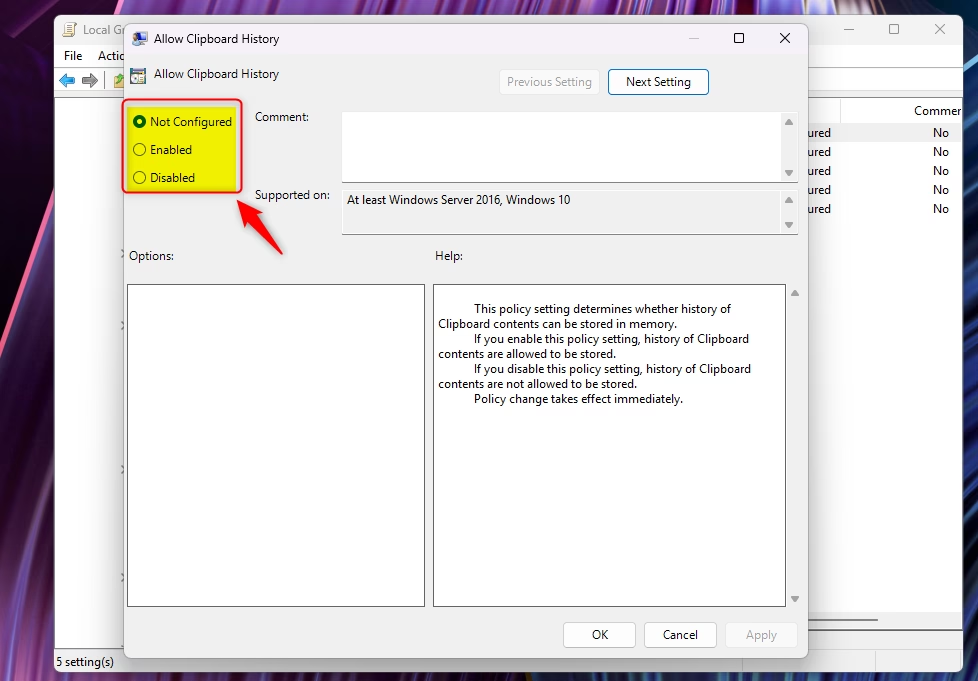
- Double-click Allow Clipboard History in the right pane. A settings window opens.
- Select Enabled to turn it on for everyone, or Disabled to turn it off. Click Apply, then OK.
This policy applies to every user on the PC. While it is set to Disabled, the Clipboard history switch in Settings is greyed out. To hand control back to users, set the policy to Not Configured. If the change does not take effect straight away, sign out and back in or restart.
Summary
Clipboard history keeps multiple copied items available in Windows 11. Turn it on to pin text you use often, sync your clipboard across devices and speed up your work. You can enable it through Settings, the registry or Group Policy. Look after your privacy by clearing sensitive items, such as passwords, as soon as you have pasted them. Turn off sync if you do not want copied text to reach your other devices.
Have a question about this guide?
Answered by AI from this guide. Good questions may be added to this page — please don't include personal details.
Did this guide fix your problem?

About the Author
Richard
Tech Writer, IT Professional
Richard is a writer at Geek Rewind who turns complex IT tasks into clear, step-by-step guides. He draws on years of hands-on experience in system administration and enterprise IT operations, focusing on Windows, Linux and WordPress: the problems people actually run into, and the fixes that work. His server and WordPress guides come from systems he runs himself. Richard builds and maintains the platform behind Geek Rewind, from its Ubuntu servers and Nginx configuration to its custom WordPress plugins. Many new tutorials start with readers' questions, and he's always glad to answer them in the comments.
[…] Go to Settings > System > Clipboard and turn off Clipboard history if you do not use […]