How to Change from a Microsoft Account to a Local Account in Windows 11
Switching from a Microsoft account to a local account in Windows 11 disconnects your PC from Microsoft services. A local account uses a username and password specific to your computer, unlike a Microsoft account which syncs settings and files across devices.
Switching to a local account in Windows 11 offers more privacy or a simpler setup. For example, users might prefer a local account to prevent Windows from automatically backing up their data to the cloud.
The process involves a few steps within the Windows Settings app. You can complete the switch without needing to reinstall Windows.
Go to Settings > Accounts > Your info, then click “Sign in with a local account instead.” Enter your Microsoft account password, then create a username, password, and hint for your local account. Finally, sign out and back in with your new local account credentials.
Why Change to a Local Account?
Switching to a windows 11 local account means your computer login is separate from Microsoft’s online services, which gives you more privacy. Your settings won’t automatically be shared across different devices, and your login is just for your PC. It’s a simpler way to sign in using a username and password that’s only for your computer.
- More privacy: Your settings and files are not linked to your Microsoft account online.
- No syncing: Your settings won’t automatically copy to other devices.
- Simpler login: You use a username and password specific to your computer.
How to Change to a Local Account
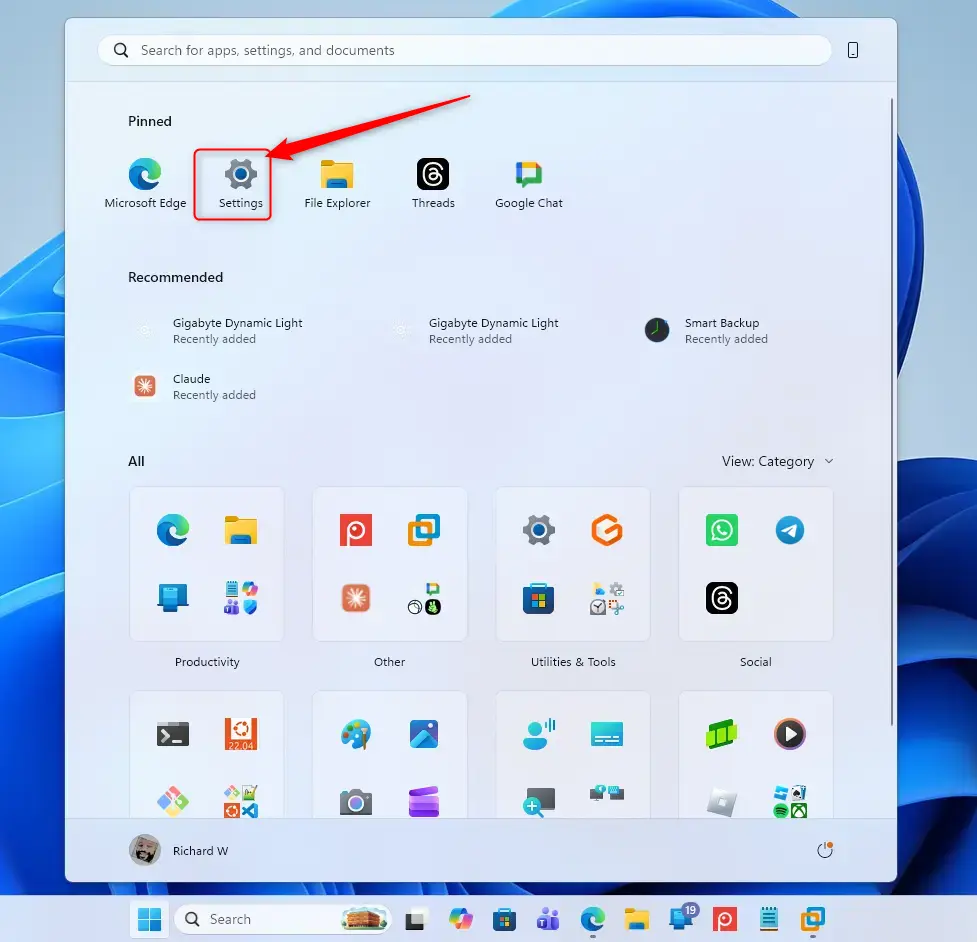
Step 1 Open Settings
Press Windows key + I on your keyboard, or click the Start button and then the gear icon for Settings.
Step 2Go to Your Account Settings
Within the Settings window, select Accounts from the left sidebar. Then, click on Your info.
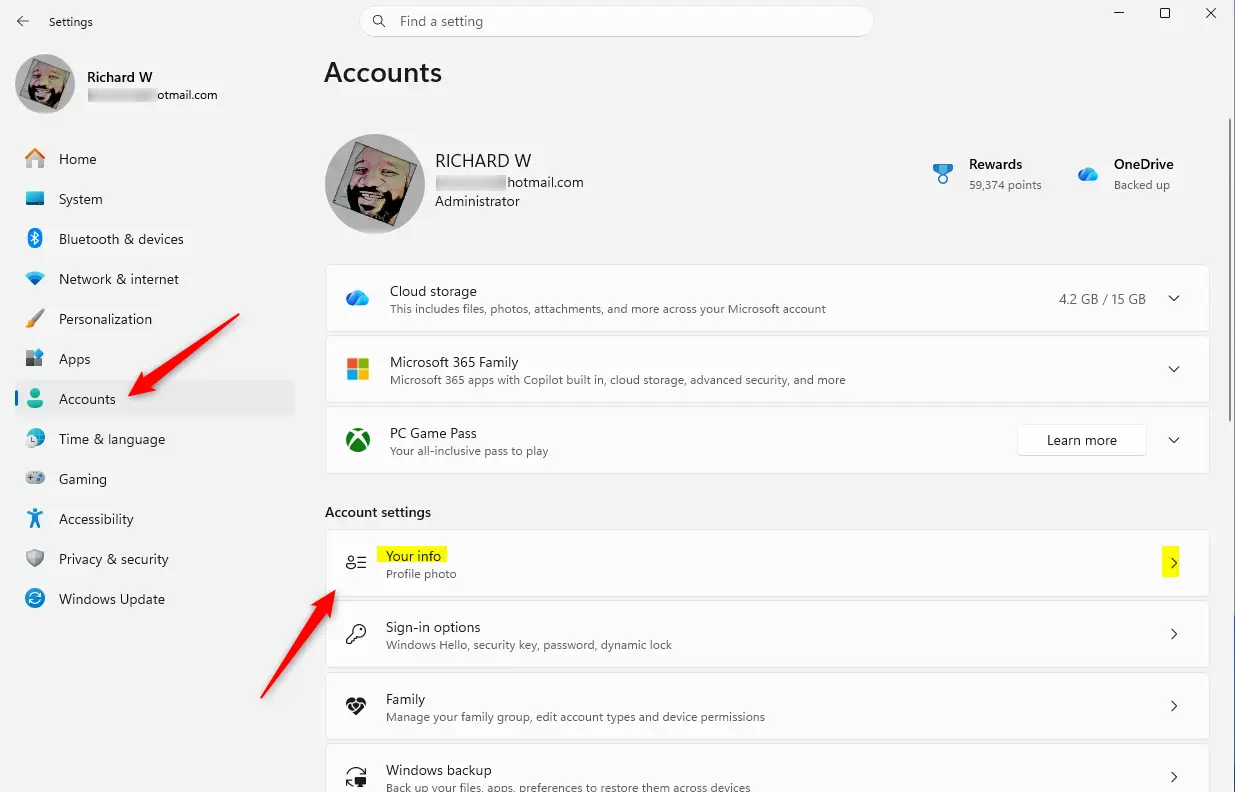
Step 3Start the Switch
To start switching to a windows 11 local account, find the “Sign in with a local account instead” link on your account settings page. Clicking this link begins the process if you’re currently signed in with a Microsoft account. If you don’t see this option, your computer is already set up with a local account.
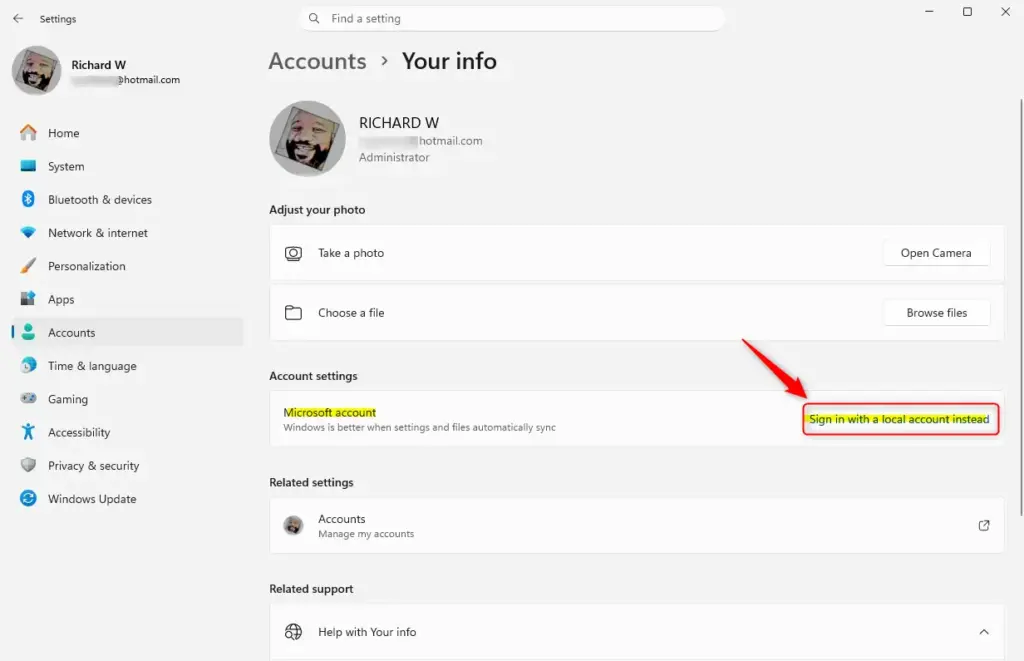
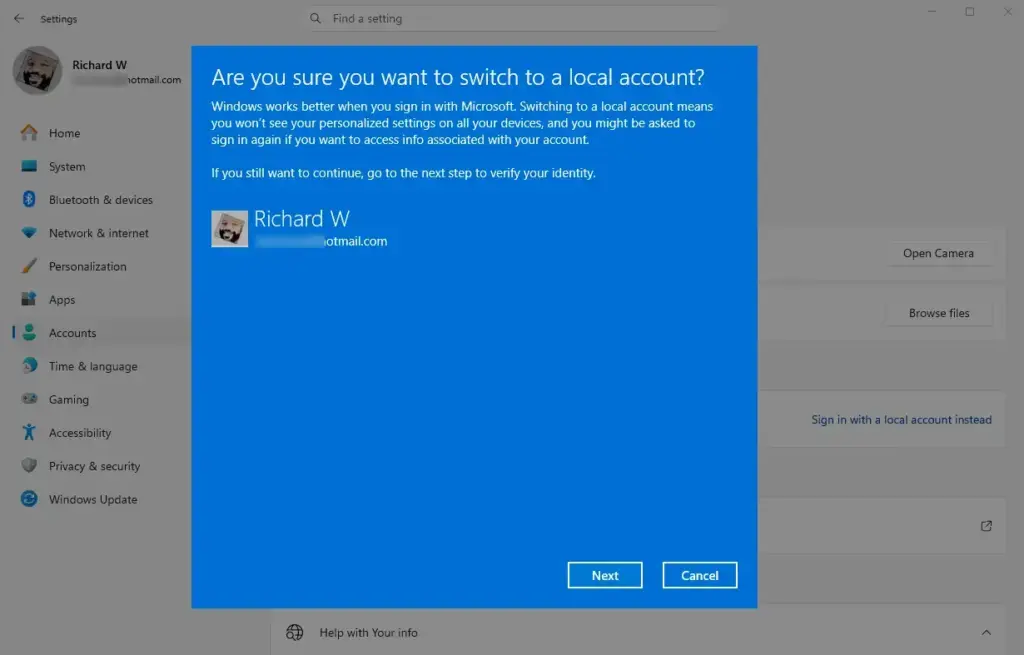
Step 4Enter Your Microsoft Account Password
Windows needs to confirm your identity. Provide the password for your current Microsoft account and click Next.

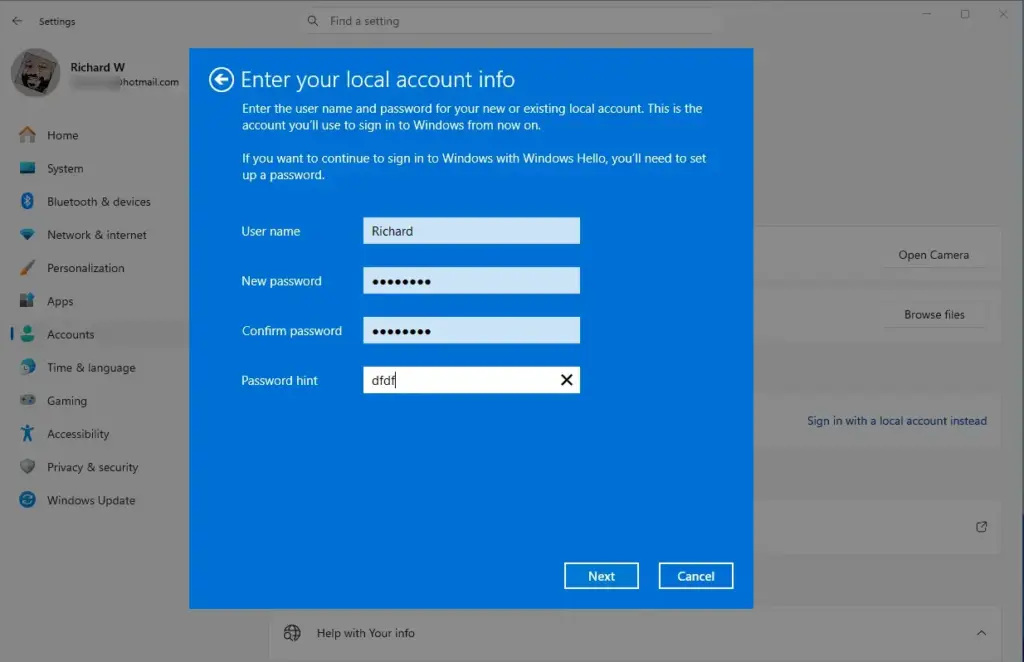
Step 5Create Your Local Account Details
When you create your local account in Windows 11, you’ll choose a username and a secure password for signing in. This username is what you’ll type to log into your computer. Pick a strong password because there’s no easy online way to reset it if you forget, unlike a Microsoft account. You’ll also set up a password hint.
- Username: This is the name you’ll use to log in. Make it something you like. It must be different from other usernames on your PC.
- Password: Choose a strong password. You can’t easily reset this online like a Microsoft account password.
- Password Hint: This helps you remember your password. Make it a clue, but not too obvious.
Step 6Finish the Sign-Out

Your computer will sign you out.
Step 7Sign Back In
Reference:
Summary
Switching from a Microsoft account to a local account in Windows 11 involves using the Settings app to enter your current password and then creating a new username, password, and hint for your computer.
Why is Microsoft removing local accounts?
Microsoft's stated reason for blocking local account setups in the initial setup screens of Windows 11 is, they claim, the commands to create a local account: “inadvertently skip critical setup screens, potentially causing users to exit OOBE with a device that is not fully configured for use.”
Was this guide helpful?

About the Author
Richard
Tech Writer, IT Professional
Richard, a writer for Geek Rewind, is a tech enthusiast who loves breaking down complex IT topics into simple, easy-to-understand ideas. With years of hands-on experience in system administration and enterprise IT operations, he’s developed a knack for offering practical tips and solutions. Richard aims to make technology more accessible and actionable. He's deeply committed to the Geek Rewind community, always ready to answer questions and engage in discussions.

No comments yet — be the first to share your thoughts!