How to Make Dropbox Files Online-Only Default in Win 11

Online-only files in Dropbox (cloud storage that keeps your files on remote servers instead of your device) save local disk space. Your content stays in the cloud until you open it.
This setting makes new files you save to Dropbox online-only automatically, so your hard drive does not fill up unexpectedly. You still see every file listed normally in your Dropbox folder. You can switch any file back to local storage whenever you need offline access.
To make Dropbox files online-only by default in Windows 11, click the Dropbox icon, go to Preferences, select the Sync tab, and choose “Online-only” from the “New files default” dropdown. This ensures new files are saved to the cloud first, saving local storage.
Make Dropbox Files Online-Only by Default
Making Dropbox files online-only by default on Windows 11 saves hard drive space. New files you add stay in the cloud and only download when you open them. Your computer’s storage stays free, and you don’t have to change each file by hand.
Two things to keep in mind before you start:
- An online-only file needs an internet connection the first time you open it. If you work offline often, keep those files available offline.
- The default only affects files added after you change it. Files already on your PC stay as they are until you change them yourself, which the second half of this tutorial covers.
Find the Dropbox Icon
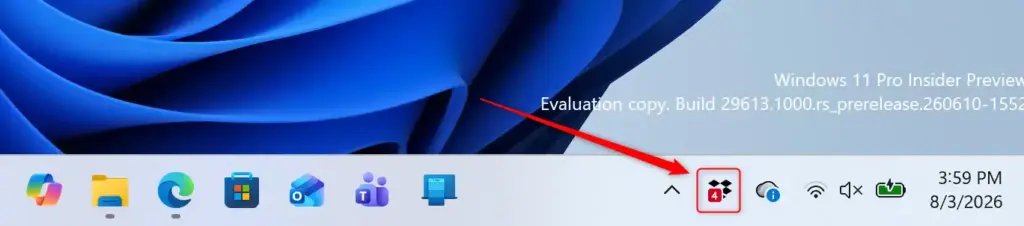
Start with the Dropbox icon in the Windows taskbar. It usually looks like the Dropbox logo, or a small blue cloud or open box, and it sits in the notification area at the right end of the taskbar .
- Look at the right end of the taskbar for the Dropbox icon.
- If you don’t see it, click the small upward-pointing arrow to open the hidden icons. The Dropbox icon should be in the small panel that appears.
If the icon is not in either place, Dropbox is probably not running. Open Dropbox from the Start menu , wait a few seconds, and check again.
Open Dropbox Preferences
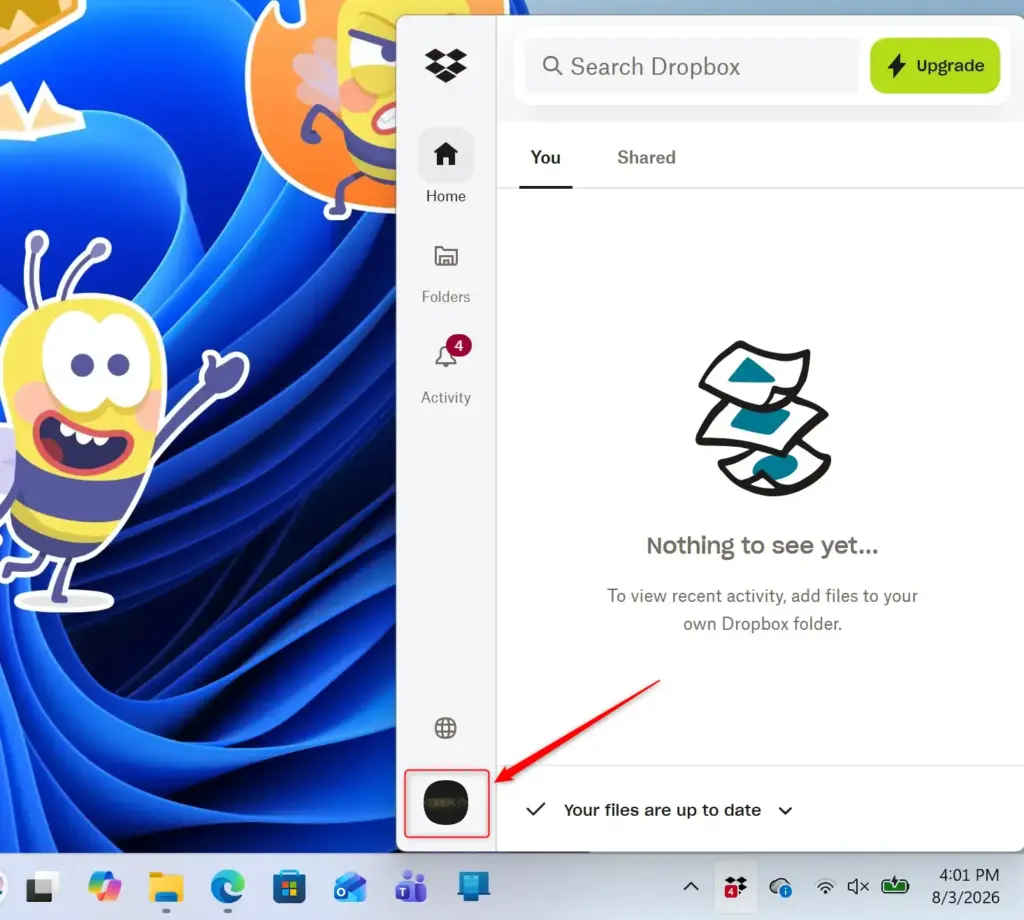
Clicking the Dropbox icon opens a small menu. Your profile picture or initials appear in it. In the version this tutorial was written for, they are in the bottom-left corner. Newer versions of the app sometimes put them in a different corner, so look around the edges of the panel if you don't see them.
- Click the Dropbox icon. A small menu opens.
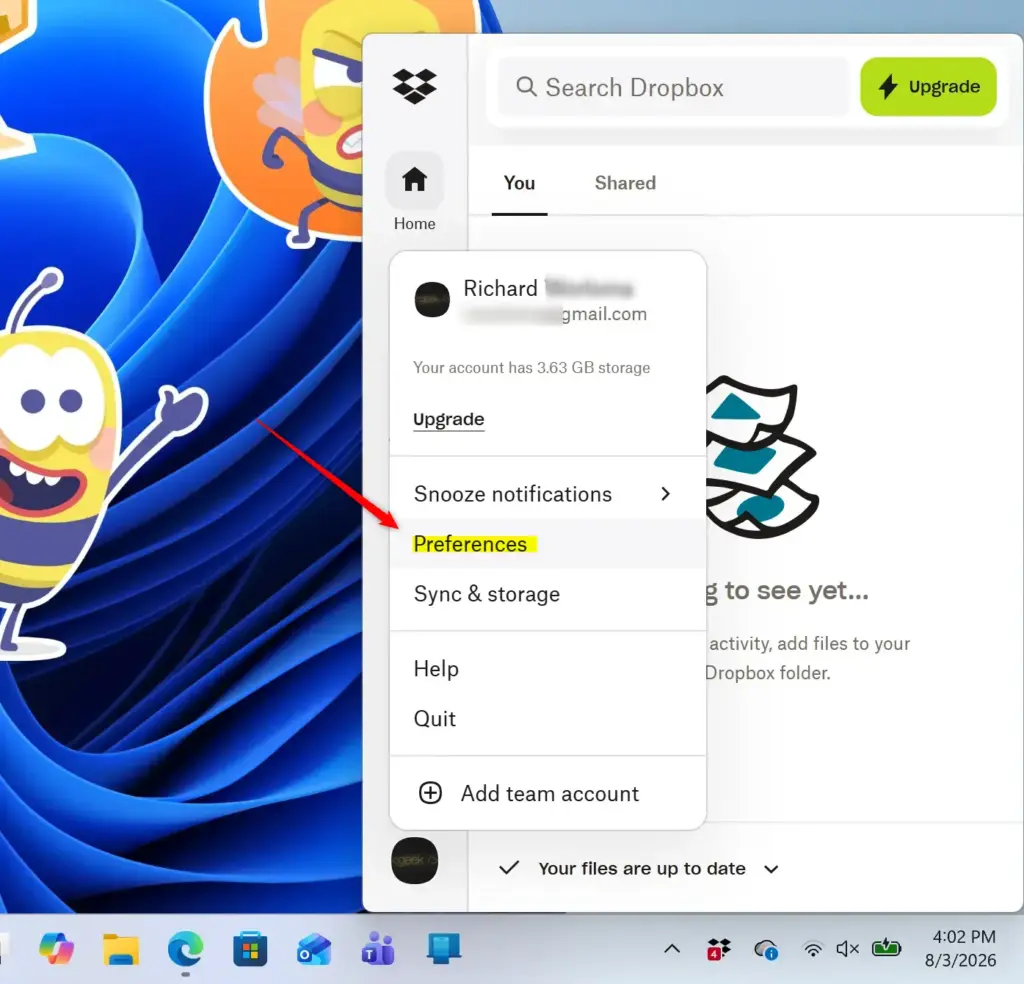
- Click your profile picture or initials. A second menu opens.
- Choose Preferences. The Preferences window opens.
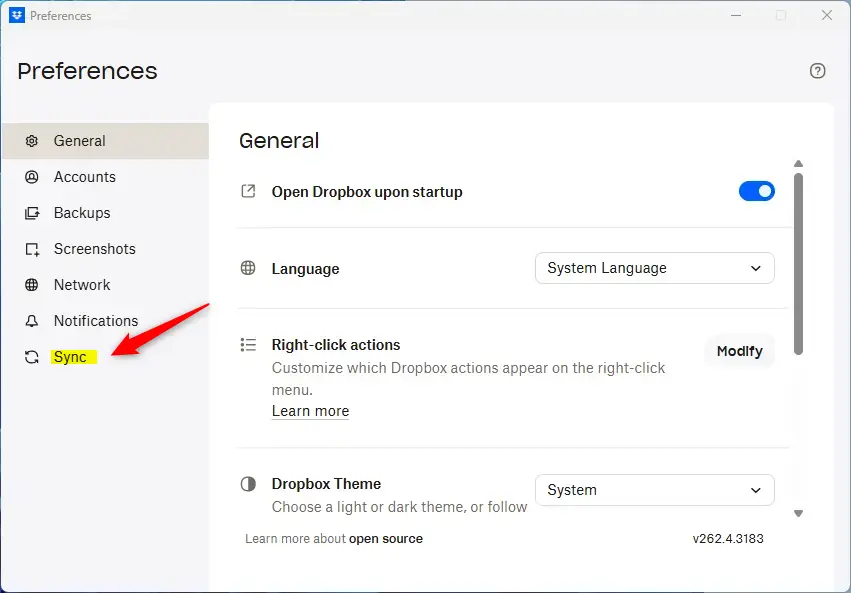
Go to Sync Settings
The Preferences window has several tabs across the top. The Sync tab controls how your files are stored on your computer and in the cloud, so that is where this setting lives.
- In the Preferences window, click the Sync tab. The sync options for your account appear below the tabs.
Set New Files to Online-Only
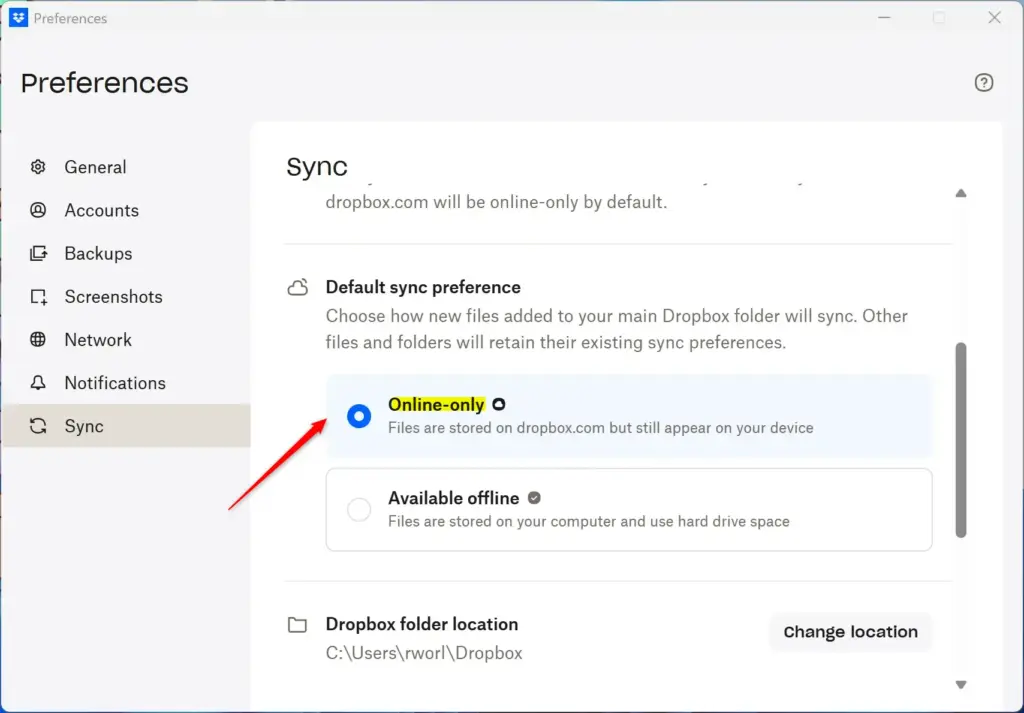
Dropbox changes the wording here from version to version. Look for an option along the lines of "New files default" or "Default save location", usually with a dropdown menu next to it.
- Find the default-setting option in the Sync tab.
- Click the dropdown menu next to it. You should see choices such as "Available offline" and "Online-only".
- Choose Online-only from the list. The dropdown should now show Online-only.
If you can't find this option, update the Dropbox desktop app to the latest version first, because older versions lay out the Sync tab differently. Some account types also don't include every file-state option. If it is still missing, check Dropbox's help pages for your plan.
To undo the change later, come back to the same dropdown and pick the offline option again.
Close Preferences
Once you've made your choice, close the Preferences window. The change saves automatically, and you don't need to restart Windows or Dropbox. From now on, any new file you put in your main Dropbox folder will be online-only by default.
You can check this in File Explorer. Online-only files show a cloud icon in the Status column, instead of a green check mark.
Manually Changing Files to Online-Only
The default is good for new files, but you may have older files already using space that you want to make online-only. You can update these manually, one file at a time or a whole folder at once.
Open Your Dropbox Folder
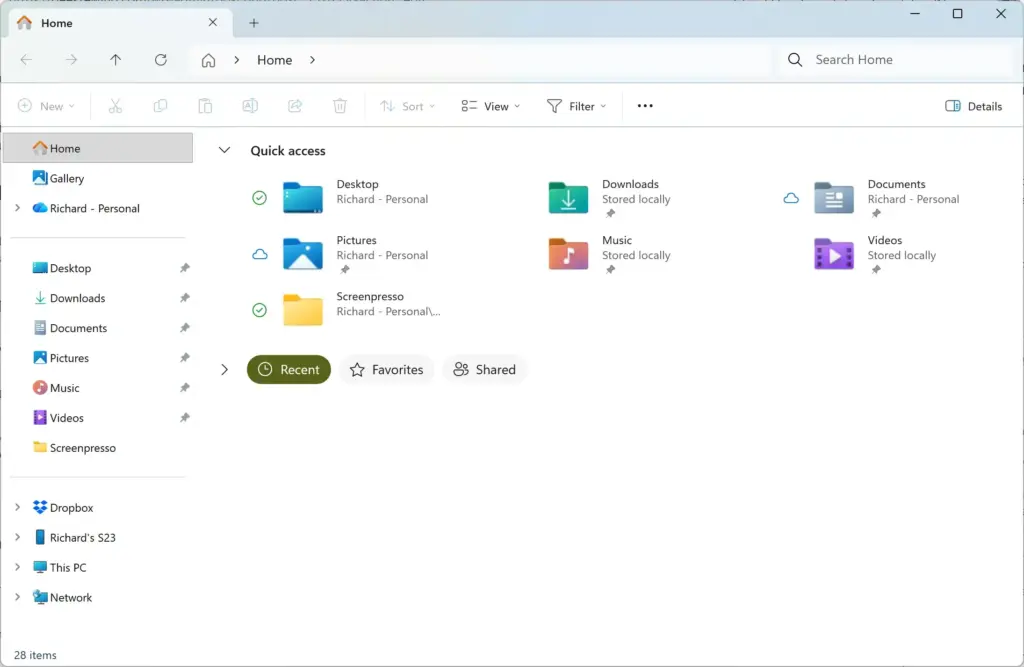
Your Dropbox folder in Windows File Explorer holds all your synced files. Making Dropbox files online-only saves storage space on your computer.
- Open File Explorer. You can press Windows key + E.
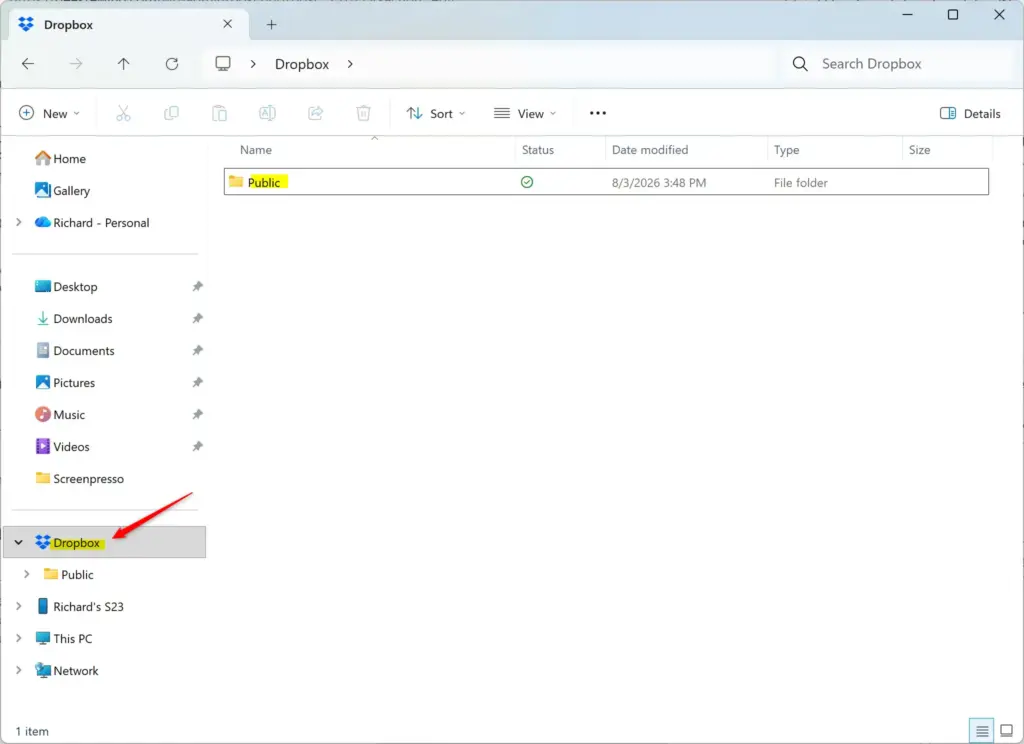
- Click Dropbox in the left-hand pane. Your Dropbox files and folders appear.
Locate the File or Folder
Look through your files and folders and find the ones you want to make online-only. To pick more than one, hold down the Ctrl key while you click each item. Each selected item is highlighted.
Only files that have finished syncing can be made online-only. If a file still shows the sync-in-progress icon, wait for it to finish first.
Right-Click for Options
With your files or folders selected, right-click one of them. A context menu opens with options for managing the selection.
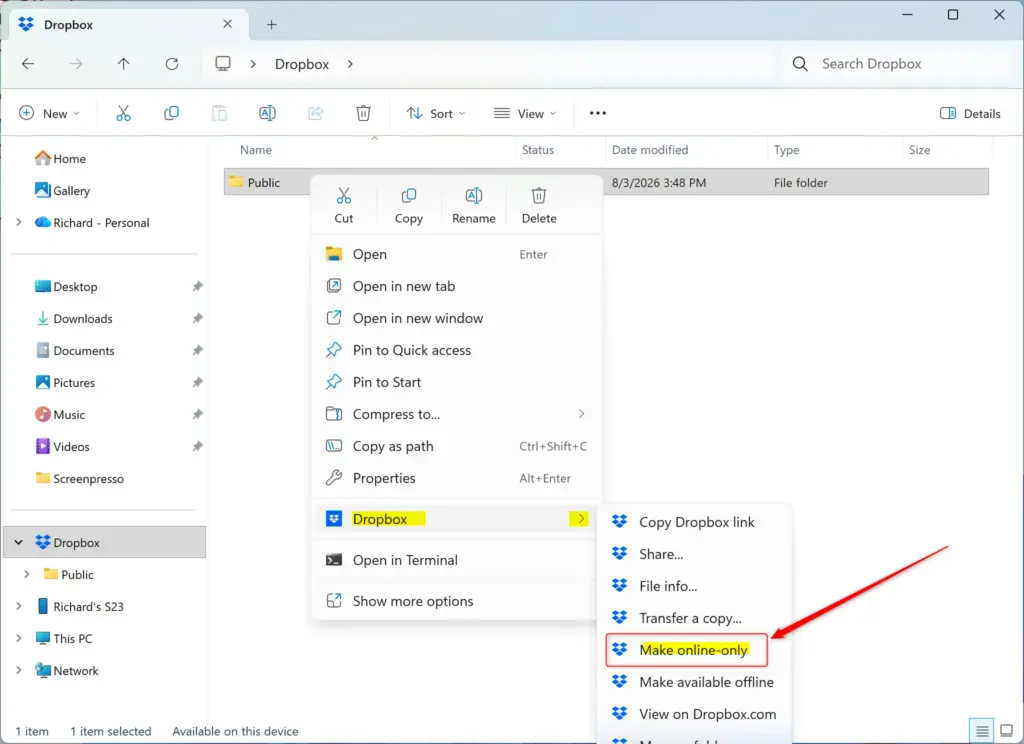
On Windows 11, the Dropbox options sometimes only appear in the full classic menu. If you don't see them, click Show more options at the bottom of the menu, or press Shift + F10 with the item selected.
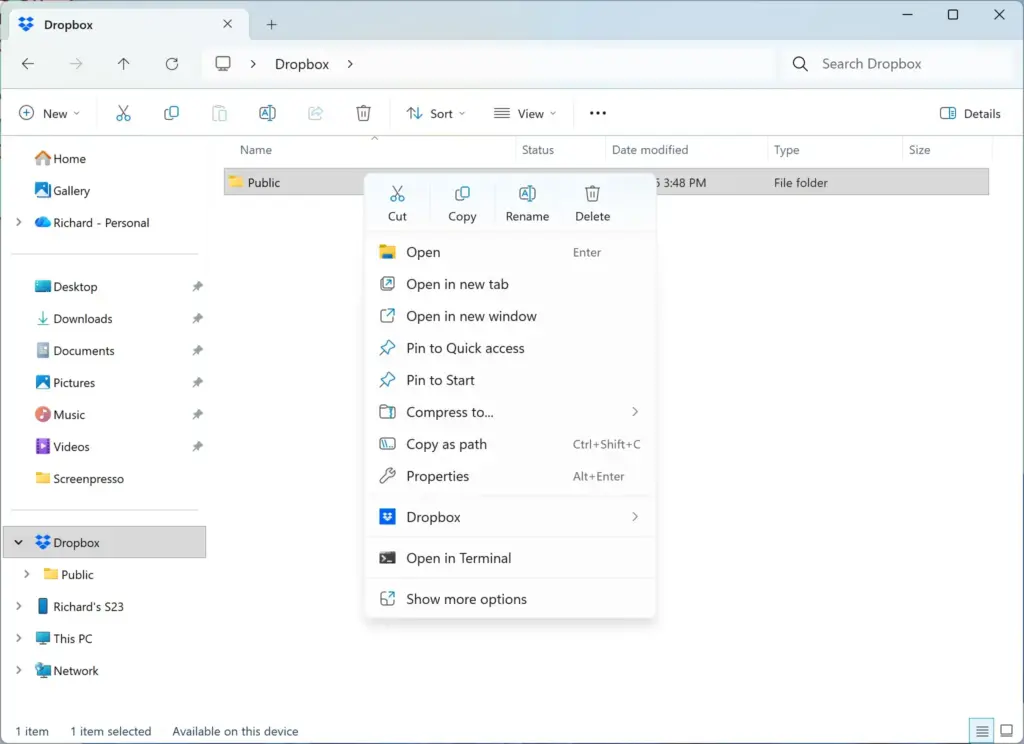
Choose "Make online-only"
- In the menu, find the option called Make online-only. It may sit inside a Dropbox submenu.
- Click it. The cloud icon replaces the green check mark in the Status column, and the file stops taking up space on your drive.
To reverse this, right-click the same file or folder and choose the option to make it available offline. Dropbox then downloads a full copy to your PC.
References:
Summary
Setting Dropbox files to online-only by default stops new files from taking up hard drive space on your Windows 11 PC until you open them. You can turn this on in the Dropbox desktop app under Preferences, on the Sync tab. Your local storage stays free, and you can still browse all your cloud files in File Explorer. For older files, right-click them and choose Make online-only.
Was this guide helpful?

About the Author
Richard
Tech Writer, IT Professional
Richard is a writer at Geek Rewind who turns complex IT tasks into clear, step-by-step guides. He draws on years of hands-on experience in system administration and enterprise IT operations, focusing on Windows, Linux and WordPress: the problems people actually run into, and the fixes that work. His server and WordPress guides come from systems he runs himself. Richard builds and maintains the platform behind Geek Rewind, from its Ubuntu servers and Nginx configuration to its custom WordPress plugins. Many new tutorials start with readers' questions, and he's always glad to answer them in the comments.
No comments yet — be the first to share your thoughts!