How to Add Windows 11 Resource Widgets Using Dev Home
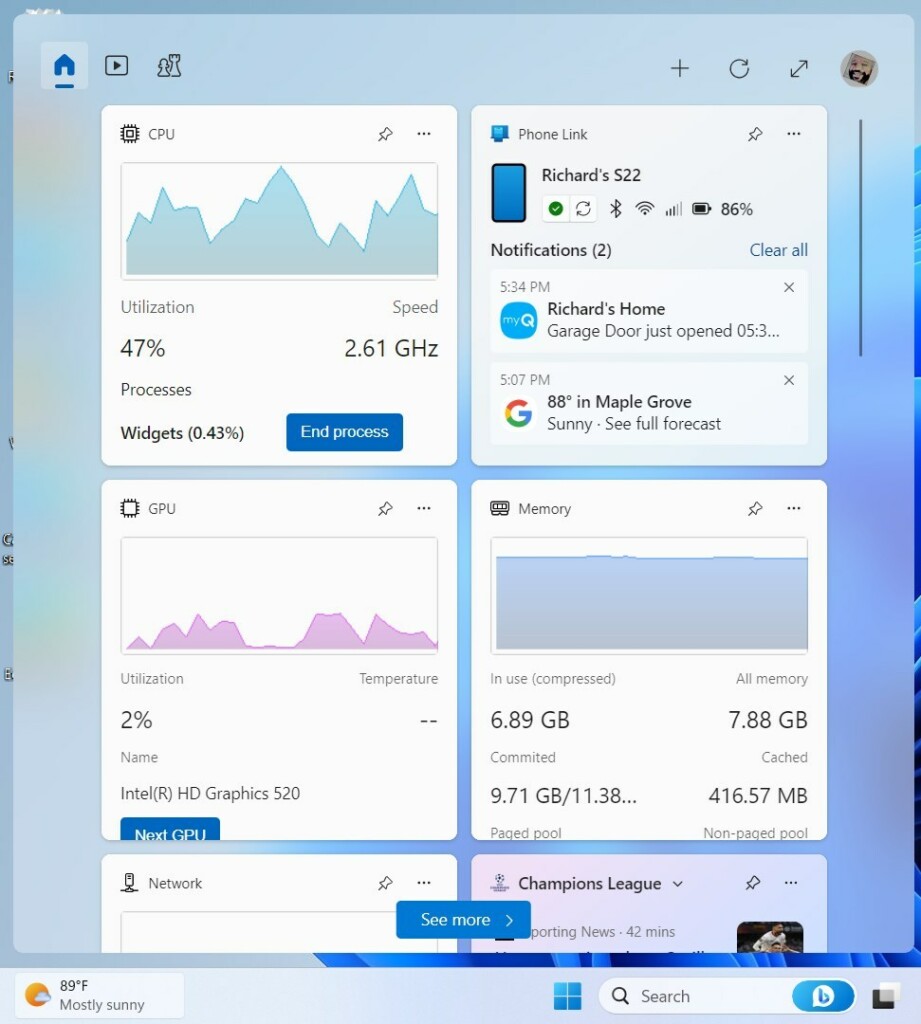
Windows 11 resource widgets display your PC’s performance stats, like CPU and memory usage, directly on your Widgets board.
These widgets are like little windows showing live data about your computer’s health, giving you a quick look at how hard it’s working.
You can easily see things like how much of your processor is being used or how much memory your programs are taking up.
For instance, checking your GPU temperature can help you spot overheating problems fast, without needing to open another app.
Once set up, these helpful widgets appear when you press the Windows Key + W to open your Widgets panel, giving you instant hardware insights.
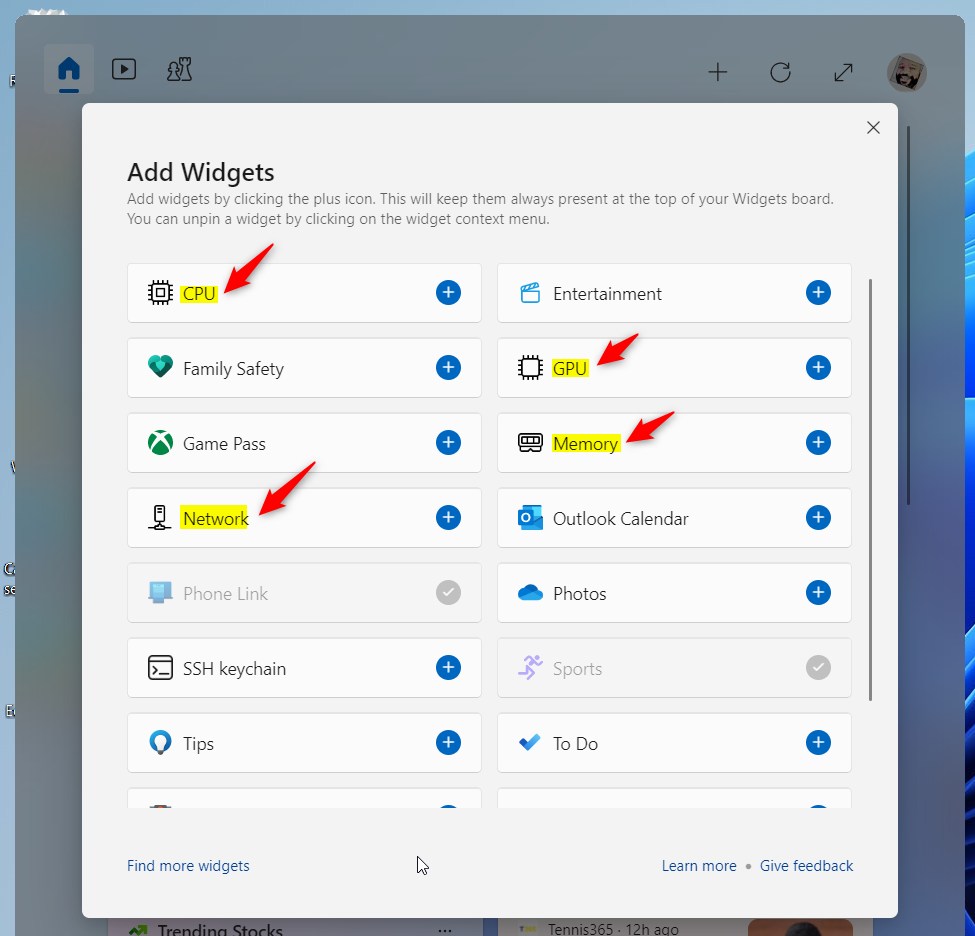
Install Dev Home from the Microsoft Store or Windows Terminal using the command `winget install –id Microsoft.DevHome -e`. After installation, open your Widgets board, click “Add” next to the desired hardware like CPU or Memory, and close the window.
Installing the Dev Home App
The new Windows Dev Home app is an open-source developer app that allows you to add special tools to track your system’s health. To get these, you need to install Dev Home from the Microsoft Store or by using the command line.
Steps to Install Dev Home
- Open the Windows Terminal app. Note: This step requires admin privileges.
- Type the following command and press Enter:
winget install --id Microsoft.DevHome -e - Wait for the success message to appear in the terminal.
Installing Dev Home, the app that adds Windows 11 resource widgets, involves opening the Windows Terminal and running a specific command. This process requires admin privileges, but it’s a well-defined procedure. Once the command is entered and accepted, Dev Home will be installed, allowing you to access new widgets.
Summary
Adding Windows 11 resource widgets through Dev Home lets you easily monitor your CPU, RAM, and GPU usage without opening extra apps.
Are 🪟 Windows 11 resource widgets available on all versions?
Yes, resource widgets provided by the Dev Home app are available on all modern versions of Windows 11. Ensure your system is fully updated via Windows Update to maintain compatibility with the latest widget board features and the Dev Home application.
Do I need to install third-party software for resource monitoring?
While you do not need traditional third-party monitoring software, you must install the official Microsoft Dev Home app. This app acts as a bridge to provide the necessary hardware telemetry data to your Windows Widgets board for real-time performance tracking.
Was this guide helpful?

About the Author
Richard
Tech Writer, IT Professional
Richard, a writer for Geek Rewind, is a tech enthusiast who loves breaking down complex IT topics into simple, easy-to-understand ideas. With years of hands-on experience in system administration and enterprise IT operations, he’s developed a knack for offering practical tips and solutions. Richard aims to make technology more accessible and actionable. He's deeply committed to the Geek Rewind community, always ready to answer questions and engage in discussions.


No comments yet — be the first to share your thoughts!