Accessing the Windows Studio Effects Settings in Windows 11

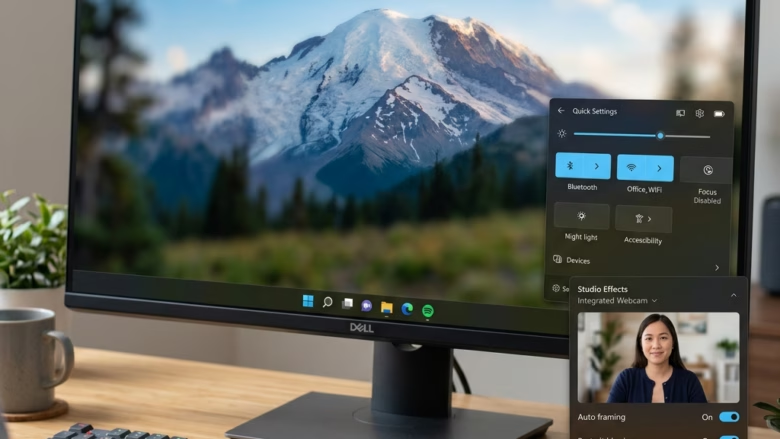
Windows Studio Effects are built-in camera and audio features that use AI to blur your background, keep you centered in the frame, and correct your eye contact during video calls. They first appeared in the Windows 11 2022 Update (version 22H2). The processing runs on your own PC, so you don’t need extra gear.
You can turn the effects on or off from Quick Settings, the Settings app, or the Camera app. They only work on PCs with a supported NPU (neural processing unit), a chip built for AI tasks. If your PC has no NPU, the controls usually won’t appear at all. The effects then run in the background while you talk, and the camera settings are where you adjust them.
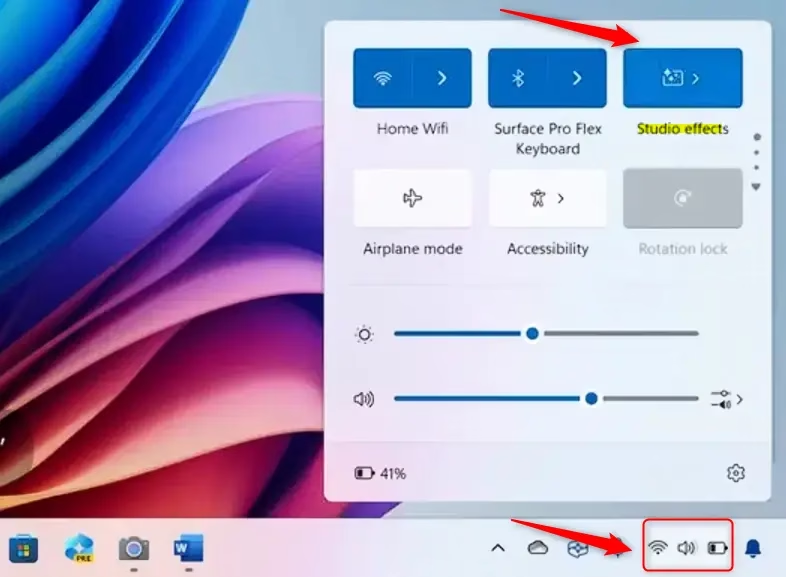
Windows Studio Effects are turned on or off from Quick Settings by clicking the network, sound, or battery icons in the taskbar ’s bottom-right corner, finding the Studio Effects tile, and clicking it. If the tile is missing, click the pencil icon at the bottom of the panel, select Add, choose Studio Effects from the list, and click Done.
Method 1Quick Settings – The Fastest Way
Quick Settings is the fastest route. It gives you an on/off switch for your camera effects without opening any app. The steps below show how to open it and add the tile if it’s missing.
- Click the network, sound, or battery icons near the clock in the bottom-right corner of the taskbar . These three icons act as one button. You should see the Quick Settings panel open above the taskbar.
- Look for the Studio Effects tile among the other tiles and buttons. Click it to switch the effects on or off. The tile changes color when the effects are on.
- If you don’t see the tile, click the pencil (Edit quick settings) icon at the bottom of the panel. Click Add, then choose Studio Effects from the list. Click Done to save the layout.
The tile isn’t on the taskbar by default. Some guides also point to Settings Personalization Taskbar for managing which icons appear, but the pencil icon in the panel is the more direct way to add or remove Quick Settings tiles. To undo, click the pencil again and unpin the tile.
See the troubleshooting notes further down.
Good Tip: If you change your effects often, pin the tile to Quick Settings. It saves you a trip into Settings each time.
On a PC with a supported NPU, much of that work moves off the CPU, but the effects can still slow the system down and use more battery. This matters most on laptops. If the fans spin up or the battery drains faster during calls, check Task Manager while the effects are on, and turn off any you don't need.
Method 2The Settings App - For More Control
Use the main Settings app when the Quick Settings tile isn't enough. It gives you finer control over each effect, per camera.
- Press Windows key + I to open Settings. You can also click the Start button and select the gear icon. The Settings window should open.
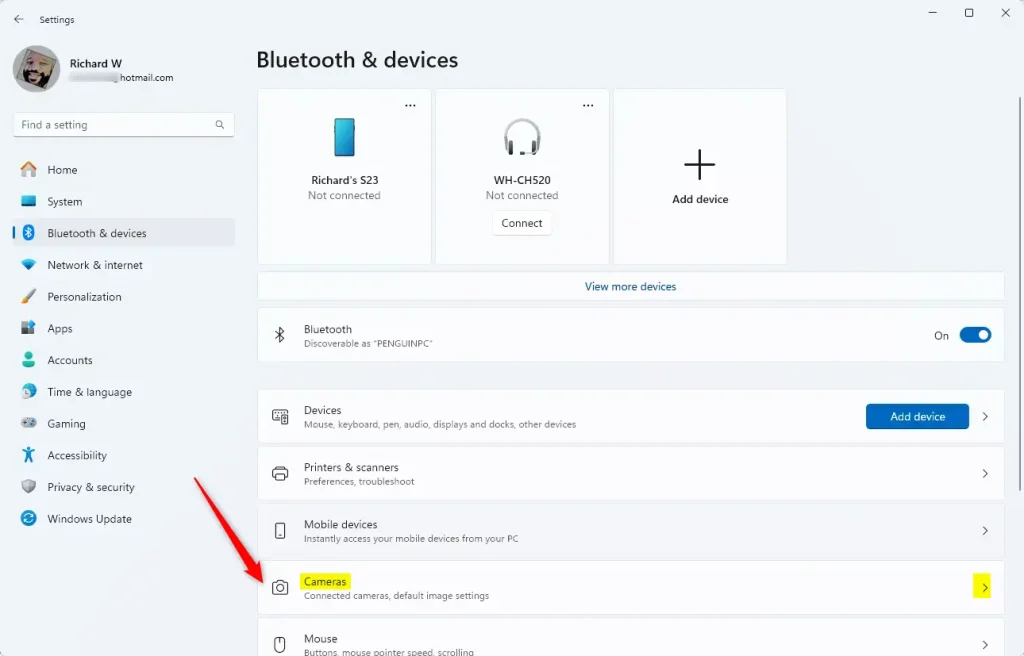
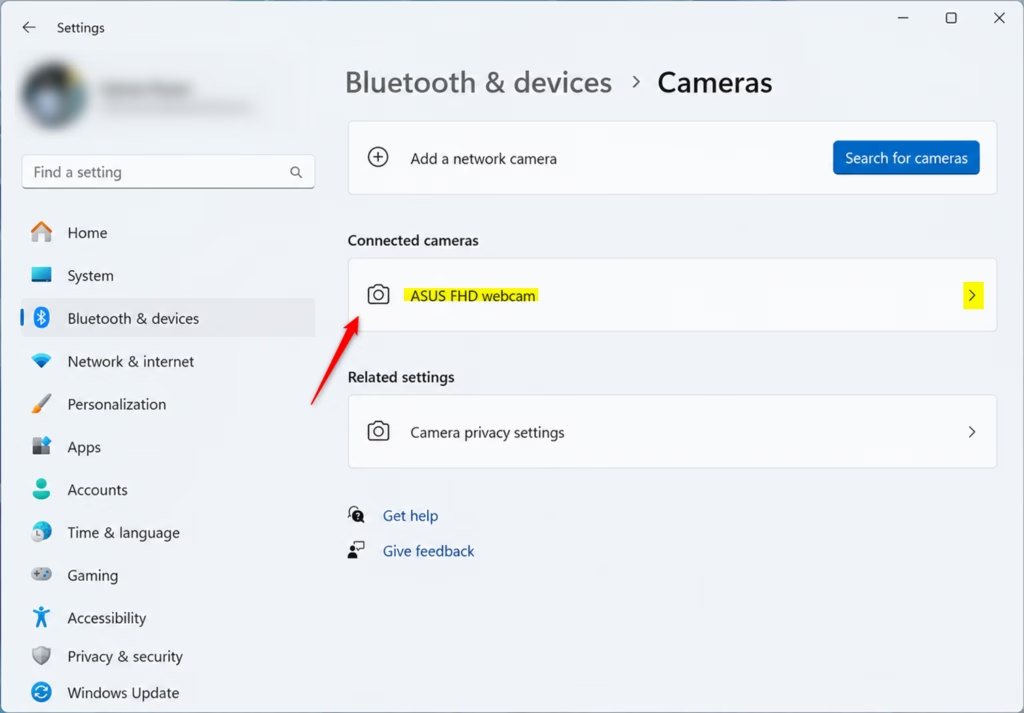
- Click Bluetooth & devices in the left-hand list. The device options appear on the right.
- Scroll down on the right side and click Cameras. You should see a list of the cameras Windows has detected.
- Click your main webcam, such as Integrated Webcam or a model with a brand name. The picture adjustments and effects for that camera appear.
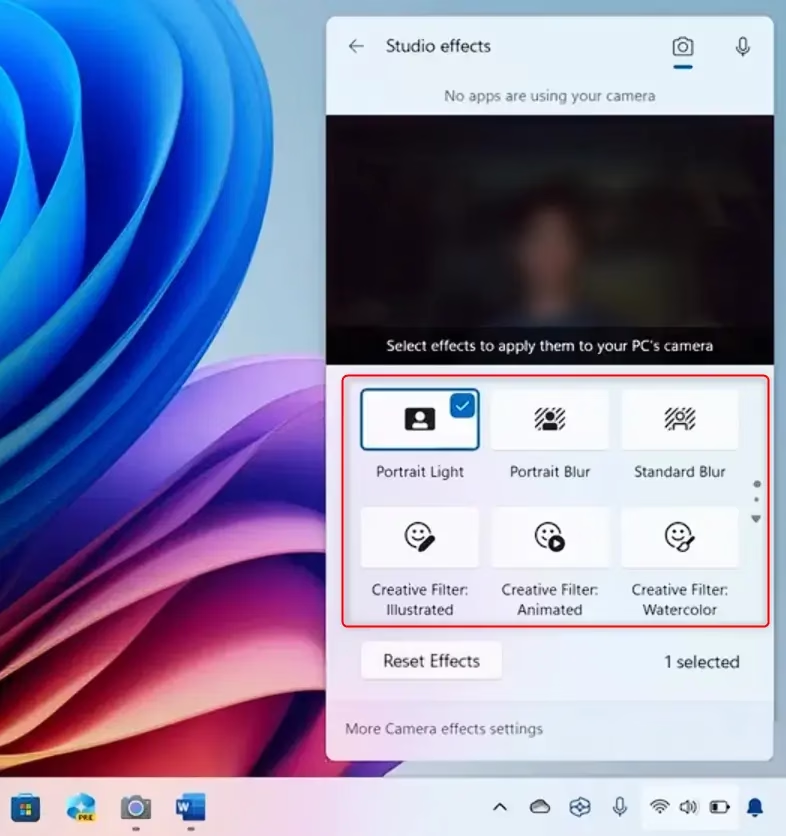
- Find the Windows Studio Effects options on that page. Switch Automatic framing, Eye contact, and Background effects on or off as you like. Where an effect offers choices, such as blur strength or style, pick the one you want.
Settings are stored per camera, so if you have an external webcam as well as the built-in one, check each separately. If the effects section is missing, the selected camera or the PC doesn't support them. Try the built-in camera first.
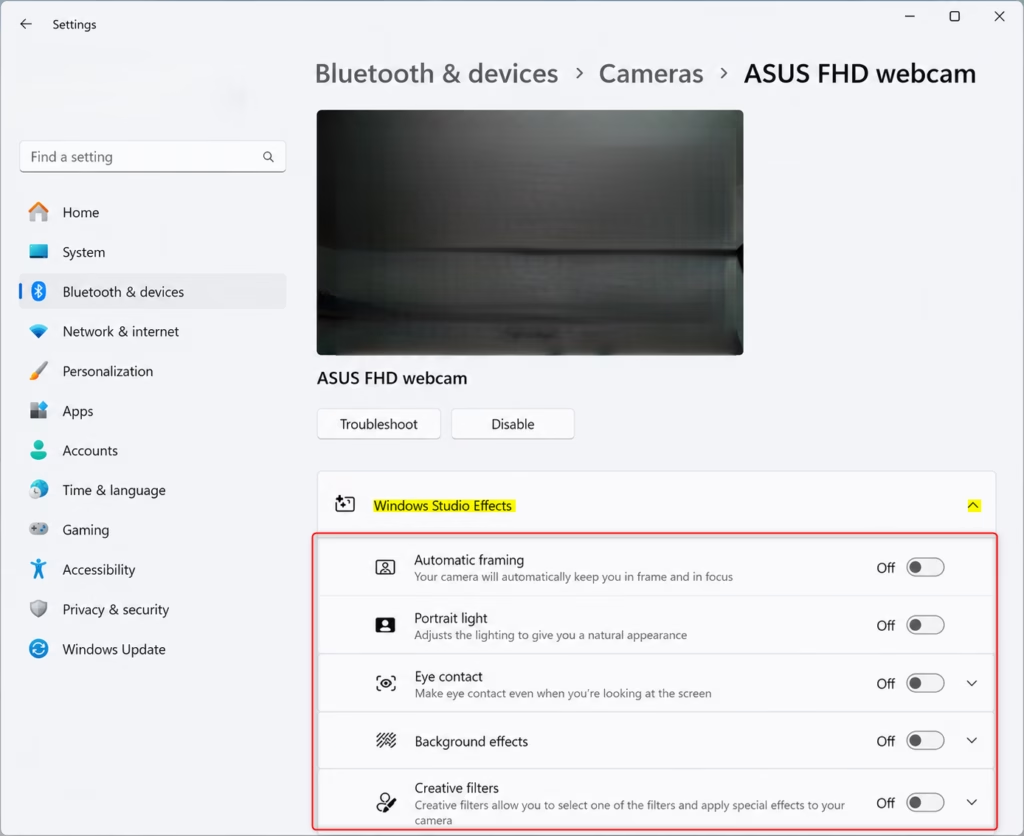
If your effects look wrong and you can't tell which setting caused it, look for a Reset Effects button in the Windows Studio Effects settings panel. Press it to return all the effects to their default setup. You can then switch on only the ones you want.
If the effects are missing altogether, the usual cause is hardware. Studio Effects need an NPU to handle the video processing, and not every PC has one. Check your PC's specifications, or the manufacturer's page for your model, to confirm it has a supported NPU. Also make sure Windows is fully updated, since the feature arrived with version 22H2. Updating the camera and NPU drivers from the manufacturer or Windows Update can help as well.
Method 3The Camera App - For Quick Previews
The Camera app is a quick way to check how you look before a call. It shows a live preview, so you see each change as you make it.
- Click the Start button and type "Camera" in the search bar. The Camera app should appear in the results.
- Select Camera to open it. Your webcam preview should appear.
- Look near the webcam view in the top-right corner of the window for the Windows Studio Effects icon. It looks like a magic wand or a star.
- Click the icon to open the Windows Studio Effects panel. It lists background blur, eye contact, and automatic framing.
- Switch each feature on or off. Where strength sliders or style options are offered, you get up to 3 choices per category.
The preview updates as you change things, so you can see right away how blur looks and how automatic framing follows your movement. Try leaning side to side and moving closer to the camera. If the icon doesn't appear in your version of the Camera app, use the Settings route above. The same options are there.
Summary
Windows Studio Effects improve video calls with features like background blur and eye contact. You can reach their settings through Quick Settings, the main Settings app, or the Camera app. If you can't find them, check that your PC has a supported NPU and that Windows is up to date.
Was this guide helpful?

About the Author
Richard
Tech Writer, IT Professional
Richard is a writer at Geek Rewind who turns complex IT tasks into clear, step-by-step guides. He draws on years of hands-on experience in system administration and enterprise IT operations, focusing on Windows, Linux and WordPress: the problems people actually run into, and the fixes that work. His server and WordPress guides come from systems he runs himself. Richard builds and maintains the platform behind Geek Rewind, from its Ubuntu servers and Nginx configuration to its custom WordPress plugins. Many new tutorials start with readers' questions, and he's always glad to answer them in the comments.

No comments yet — be the first to share your thoughts!