This article explains how to blur an image background using the Photo app in Windows 11.
The Windows Photo app is a built-in image viewer and editor that allows users to view, edit, and organize their photos and images. With the Photo app, users can perform basic tasks such as cropping, rotating, resizing, and adjusting the brightness and contrast of their images.
Starting with version 2023.11090.13001.0, Microsoft added a background blurring feature to find the background in the photo automatically, and with a single click, instantly highlights your subject and blurs out the background.
Blurring the image background can help to bring focus to the main subject of the photo, making it stand out more prominently. It can also create a more professional and aesthetically pleasing image, especially when the background is cluttered or distracting.
Blurring the background can also help to create a sense of depth and perspective in the photo, making it more visually interesting and engaging.
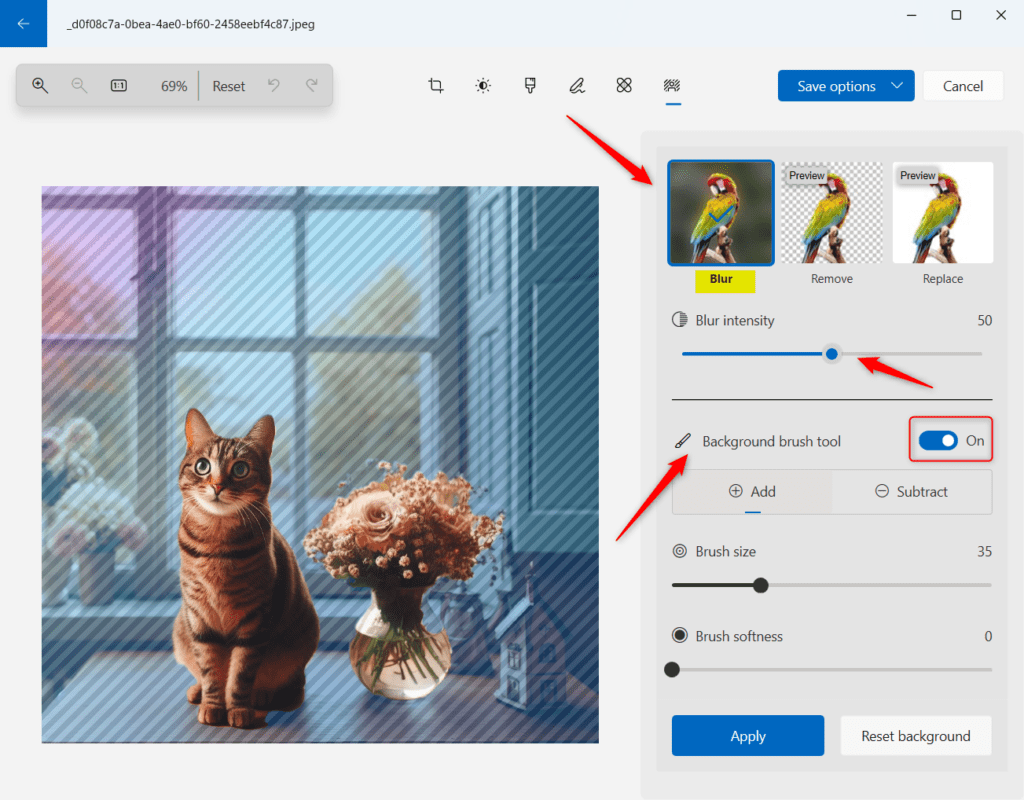
Blue background image in the Photo app on Windows
As mentioned, the Phone app in Windows 11 has a new feature that blurs the image background with a few clicks.
Here’s how to do it.
First, Open the Phone app. Then select the image you want to blur out its background.
With the image selected, click the Edit image ( CTRL + E ) button on the toolbar.

Next, click on the Background blur button on the toolbar. The app automatically starts finding the photo’s background when you do that.

You can also customize the effect by adjusting the Blur Intensity or using the Brush Tool to modify blurred areas.

Adjust different settings until you are pleased with the results. Then click the Apply button to save your changes.
Reference:
Conclusion:
This post showed you how to blur an image background in the Photos app in Windows 11. If you find any errors above or have something to add, please use the comments form below.
Leave a Reply