How to Replace Image Background in Windows 11 Photos App
Windows 11’s Photos app lets you easily replace image backgrounds.
This built-in tool allows you to remove the original background of a photo and replace it with a new one. It’s a simple way to make your pictures more interesting or put a person or object onto a different scene.
You don’t need complex software for this. The Photos app in Windows 11 includes this feature right out of the box, making it easy to get creative with your images directly on your PC.
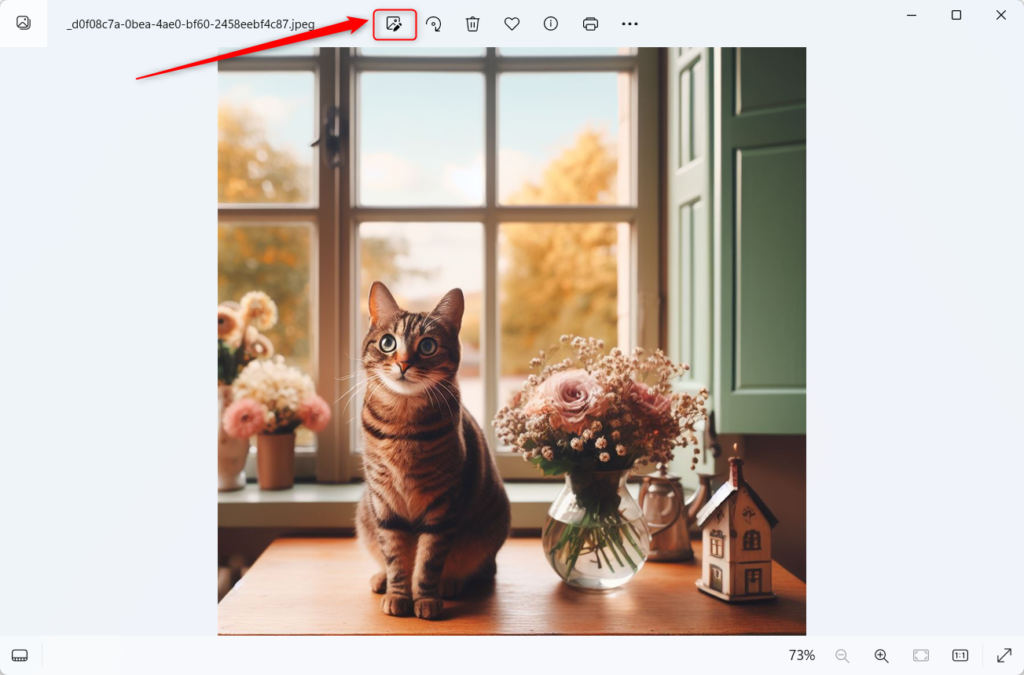
Open your photo in the Photos app, click Edit image, then select the Background tab. Click Remove to make the background transparent or Replace to choose a new color. Click Apply and then Save a copy.
Why the Confusion? Desktop Wallpaper vs. Image Editing
Many people looking to replace an image background in Windows 11 are actually trying to change their desktop wallpaper, a screen setting distinct from image editing.
Why Replace an Image Background?
Replacing an image background in Windows 11 helps your main subject stand out. This makes photos look cleaner and more professional, which is perfect for profile pictures or product shots. You can easily make your subject the focus and give your images a polished look.
How to Replace an Image Background Using the Photos App
Replacing an image background in Windows 11 is achievable with the Photos app. Its smart AI tools let you remove or change backgrounds for free, right on your computer. Open your photo in the Photos app, click ‘Edit image’ or press Ctrl+E, then select the ‘Background’ tab.
- Open your photo in the Photos app. Click the Edit image button or press Ctrl+E.
- Click the Background tab in the top toolbar.
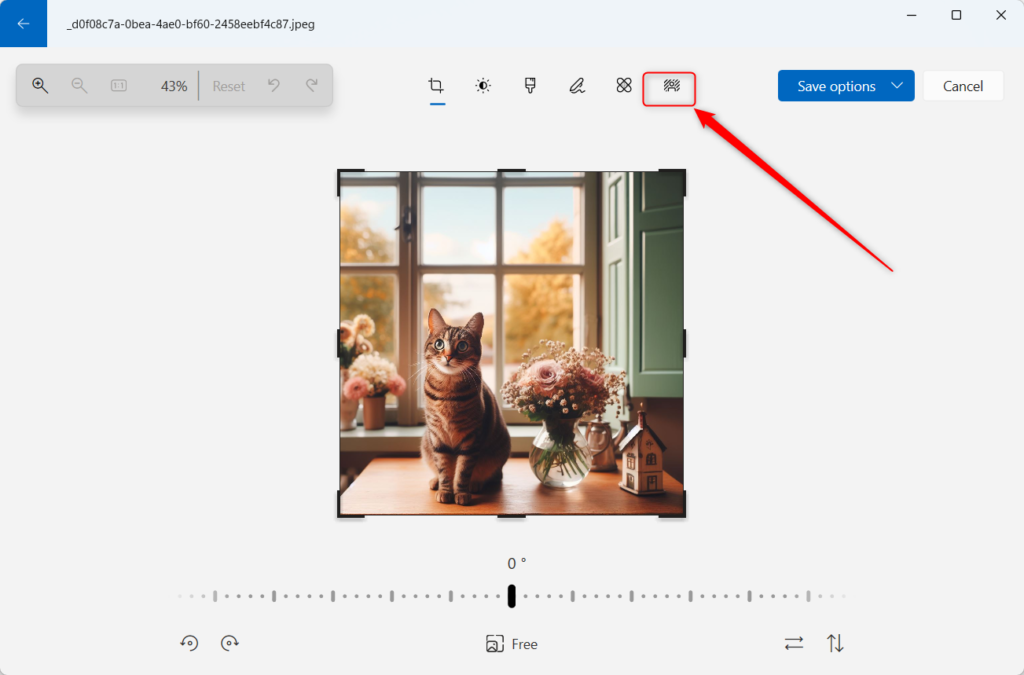
- The app will automatically identify the background. Click Remove to make it transparent, or Replace to select a new color.
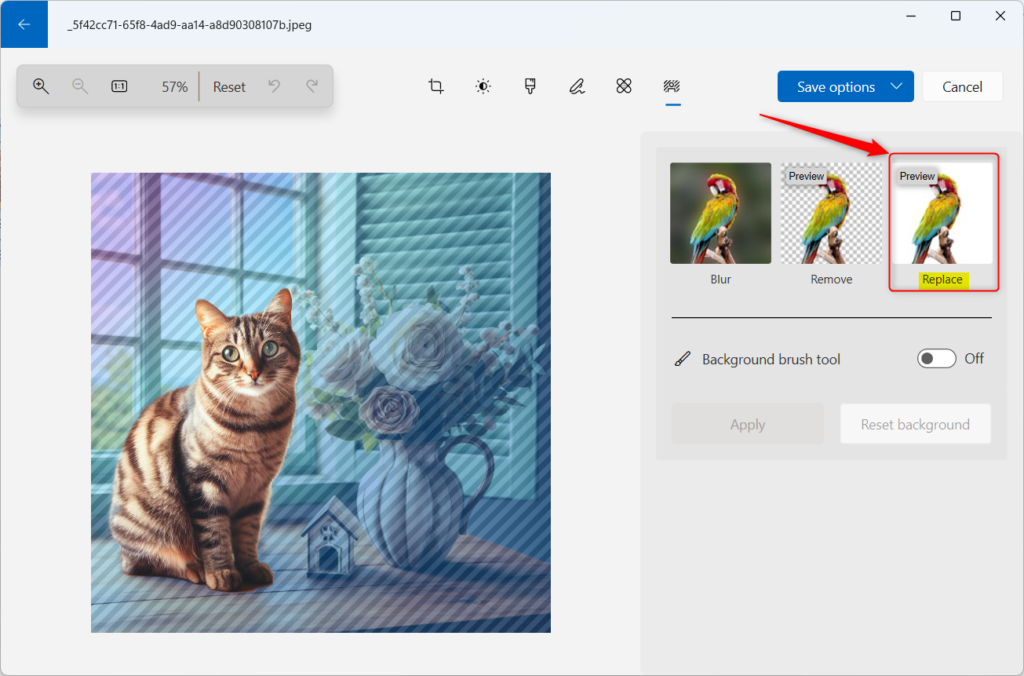
- Use the color picker to choose a new background. You can enter specific Hex or RGB codes for branding.
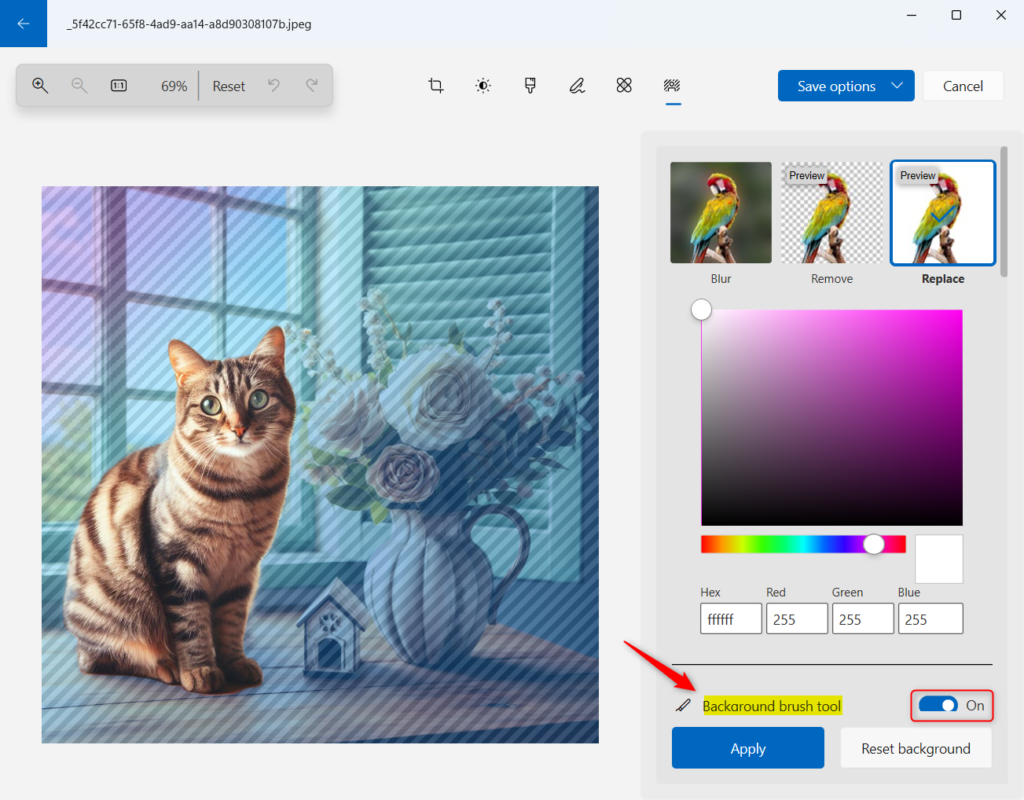
- If the AI misses a spot, use the Background brush tool. Adjust the Brush size and Softness to refine the edges.
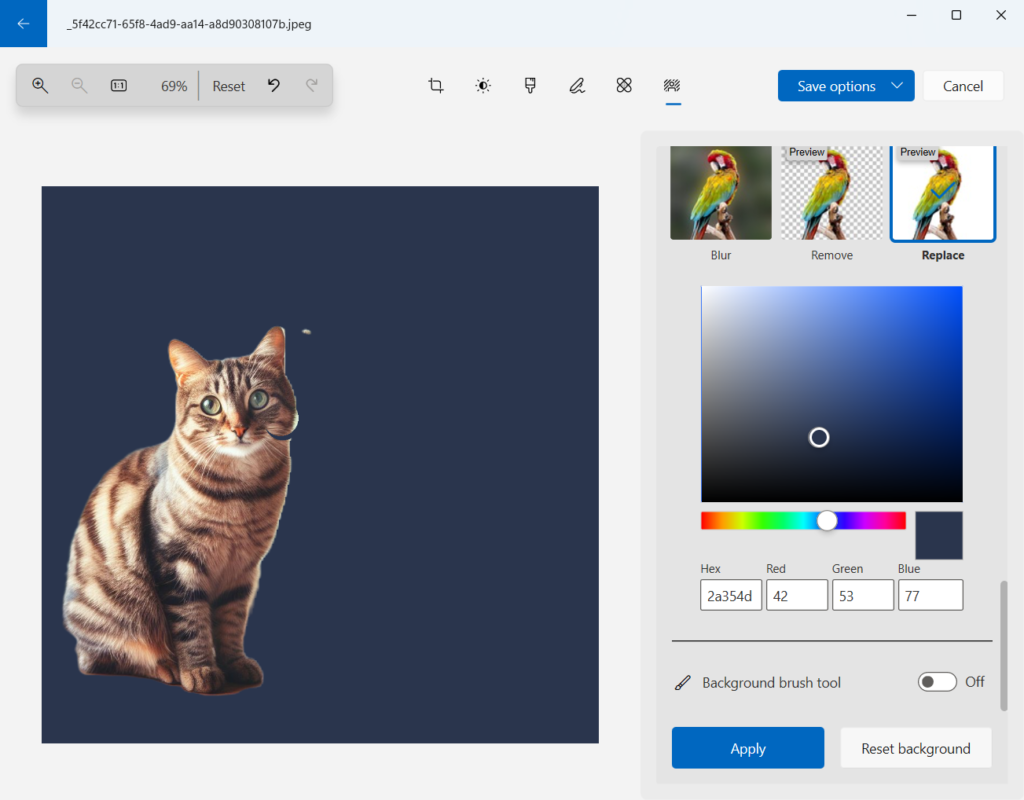
- Click Apply to finalize, then Save a copy to keep your original file safe.
Troubleshooting Common Issues
If the background tool isn’t showing up in the Photos app, first check that your app is updated through the Microsoft Store. This often fixes the problem.
Summary
Replacing an image background in Windows 11 is a free task using the Photos app, allowing you to improve your photos effectively.
Does the Windows Photos app support transparent backgrounds?
Yes, the Photos app lets you remove a background entirely. When you choose the remove option, the app creates a transparent layer. You can then save this as a PNG file to maintain the transparency for use in other design projects or web graphics.
Is the background removal feature free in 🪟 Windows 11?
Yes, the background removal and replacement feature is completely free. It is integrated directly into the Microsoft Photos app for all Windows 11 users. You do not need a subscription or extra software to access these AI-powered editing tools.
Can I use the Photos app to replace backgrounds on batch images?
Currently, the Photos app does not support batch background replacement. You must open and process each image individually. This ensures the AI can accurately detect the subject in every unique photo, providing the best possible result for each specific image file.
Was this guide helpful?

About the Author
Richard
Tech Writer, IT Professional
Richard, a writer for Geek Rewind, is a tech enthusiast who loves breaking down complex IT topics into simple, easy-to-understand ideas. With years of hands-on experience in system administration and enterprise IT operations, he’s developed a knack for offering practical tips and solutions. Richard aims to make technology more accessible and actionable. He's deeply committed to the Geek Rewind community, always ready to answer questions and engage in discussions.


[…] can use the Photos app to replace an image background, remove an image background, import photos and videos, show iCloud in the app, change mouse wheel […]
[…] File Explorer is good, users can also use the Paint and Photos apps to rotate images in […]
[…] can use the Photos app to replace an image background, remove an image background, import photos and videos, show iCloud in the […]
[…] can use the Photos app to replace an image background, remove an image background, import photos and videos, show iCloud in the app, change mouse […]
[…] can use the Photos app to replace an image background, remove an image background, import photos and videos, show iCloud in the app, change mouse […]
[…] can do a lot with Photos, like change picture backgrounds, remove backgrounds, and […]