How to Use the Filmstrip Feature in Windows 11 Photos App

The Filmstrip feature in the Windows 11 Photos app lets you quickly browse and select multiple images within a folder without leaving the main viewing window.
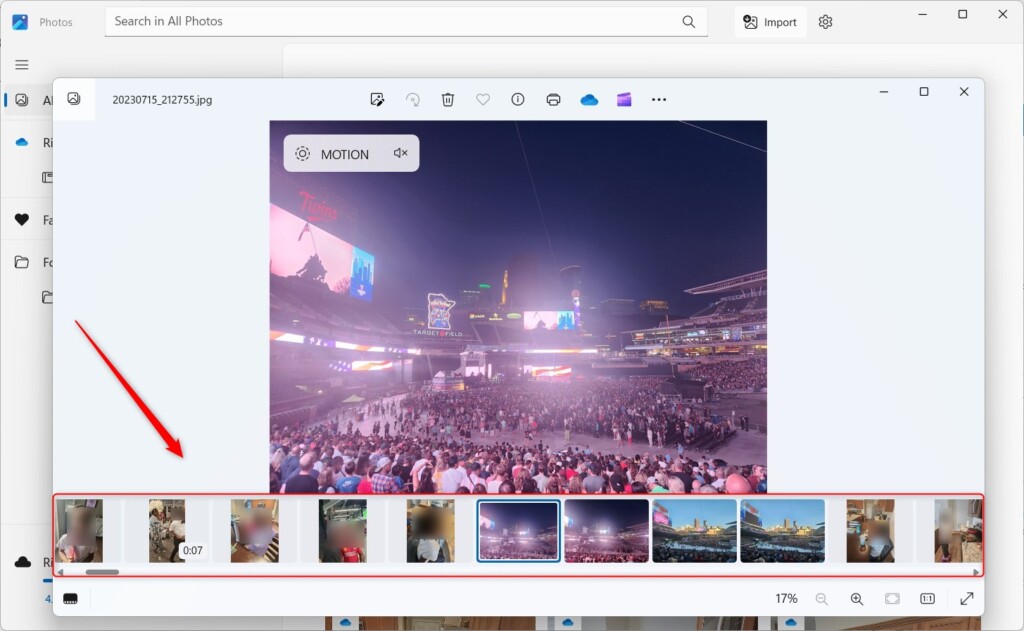
This new addition acts like a visual index, displaying small thumbnails of all photos in your current folder directly below the main image you’re viewing.
For example, you can use it to easily compare several pictures from your recent vacation photos or select a batch of images for editing or deletion.
You activate Filmstrip by simply opening any photo in the Photos app; the filmstrip automatically appears at the bottom, allowing you to click through other pictures instantly.
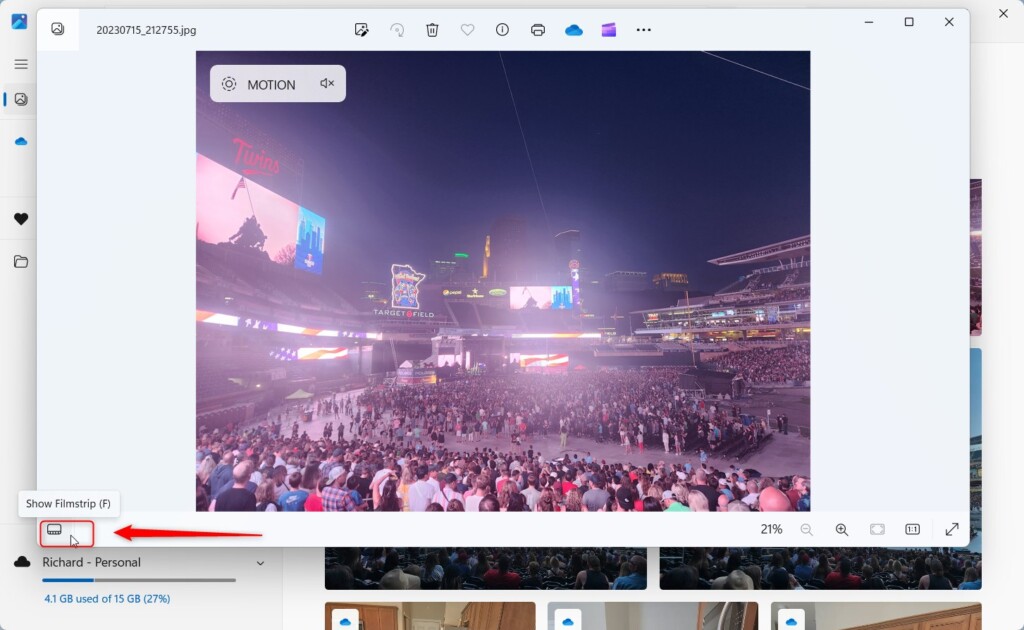
Open the Photos app and any image. Click the Show Filmstrip icon in the bottom left or press the F key. This displays a row of thumbnails at the bottom, allowing you to quickly browse and compare photos in the same folder.
How to turn on the Filmstrip
- Open the Photos app on your computer.
- Open any photo or video from your folders.
- Look at the bottom left corner of the window. Click the Show Filmstrip icon.
- Alternatively, you can just press the F key on your keyboard.
You can turn on the Windows 11 Filmstrip feature in the Photos app by opening the app and then opening any photo or video from your folders. Look for the Filmstrip icon at the bottom left of the window and click it to show the filmstrip, or simply press the F key on your keyboard.
To hide the Filmstrip, click the toggle button again or press the F key once more.
Reference: Microsoft
Summary
The Windows 11 Filmstrip feature shows a row of small pictures at the bottom of the Photos app, making it easy to quickly look through and compare photos in the same folder.
How to view Pictures without clicking on them?
So what we do in this case is we head to our three dotted menu click on options this opens up the legacy folder options menu. Click on view.
Was this guide helpful?

About the Author
Richard
Tech Writer, IT Professional
Richard, a writer for Geek Rewind, is a tech enthusiast who loves breaking down complex IT topics into simple, easy-to-understand ideas. With years of hands-on experience in system administration and enterprise IT operations, he’s developed a knack for offering practical tips and solutions. Richard aims to make technology more accessible and actionable. He's deeply committed to the Geek Rewind community, always ready to answer questions and engage in discussions.


No comments yet — be the first to share your thoughts!