How to Import Photos and Videos in Windows 11
Windows 11 imports photos and videos using built-in tools like the Photos app and File Explorer, or through cloud services.
Importing means copying pictures and videos from devices such as your phone, camera, or an external drive onto your Windows 11 computer.
This keeps your memories safe and easy to find on your PC, ready for organizing and editing within the Photos app.
For example, you can move hundreds of photos from your phone to your PC quickly.
After importing, your media sits in a special folder on your computer, ready for you to view, edit, and save whenever you like.
Import photos and videos into Windows 11 using the Photos app, File Explorer, or cloud services. Connect your device via USB, then use the Photos app’s Import button or File Explorer’s copy/paste function to transfer files. Cloud services like OneDrive offer automatic syncing.
Comparison of Import Methods
| Method | Speed | Convenience |
|---|---|---|
| USB Cable | Fast | Medium |
| OneDrive/Cloud | Depends on Internet | High |
| File Explorer (Copy/Paste) | Fast | High |
How to Import Using the Photos App
You can easily import photos and videos in Windows 11 using the Photos app that’s already on your PC. Simply connect your phone or camera, open the Photos app, and then click the ‘Import’ button to see all your pictures and videos ready to be copied over.
- Open the Photos app from the Start menu.

Microsoft Photos app on the All apps list - Connect your phone or camera using a USB cable.
- Click Import at the top of the app.
- Select your device from the list.
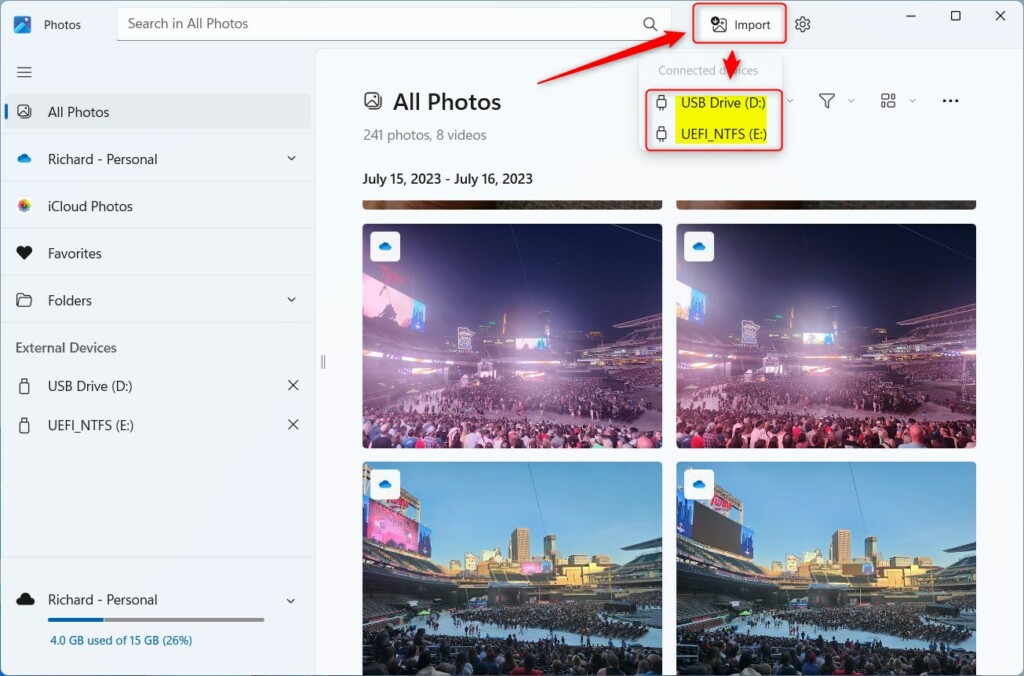
Windows 11 import photos and videos into photos app - Choose the photos you want to move.
- Pick a folder to save them in.
- Select Delete items after import if you want to clear space on your phone.
Importing via File Explorer
Importing photos and videos in Windows 11 using File Explorer is straightforward. After connecting your device, you can find it in File Explorer, open the folder where your pictures are saved (usually called DCIM), and then copy them directly to your computer.
- Connect your device via USB.
- Open File Explorer (Windows key + E).
- Find your device in the left sidebar.
- Open the DCIM folder.
- Select your files, right-click, and choose Copy.
- Navigate to your desired folder on your PC and Paste.
Cloud Integration: OneDrive and iCloud
You can sync your OneDrive storage to see your files on any device. For iPhone users, installing iCloud for Windows allows your photos to sync automatically to your PC without cables.
Troubleshooting Common Issues
If your PC does not see your device, try these steps:
- Use a different USB cable.
- Ensure your phone is unlocked.
- Check your phone settings to ensure it is in File Transfer mode.
- Update your drivers via Device Manager.
Summary
Importing your media into the Photos app keeps your files organized in one place. Whether you use a USB cable for speed or cloud services for convenience, your photos will be ready for viewing and editing. Remember to check your device settings if you run into connection issues.
Why is my 🪟 Windows 11 PC not detecting my phone?
This often happens because the USB cable is for charging only or the phone is locked. Ensure you are using a data-capable cable, unlock your phone screen, and select the ‘File Transfer’ or ‘MTP’ option on your phone’s notification menu when prompted.
How do I change the default import folder in 🪟 Windows 11?
In the Photos app, go to Settings. Look for the ‘Sources’ section. Here you can add or remove folders that the app monitors. You can also change the default save location in your system settings under Storage or by right-clicking your Pictures folder and selecting Properties.
Was this guide helpful?

About the Author
Richard
Tech Writer, IT Professional
Richard, a writer for Geek Rewind, is a tech enthusiast who loves breaking down complex IT topics into simple, easy-to-understand ideas. With years of hands-on experience in system administration and enterprise IT operations, he’s developed a knack for offering practical tips and solutions. Richard aims to make technology more accessible and actionable. He's deeply committed to the Geek Rewind community, always ready to answer questions and engage in discussions.


[…] can use the Photos app to replace an image background, remove an image background, import photos and videos, show iCloud in the app, change mouse wheel behavior, and […]