How to Change File Explorer Layout in Windows 11


Changing the File Explorer layout in Windows 11 lets you adjust how files and folders appear on your screen, switching between options like large icons, a simple list, or detailed columns. File Explorer is the built-in file manager you use to browse, open, and manage documents on your PC.
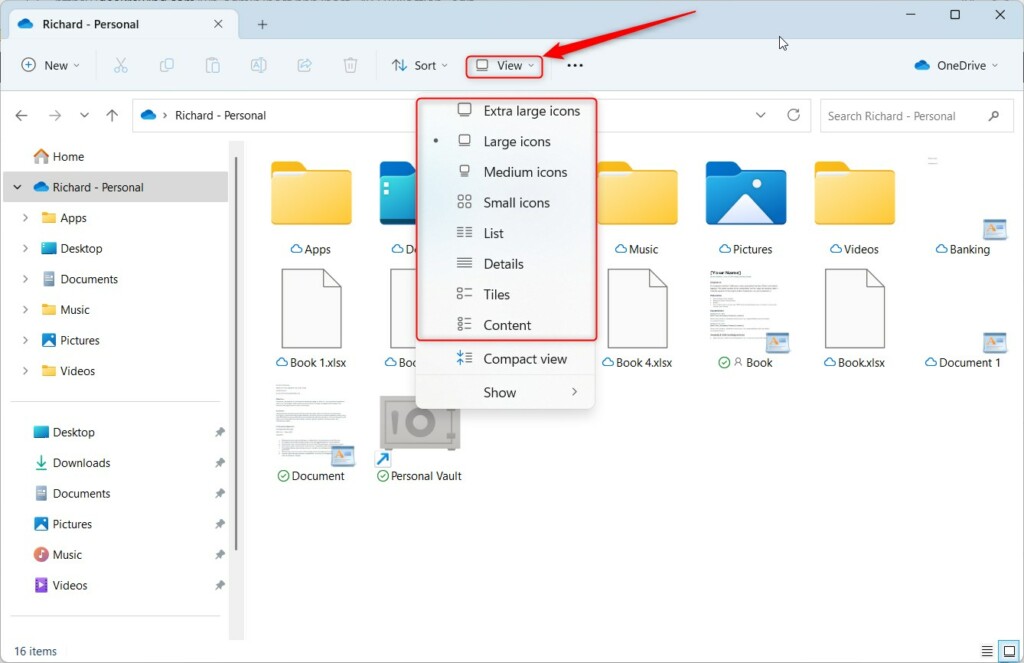
You can pick from several view styles, including Details view for file sizes and dates, or compact List view to see more items at once. The other choices are Extra large, Large, Medium and Small icons, Tiles, and Content. You will find them under View Layout in the command bar at the top of the window. If you prefer the keyboard, Ctrl+Shift+6 switches the current folder to Details and Ctrl+Shift+5 switches it to List.
Windows 11 saves your layout choice for each folder automatically, so you do not have to set it up again next time you open it. The same applies to sorting and grouping. The catch is that each folder remembers its own view, which is why you sometimes end up with a mix of layouts. The sections below show how to make them all match and what to do when Windows stops remembering.
Open File Explorer , click View Layout, and select your preferred style such as Details, List, or Large Icons. To apply that layout to all folders of the same type, click View Options, go to the View tab, click Apply to Folders, and confirm with Yes.
Comparison of File Explorer Layouts
| Layout Type | Best For |
|---|---|
| Extra Large/Large Icons | Photos and Videos |
| Medium Icons | General file browsing |
| List | Quick scanning of many files |
| Details | Sorting by date, size, or type |
| Tiles | Seeing file info with larger icons |
| Content | Detailed file metadata view |
Using the View Menu and Apply to Folders
You can quickly change File Explorer layout preferences and apply that exact view to every folder on your computer so they all match. Open File Explorer, choose your preferred layout from the top menu, and use the Folder Options settings window to copy that view across all your drives.
One thing to know first: Apply to Folders does not touch every folder at once. Windows sorts folders into types, such as General items, Documents, Pictures, Music and Videos, and the button only applies your view to folders of the same type as the one you are in. If you want Details view everywhere, repeat the steps once in a folder of each type. This works the same on Windows 11 Home and Pro.
- Open File Explorer and set your preferred view (e.g., Details). Go to View Layout and pick the style. The folder contents should change right away. Use a folder that holds ordinary files, not a special one like This PC, so the view you copy is the one you want.
- Click the View menu in the top command bar. A drop-down list of layout, sorting and display options opens.
- Select Options at the bottom of the menu. If you do not see it in the View menu on your build, click the three-dot See more button at the right end of the command bar instead. On current Windows 11 releases, Options usually sits there. The Folder Options window opens.
- In the Folder Options window, click the View tab. You will see a Folder views box at the top and a list of advanced settings below it.
- Click Apply to Folders. Windows asks you to confirm that you want all folders of this type to match the current folder’s view settings. Click Yes, then OK to close the window. Open a few other folders of the same type to check that they now use the same layout.
Open a normal folder on one of your drives and try again. There is no single undo button. To go back, set a different view and apply it the same way, or use the reset steps in the next section.
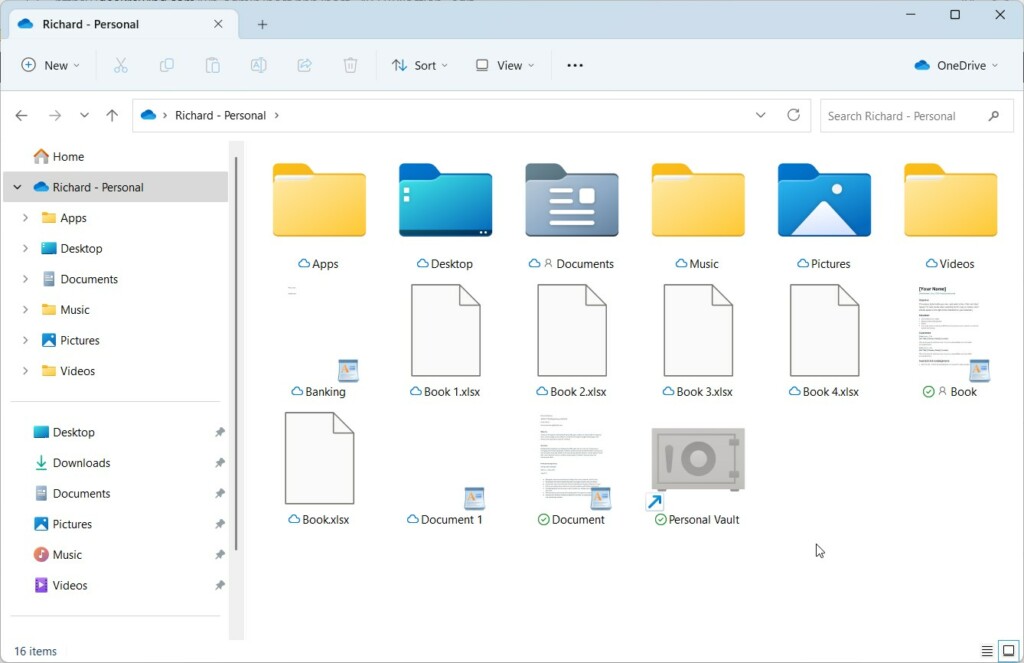
Troubleshooting: Why Windows Resets Folder Views
Windows sometimes forgets your settings because the `BagMRU` registry keys, which store your view preferences, have reached their limit. Reset your folder views to fix this.
Typical signs are folders that go back to icon view after you close them, or a layout that works one day and is gone the next. The reset below clears the saved views for the folder type you are in and sends them back to the Windows defaults. Your files are not touched, only the way folders are displayed. Expect to set your preferred layouts again afterward.
How to Reset Folder Views
- Open Folder Options via the View menu. If Options is not listed there, use the three-dot See more menu in the command bar. The Folder Options window opens.
- Go to the View tab. The Folder views section is at the top.
- Click Reset Folders. Confirm with Yes when Windows asks, then click OK. Your folders should return to their default look. Open a folder or two to check, then set your preferred layout again and use Apply to Folders if you want it everywhere.
Advanced Customization via Registry Editor
You can change File Explorer layout settings that refuse to save properly by clearing out stuck view preferences in Registry Editor (a database for low-level Windows settings). This advanced fix lets you delete corrupted layout keys so Windows rebuilds them from scratch.
Try this only if Reset Folders did not help. Deleting the wrong registry key can cause real problems, so take a backup first and delete only the two keys named below. Registry Editor is included in both Home and Pro editions. You need an administrator account, or you will be asked for admin credentials.
- Press Win + R, type `regedit`, and hit Enter. If User Account Control asks for permission, click Yes. Registry Editor opens.
- Make a backup before you change anything. Click File Export, choose a location such as your Desktop, name the file, and click Save. To undo your changes later, double-click that file and confirm the merge.
- Navigate to: `HKEY_CURRENT_USER\Software\Classes\Local Settings\Software\Microsoft\Windows\Shell\BagMRU`. You can paste the path into the address bar at the top of Registry Editor, or expand the folders in the left pane one by one.
Deleting the `BagMRU` and `Bags` registry keys resets all custom folder views in File Explorer to their default settings. This action removes personalized layouts saved for each folder, returning them to the standard Windows 11 appearance. Performing this reset ensures a clean slate for folder view configurations.
- Right-click the `BagMRU` key in the left pane, click Delete, and confirm with Yes.
- Find the `Bags` key. It sits next to `BagMRU` under the same Shell key. Right-click it, click Delete, and confirm.
- Close Registry Editor, then restart your PC, or sign out and back in. File Explorer reads these keys when it starts, so the change will not show until then.
After you sign back in, your folders should use the default Windows 11 layout. Windows creates fresh keys as you open folders. Set your preferred view again and use Apply to Folders to make it stick.
Summary
Changing your File Explorer layout helps you manage files better, and you can do this using the View menu, keyboard shortcuts, or the 'Apply to Folders' feature.
For a one-off change, pick a style under View Layout or use the Ctrl+Shift shortcuts. To make folders of the same type match, use Apply to Folders. If Windows keeps forgetting your choices, try Reset Folders first, and only then clear the `BagMRU` and `Bags` keys in the registry, with a backup in hand.
Have a question about this guide?
Answered by AI from this guide. Good questions may be added to this page — please don't include personal details.
Did this guide fix your problem?

About the Author
Richard
Tech Writer, IT Professional
Richard is a writer at Geek Rewind who turns complex IT tasks into clear, step-by-step guides. He draws on years of hands-on experience in system administration and enterprise IT operations, focusing on Windows, Linux and WordPress: the problems people actually run into, and the fixes that work. His server and WordPress guides come from systems he runs himself. Richard builds and maintains the platform behind Geek Rewind, from its Ubuntu servers and Nginx configuration to its custom WordPress plugins. Many new tutorials start with readers' questions, and he's always glad to answer them in the comments.
No comments yet — be the first to share your thoughts!