How to turn Keyboard Backlight Autobrightness on or off in Windows 11

You can turn keyboard backlight autobrightness on or off in Windows 11 to control when your keyboard lights adjust automatically based on ambient light.
The Windows 11 keyboard backlight autobrightness feature lets the backlight dynamically change its brightness. This autobrightness adjustment makes the keyboard easier to see in dim light or prevents excessive brightness in well-lit areas.
This intelligent lighting adjustment is available for many modern laptops and compatible external keyboards equipped with a light sensor, functioning much like your screen’s auto-brightness feature but specifically for your keyboard.
Open Settings, navigate to Bluetooth & devices, then Keyboard, and toggle “Change keyboard brightness automatically when lighting changes” on or off. For advanced users, modify the EnableBucketedBacklightAutobrightness value in Registry Editor.
Why turn Keyboard Backlight Autobrightness on or off?
Turning keyboard backlight autobrightness on lets your keyboard light adjust itself automatically, which is handy if you often move between bright and dark rooms.
What happens when done?
Once you change this setting, your keyboard backlight will either automatically adjust its brightness based on the room’s light, or it will stay at the brightness level you set manually.
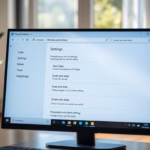
Option 1Use Windows Settings
You can easily turn your keyboard backlight autobrightness on or off using Windows Settings.
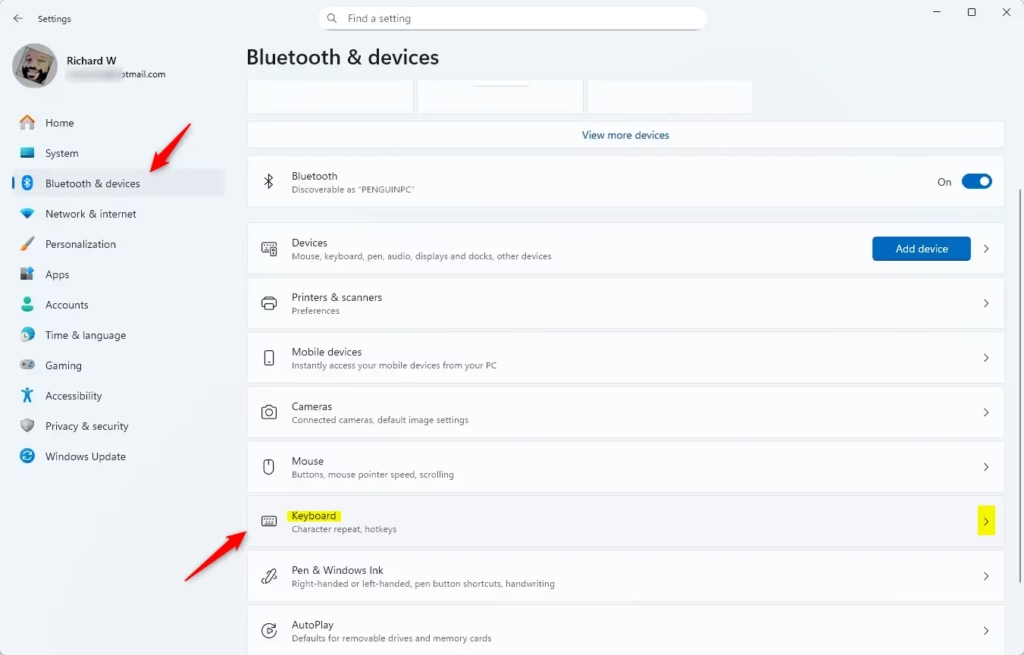
- Open Settings. You can do this by pressing the Windows key + I on your keyboard.
- On the left side, click on Bluetooth & devices. Then, on the right side, click on Keyboard.
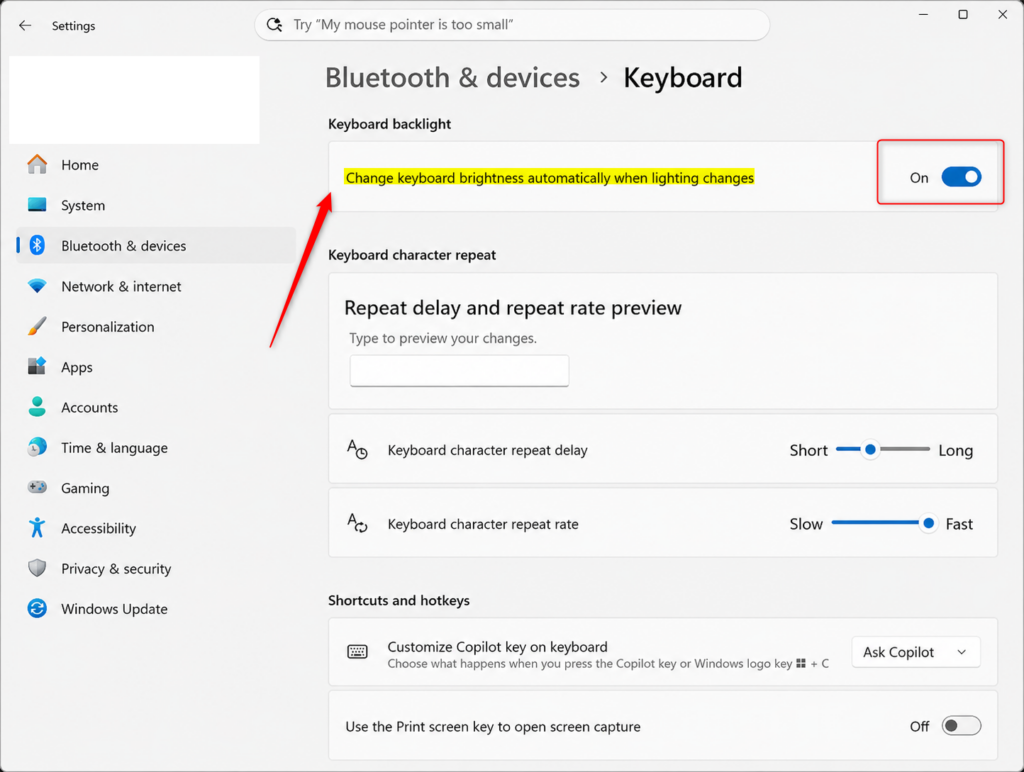
- Look for the Keyboard backlight section. You will see an option that says “Change keyboard brightness automatically when lighting changes”. Turn this setting On or Off, depending on what you want.
- You can now close the Settings window.
Option 2Use Registry Editor (Advanced Users)
If you’re comfortable with advanced settings, you can change keyboard backlight autobrightness using the Registry Editor.
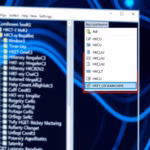
First, open the Registry Editor. You can search for “regedit” in the Windows search bar and press Enter. You might need to click “Yes” on a User Account Control prompt.
To Turn On Keyboard Backlight Autobrightness
To turn on keyboard backlight autobrightness using the Registry Editor, you’ll need to find a specific setting and make sure it’s turned on.
HKEY_LOCAL_MACHINE\SOFTWARE\Microsoft\Windows\CurrentVersion\
You will need to create or modify a value named EnableBucketedBacklightAutobrightness.
Double-click on EnableBucketedBacklightAutobrightness. Make sure the “Value data” is set to 1. Click OK.
To Turn Off Keyboard Backlight Autobrightness
To turn off keyboard backlight autobrightness with the Registry Editor, you’ll adjust a specific value to ‘0’.
HKEY_LOCAL_MACHINE\SOFTWARE\Microsoft\Windows\CurrentVersion\ airson\Sensors\LightSensors\KeyboardBacklight
Double-click on EnableBucketedBacklightAutobrightness. Make sure the “Value data” is set to 0. Click OK.
After changing Windows 11 keyboard backlight settings, restarting the computer ensures the new brightness control takes full effect. This restart action applies the chosen automatic brightness adjustments, whether turning it on or off, to the keyboard's lighting.
Reference:
Summary
You’ve learned how to manage your keyboard’s automatic brightness in Windows 11, with the straightforward Settings app for most users and the more advanced Registry Editor for those who need it.
How do I turn off the automatic keyboard backlight?
So what I'm doing here. I will hold the uh. Function button and then I will press the down arrow. Key. So when I press the down arrow. Key. Look at that the backlight is gone.
How to make a Mac keyboard light up automatically?
Do one of the following: On all Mac computers: Choose Apple menu > System Settings, then click Keyboard in the sidebar (you may need to scroll down). Drag the “Keyboard brightness” slider to adjust the brightness.
Was this guide helpful?

About the Author
Richard
Tech Writer, IT Professional
Richard, a writer for Geek Rewind, is a tech enthusiast who loves breaking down complex IT topics into simple, easy-to-understand ideas. With years of hands-on experience in system administration and enterprise IT operations, he’s developed a knack for offering practical tips and solutions. Richard aims to make technology more accessible and actionable. He's deeply committed to the Geek Rewind community, always ready to answer questions and engage in discussions.
No comments yet — be the first to share your thoughts!