How to Add or Remove File Types for Search Index in Windows 11

Adding or removing file types for the Windows 11 search index lets you control what Windows searches through when you type in the taskbar . The search index is a catalog of your files. It stores file names, properties and, for some formats, the text inside the file. Because Windows looks things up in the catalog instead of scanning the drive, results for documents, pictures and other items appear in seconds.
Open Settings Privacy & security Search, scroll to Related settings and click Advanced indexing options. In the Indexing Options window, click Advanced, then the File Types tab. Check or uncheck file extensions to add or remove them from the search index, or type a new extension in the Add new extension box and click Add.
You can customize the list of file types the index covers. Add an extension such as .docx if you want it indexed, or exclude a format such as .tmp so temporary files do not clutter your results. A shorter, more relevant list also means less background indexing work on your PC.
Before you start, keep these points in mind:
- Admin rights: Changing the file type list is an administrator task. A standard account will be asked for an administrator password, or the option may not work at all.
- Home and Pro: The steps are the same on Windows 11 Home and Pro. You do not need Group Policy or any Pro-only tool.
- Locations still matter: The file type list only decides which kinds of files get indexed. Files must also be in a location the index covers. By default that is mainly your user folders and the Start menu . If you set Windows search to Enhanced mode under Settings Privacy & security Searching Windows, it covers the whole PC.
- Re-indexing: After you change a file type, Windows rebuilds part of the index. Search may be slow or incomplete for a while, especially on large drives. A restart is not required, but you can leave the PC powered on and plugged in until indexing finishes.
- Nothing is deleted: Removing a file type from the index never touches the files. They stay on disk and can still be opened normally. Windows can usually still find them by name, just more slowly.
- Easy to undo: If a change gives you worse results, go back to the same list, restore the original setting and let the index rebuild.
How to Change File Types for Indexing
You can change which file types Windows 11 searches by opening the Settings app and navigating to the Advanced indexing options menu. This lets you control exactly which file formats are included when you search for items on your computer, helping you manage your windows 11 file types index to keep your search results fast and accurate.- Open Settings. You can do this by pressing the Win+I on your keyboard.

Windows 11 Start menu with Settings gear icon highlighted. - In Settings, click on Privacy & security in the left-hand menu. Then, on the right side, click on Search. Open Search settings
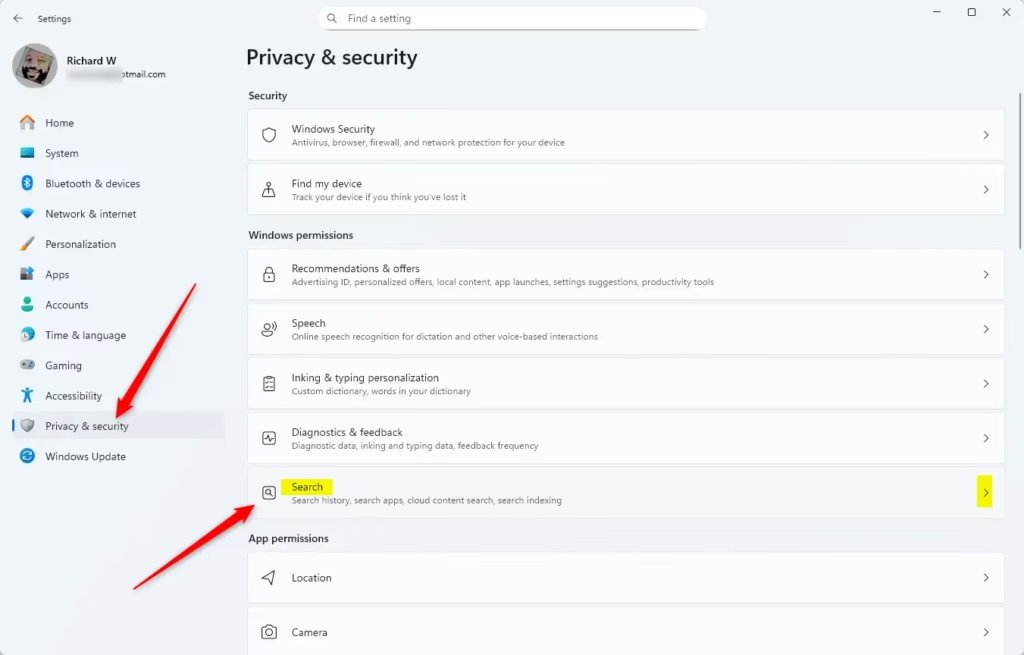
Windows 11 Search bar with the 'Search' tile highlighted. - Scroll down to the Related settings section and click on Advanced indexing options.
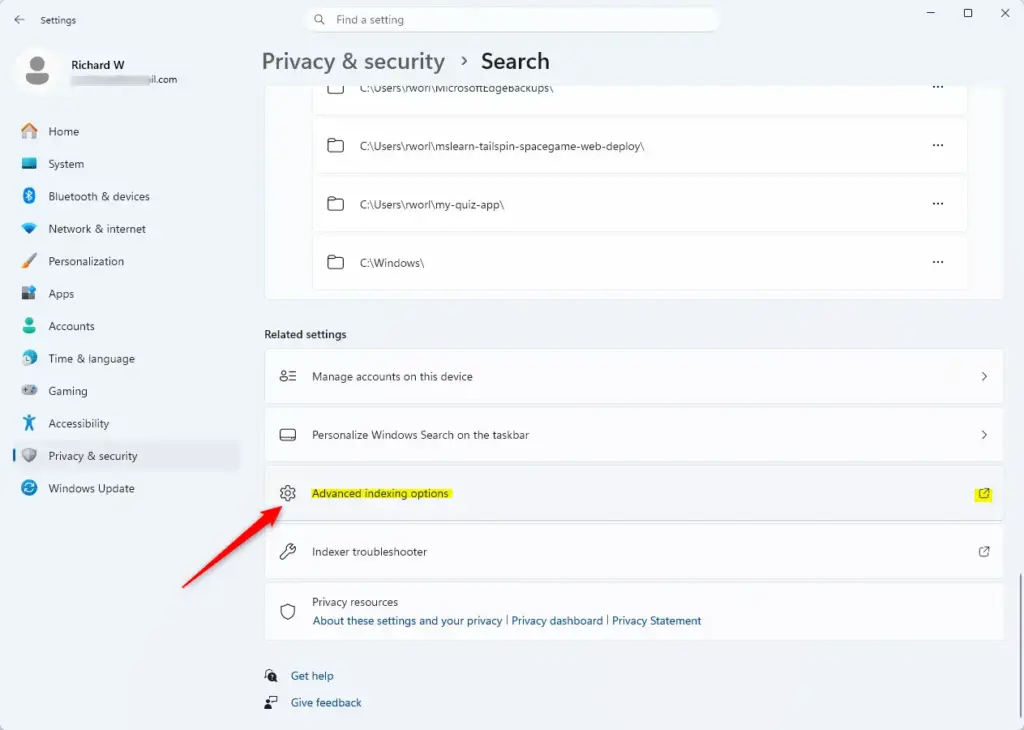
Windows 11 advanced indexing options for file types. - In the Indexing Options window, click the Advanced button.
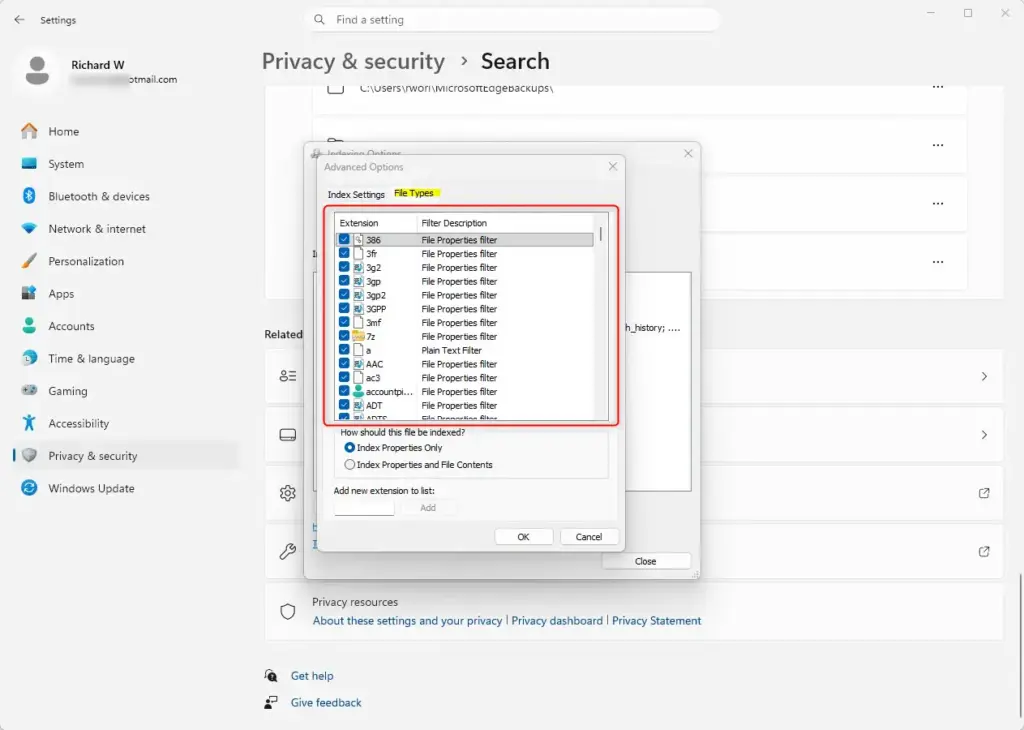
Configuring advanced file type indexing in Windows 11. - Click on the File Types tab.
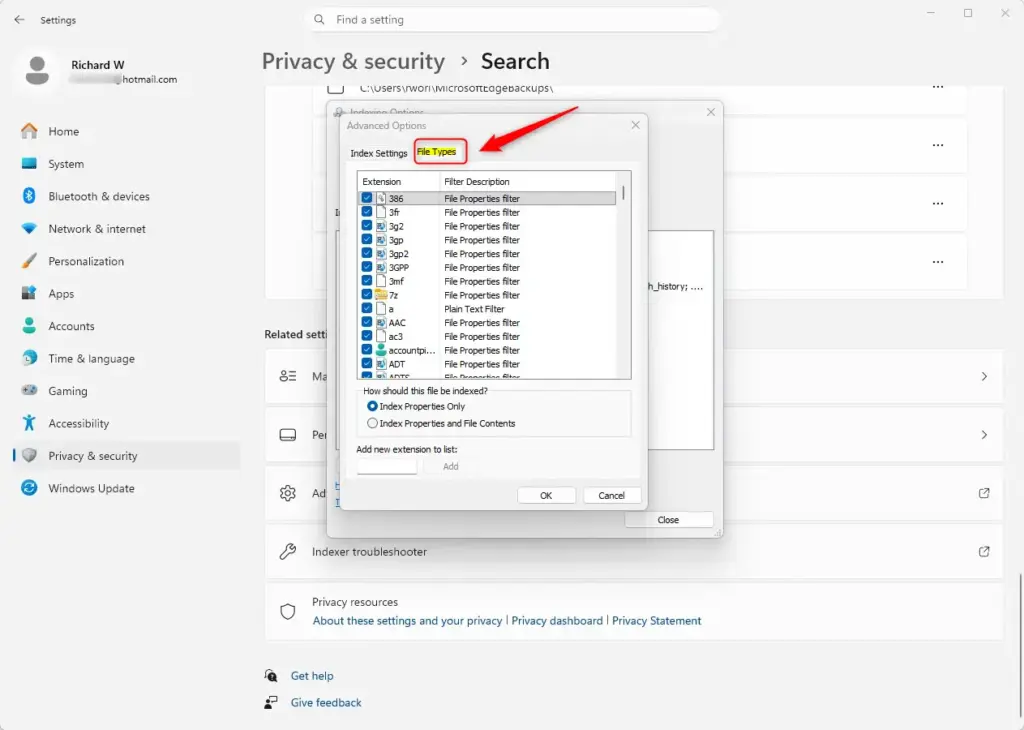
Remove a File Type from Indexing
You can stop Windows 11 from searching specific file formats by unchecking them in the File Types tab of the indexing options. Removing unwanted extensions from your windows 11 file types index prevents clutter in your search results and makes finding your important documents much faster.
- Find the file extension (like “3fr”) in the list.
- Uncheck the box next to the extension you want to remove from the search index.
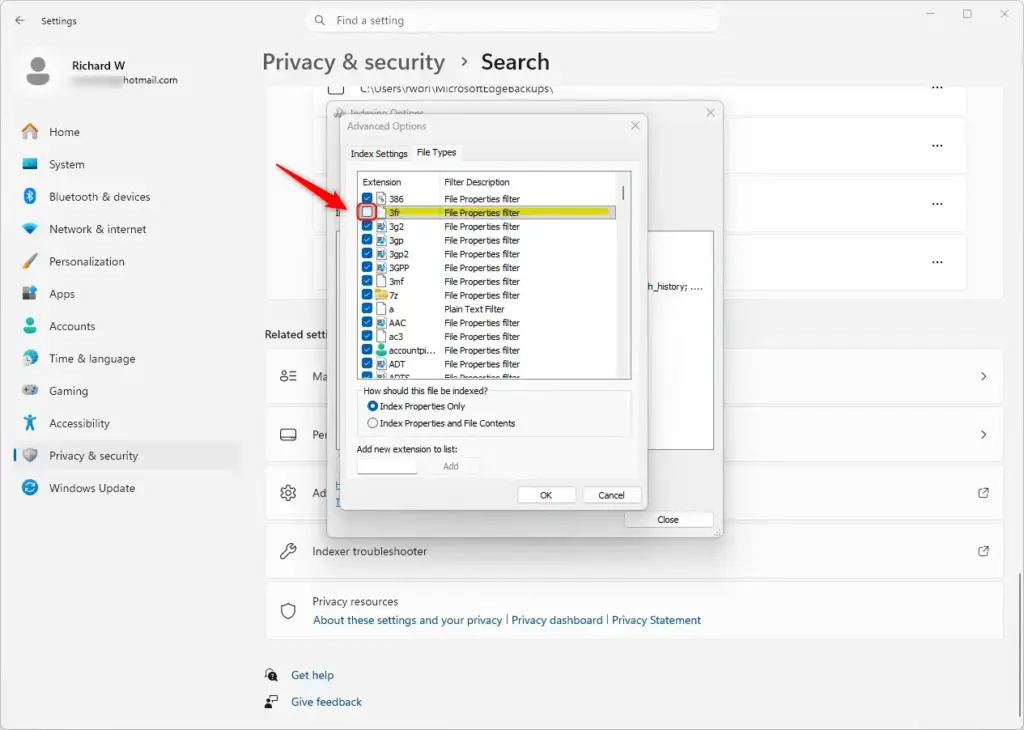
Add a File Type to Indexing
You can include extra file formats in your searches by selecting them in the indexing options list. Updating your windows 11 file types index ensures that Windows looks inside specific file extensions when you use the search bar.
- Check the box next to an extension (like “386”) that is already in the list but not being indexed.
Add a New File Type to Indexing
You can manually type in a missing file format if it does not appear in the default list. Adding a custom extension to your windows 11 file types index lets you search for specialized files that Windows does not normally track.
- In the box labeled Add new extension to list, type the file extension (like “bak”).
- Click the Add button.
- Now, you need to tell Windows how to index this new file type. Choose one of these options:
- Index Properties Only: This means Windows will only search the file name and its details.
- Index Properties and File Contents: This means Windows will search the file name, its details, and also the words inside the file.
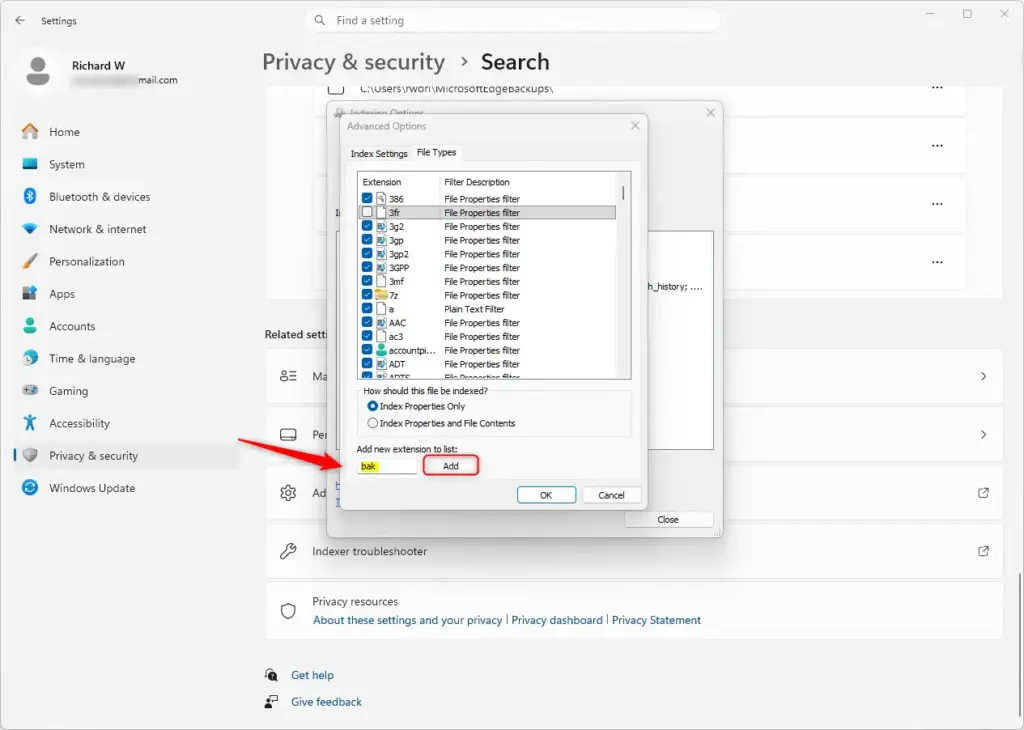
- When you are done making changes, click OK.
- Click Close to close the Indexing Options window.
- You can now close the Settings window.
Summary
You need administrator rights to make these changes.
Was this guide helpful?

About the Author
Richard
Tech Writer, IT Professional
Richard is a writer at Geek Rewind who turns complex IT tasks into clear, step-by-step guides. He draws on years of hands-on experience in system administration and enterprise IT operations, focusing on Windows, Linux and WordPress: the problems people actually run into, and the fixes that work. His server and WordPress guides come from systems he runs himself. Richard builds and maintains the platform behind Geek Rewind, from its Ubuntu servers and Nginx configuration to its custom WordPress plugins. Many new tutorials start with readers' questions, and he's always glad to answer them in the comments.

No comments yet — be the first to share your thoughts!