How to Change Windows 11 Search Index Location

Moving the Windows 11 search index location lets you relocate where Windows stores the database files it uses to find your apps and documents quickly. The search index is a built-in database that acts like an index in the back of a book. Windows looks things up in it instead of scanning the whole drive every time you search. By default, Windows saves this index in the 📂%ProgramData%\
Open Settings Privacy & security Search Advanced indexing options Advanced button > Index Settings tab. Click Select new, choose your destination drive, and click OK. Windows will move the index to that drive’s Search\Data folder.
That folder grows as you add files, email and other content. On a PC with a lot of documents, or a small system drive, the index can take up a noticeable amount of space. Moving it to another drive frees that space on your system drive without turning indexing off.
You can move this data to any other internal drive on your PC. External USB drives and network shares do not work for this purpose. An external drive can be unplugged and a network share can disappear, and either would leave search without its database.
Before you start, check a few things:
- Make sure the destination is an internal drive or partition with enough free space. The index is usually well under a few gigabytes, but it grows with the number of indexed files.
- Sign in with an administrator account. Changing indexing options needs administrator permission.
- Expect search results to be incomplete for a while after the move. Windows may need to rebuild the index in the new location, which takes longer on large drives. Your files are not affected.
- You can undo the change later by pointing the index back to a folder on your system drive. The same setting is used in both directions.
The location is set in the Indexing Options window, which you can reach from Settings Privacy & security > Searching Windows. The steps below cover the move itself.
Option 2Change Search Index Storage Location Using Registry Editor
You can change search index location by editing a specific key in Registry Editor if you prefer a system-level approach. This method involves updating the DataDirectory value path to point Windows toward your new preferred internal drive storage folder.- Open Registry Editor. You can type
regedit.exein the Windows search bar and press Enter. - In Registry Editor, go to the following location in the left pane:
HKEY_LOCAL_MACHINE\SOFTWARE\Microsoft\Windows Search - In the right pane, double-click on the value named DataDirectory.
- Enter the full path of the location where you want to store the index (for example,
D:). Add\Search\Data\to the end of this path. Then, click or tap OK. The default location is%ProgramData%\Microsoft\Search\Data\.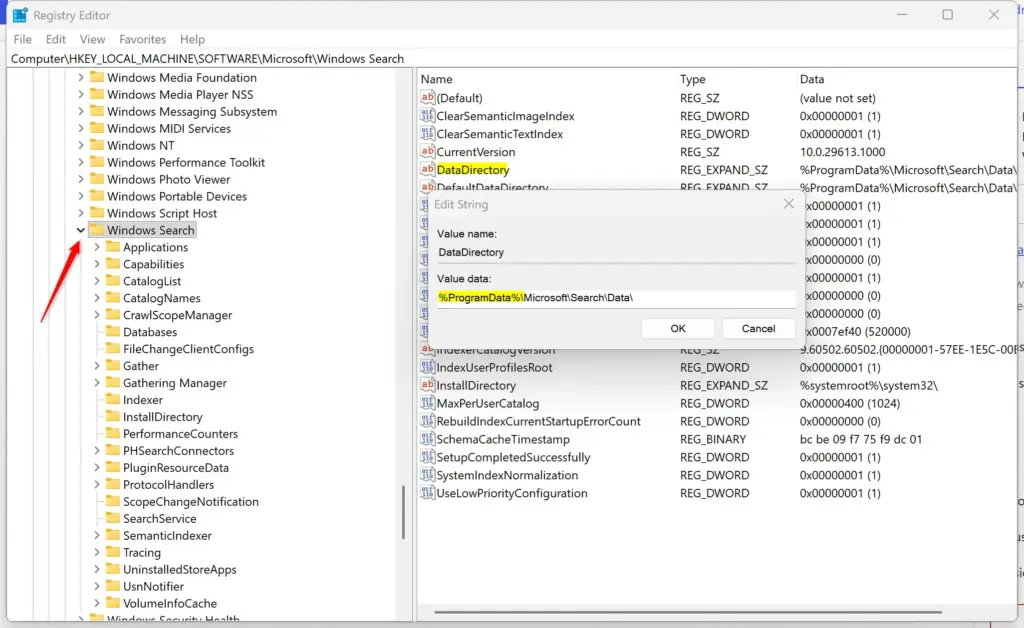
- Close Registry Editor.
- Restart the Windows Search service to apply the changes.
Summary
You can successfully change search index location in Windows 11 using either the Settings app or Registry Editor, provided you use an internal drive. Both approaches require administrator rights and a quick restart of the Windows Search service to apply your new folder path.
Option 1Change Search Index Storage Location in Settings
You can change search index location through the Settings app by using the advanced indexing options menu. This built-in method lets you move your search database to another internal drive without touching system files, which helps free up space on your main drive.- Open Settings. You can press the Windows key + I on your keyboard.

Windows 11 Start menu with Settings gear icon highlighted. - On the left side, click or tap on Privacy & security. Then, on the right side, click or tap on Search.
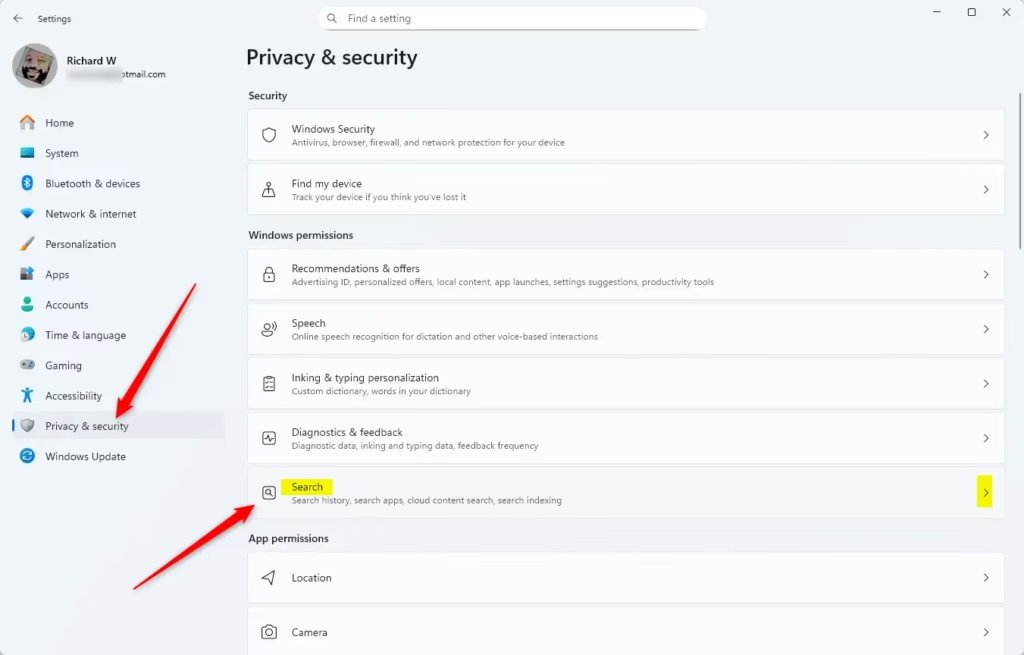
Windows 11 Search bar with the 'Search' tile highlighted. - Look for Related settings and click or tap on Advanced indexing options.
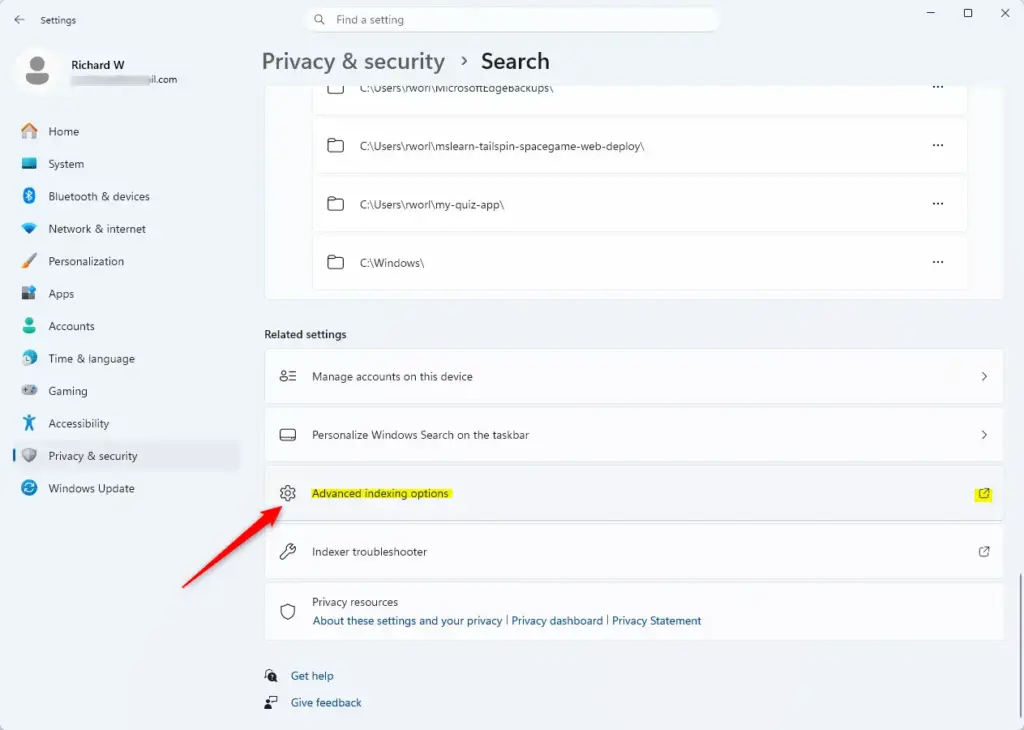
Windows 11 advanced indexing options for file types. - In the Indexing Options window, click or tap the Advanced button.
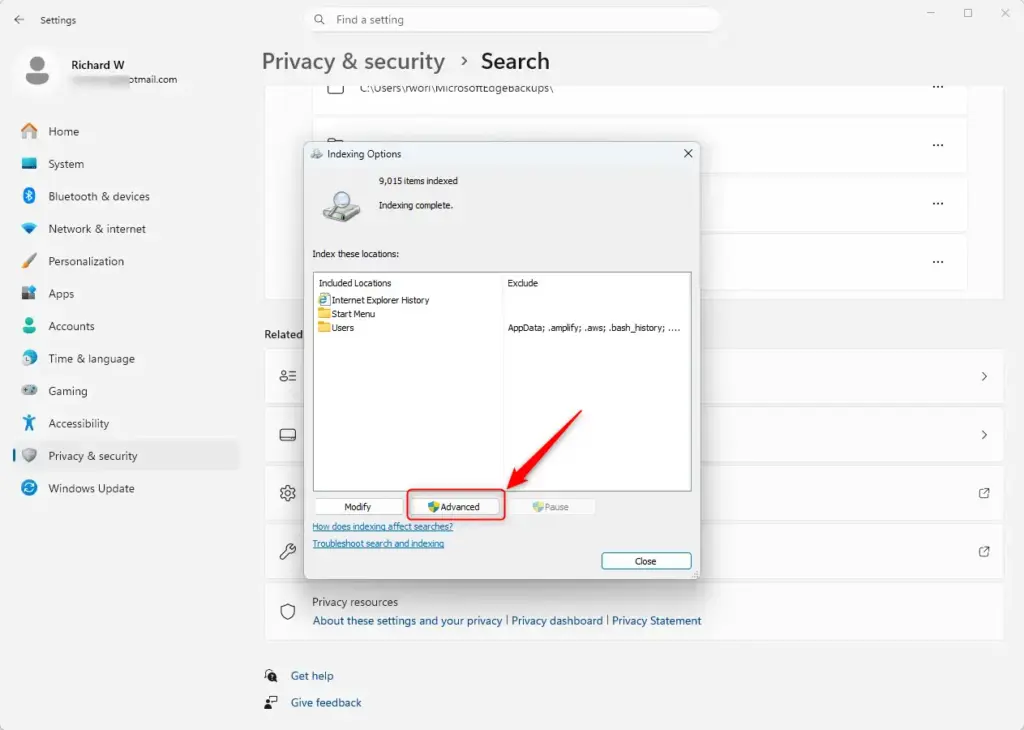
Clicking the Advanced button in Windows 11 indexing options. - Go to the Index Settings tab. Under the Index location section, click or tap the Select new button.
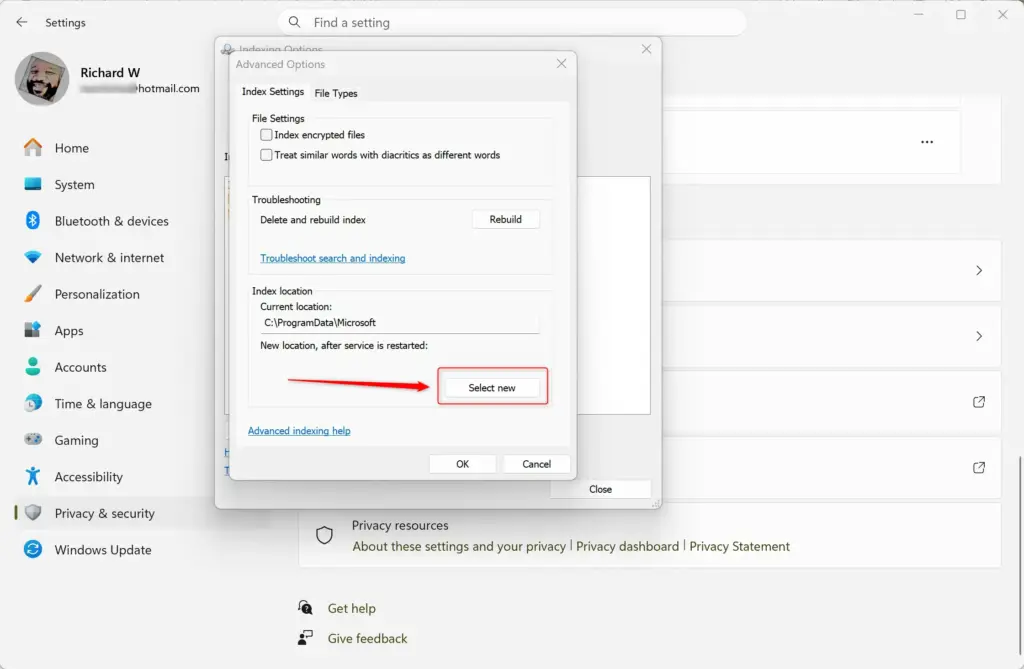
- Choose a folder or drive (for example, D:) where you want to save the search index. Then, click or tap OK. The search index will be saved in a folder like
D:\Search\Data\. The default location isC:\ProgramData\Microsoft\Search\Data\.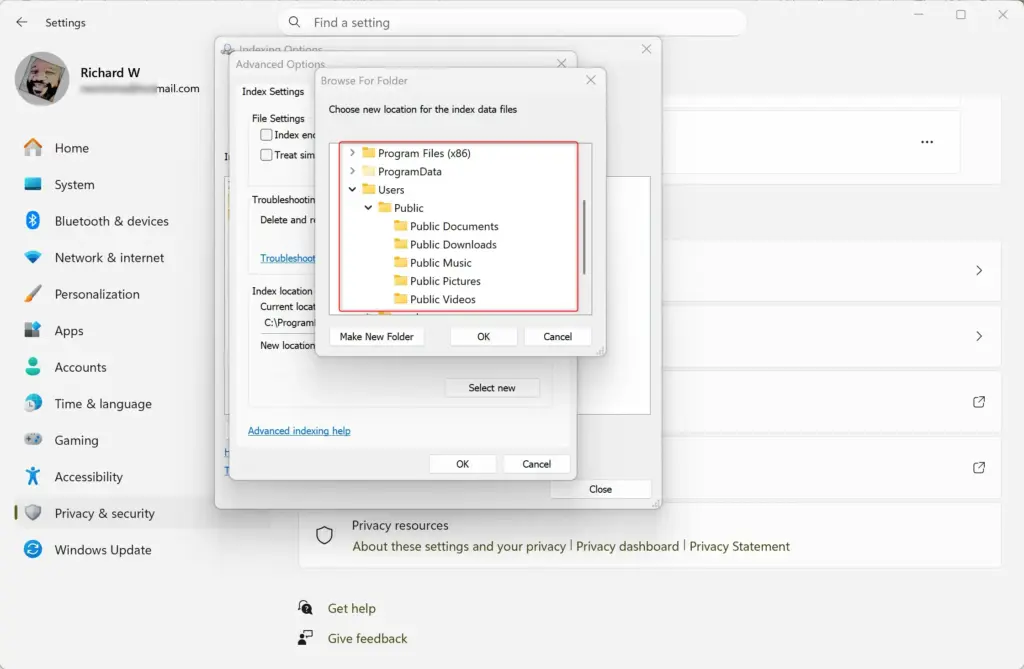
- Click or tap OK.
- Click or tap Close.
- You can now close the Settings window.
- Restart the Windows Search service to make the changes take effect. You can find instructions on how to restart services in this guide:
Option 2Change Search Index Storage Location Using Registry Editor
You can change search index location by editing a specific key in Registry Editor if you prefer a system-level approach. This method involves updating the DataDirectory value path to point Windows toward your new preferred internal drive storage folder.- Open Registry Editor. You can type
regedit.exein the Windows search bar and press Enter. - In Registry Editor, go to the following location in the left pane:
HKEY_LOCAL_MACHINE\SOFTWARE\Microsoft\Windows Search - In the right pane, double-click on the value named DataDirectory.
- Enter the full path of the location where you want to store the index (for example,
D:). Add\Search\Data\to the end of this path. Then, click or tap OK. The default location is%ProgramData%\Microsoft\Search\Data\. - Close Registry Editor.
- Restart the Windows Search service to apply the changes.
Summary
You can successfully change search index location in Windows 11 using either the Settings app or Registry Editor, provided you use an internal drive. Both approaches require administrator rights and a quick restart of the Windows Search service to apply your new folder path.
Was this guide helpful?
50% of readers found this helpful (2 votes)

About the Author
Richard
Tech Writer, IT Professional
Richard is a writer at Geek Rewind who turns complex IT tasks into clear, step-by-step guides. He draws on years of hands-on experience in system administration and enterprise IT operations, focusing on Windows, Linux and WordPress: the problems people actually run into, and the fixes that work. His server and WordPress guides come from systems he runs himself. Richard builds and maintains the platform behind Geek Rewind, from its Ubuntu servers and Nginx configuration to its custom WordPress plugins. Many new tutorials start with readers' questions, and he's always glad to answer them in the comments.



No comments yet — be the first to share your thoughts!