How to Change Drive Letters in Windows 11
You can change drive letters in Windows 11 to better organize your storage devices like hard drives, SSDs, and USB flash drives.
Drive letters are the single capital letters, such as C: or D:, that Windows uses to identify partitions and volumes on your computer. This process involves using the built-in Disk Management tool.
Users can change a removable drive's letter, for example from E: to H:, to easily identify storage devices when connecting multiple external drives. Assigning unique drive letters to each storage device prevents confusion.
Reassigning drive letters in Windows 11 simplifies your PC's file system structure. This process lets you assign new letters, like C: or D:, to specific storage devices for easier organization. For example, you might change a drive letter to keep your game files separate from your operating system files.
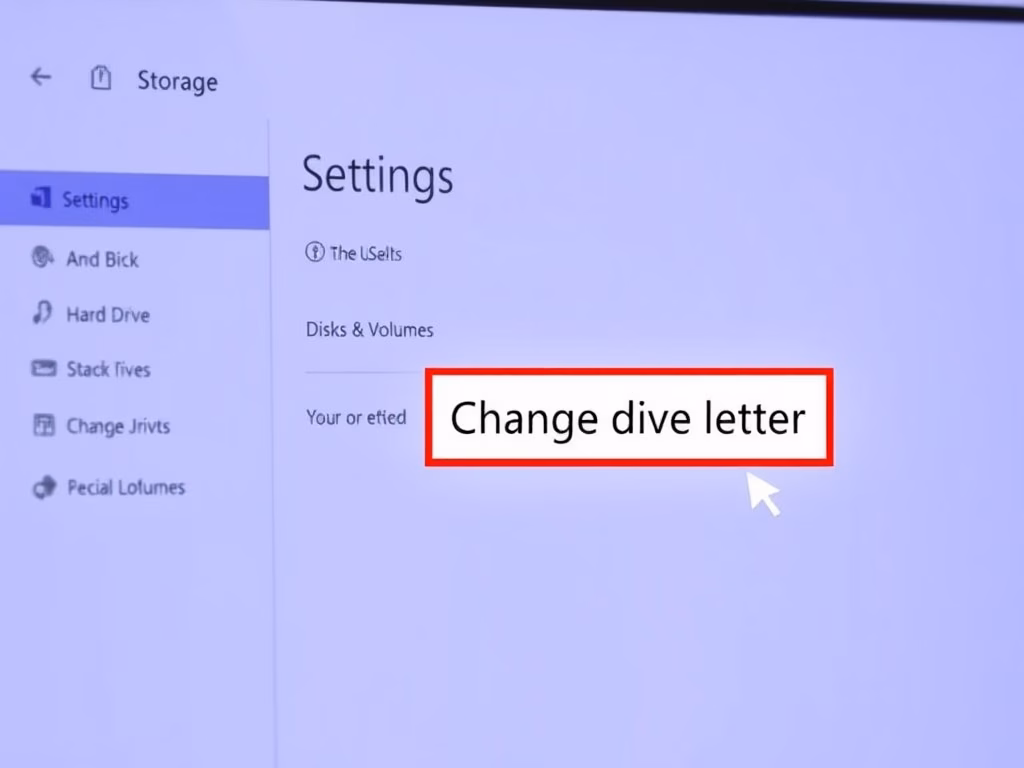
Right-click the Start button, select Disk Management, then right-click the desired drive, choose “Change Drive Letter and Paths,” click “Change,” select a new letter, and click “OK.” Avoid changing the C: drive letter.
Why Change a Drive Letter?
Windows assigns letters like D: or E: to your storage devices. You might want to change these to keep your files organized, make it easier to identify external hard drives, or fix conflicts where two devices try to use the same letter.
What Happens When Done?
Changing drive letters in Windows 11 requires updating shortcuts or programs pointing to the old letter. Never try changing the C: drive letter, as the C: drive is your main system drive. Changing the C: drive letter will stop your computer from working correctly.
Method 1Using Disk Management
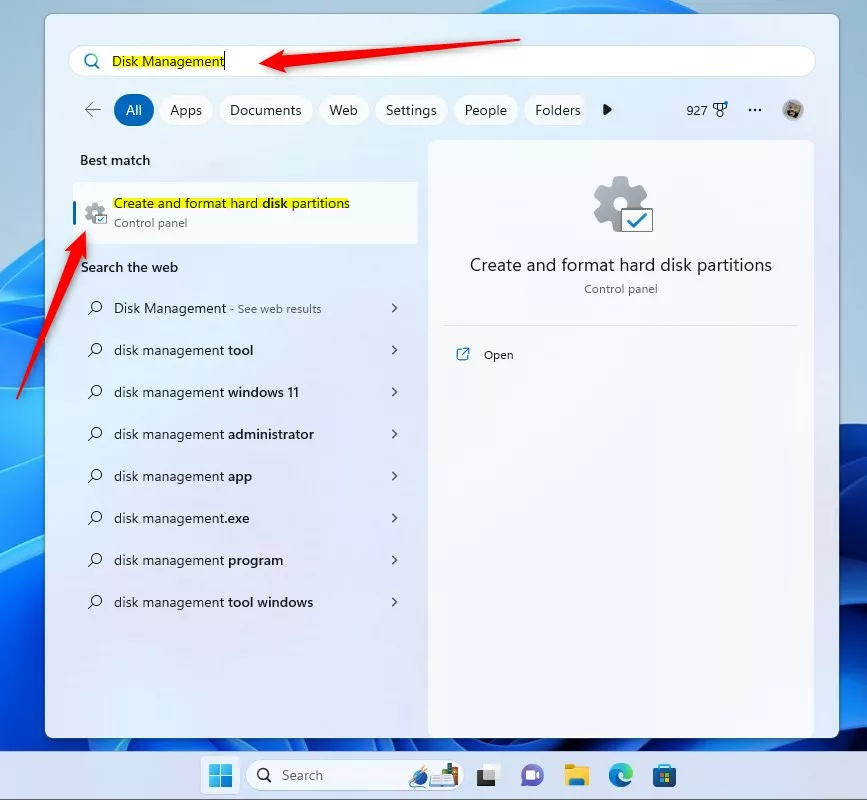
The easiest way to change drive letters in Windows 11 is by using the Disk Management tool. You can open this tool by right-clicking the Start button and picking Disk Management. From there, you can follow a few simple steps to assign a new letter to your drive.
- Right-click the Start button and select Disk Management.
- Locate the volume you wish to change in the list.
- Right-click the partition and select Change Drive Letter and Paths…
- Click Change, select a new letter from the dropdown, and click OK.

Method 2Using Command Line (Diskpart)
You can change drive letters in Windows 11 using Diskpart, which is a tool found in the Command Prompt. This method requires you to have Administrator rights and is for users who are comfortable typing commands. Diskpart gives you more control when managing your drives.
- Open Command Prompt as Administrator.
- Type
diskpartand press Enter. - Type
list volumeto see your drives. - Type
select volume X(replace X with your volume number). - Type
assign letter=Z(replace Z with your desired letter).
Method 3Using PowerShell
You can also use PowerShell for a faster approach. This requires Administrator privileges.
- Right-click Start and select Terminal (Admin).
- Type
Get-Partitionto list your drives. - Type
Set-Partition -DriveLetter D -NewDriveLetter E(replace D and E with your specific letters).
Troubleshooting and Risks
Summary
Can I change the drive letter of the system drive (C:)?
No, you should never change the drive letter of the C: drive. Windows relies on this specific path to locate system files and boot configurations. Changing it will cause critical system errors and prevent your computer from starting correctly. Always keep the system drive as C:.
Do I need to restart my computer after changing a drive letter?
In most cases, no. Windows 11 updates the drive letter assignment instantly across the system. However, if you have programs currently open that are accessing files on that drive, you may need to restart those specific applications for them to recognize the new path correctly.
Was this guide helpful?

About the Author
Richard
Tech Writer, IT Professional
Richard, a writer for Geek Rewind, is a tech enthusiast who loves breaking down complex IT topics into simple, easy-to-understand ideas. With years of hands-on experience in system administration and enterprise IT operations, he’s developed a knack for offering practical tips and solutions. Richard aims to make technology more accessible and actionable. He's deeply committed to the Geek Rewind community, always ready to answer questions and engage in discussions.

[…] post describes changing a drive or volume letter in Windows […]
[…] post describes the steps to mount a drive in a folder rather than a drive letter in Windows […]
[…] example, if you have an external drive attached to your Windows 11 computer using the drive letter F: you can mount it in WSL using the commands […]
[…] the next screen, enter the Label or name. Select a Drive Letter to assign to the Dev Drive, type in the drive size (at least 50GB), and click […]
[…] service will not index content from any drive or partition with the A and B drive letters, even when included in the index location, because A and B drive letters are reserved for floppy […]
[…] you boot the virtual machine and log in, you should see a mapped folder with the G: drive letter in the Windows virtual […]
[…] find it on your computer? If your new drive does not show up in File Explorer, you may need to add a drive letter or initialize it. This process prepares a blank drive so Windows can recognize […]