How to Change Drive Letter in Windows 11
You can easily change a drive letter in Windows 11 using the Disk Management tool.
A drive letter is a single letter, like C: or D:, that Windows uses to identify and access specific storage devices or partitions on your PC. This allows you to quickly locate and manage your files.
You might want to change a drive letter if the default assignment is confusing, or if you have multiple drives and prefer a more logical organization, perhaps to easily distinguish your main hard drive (usually C:) from external storage.
This process is straightforward but requires administrator privileges on your Windows 11 system. Be aware that changing the letter for drives containing Windows or installed applications can cause them to malfunction.
Change a drive letter in Windows 11 by opening Disk Management, right-clicking the drive, selecting “Change Drive Letter and Paths,” and then choosing a new letter. Alternatively, use Settings > System > Storage > Advanced storage settings > Disks & volumes to find the drive and change its letter.
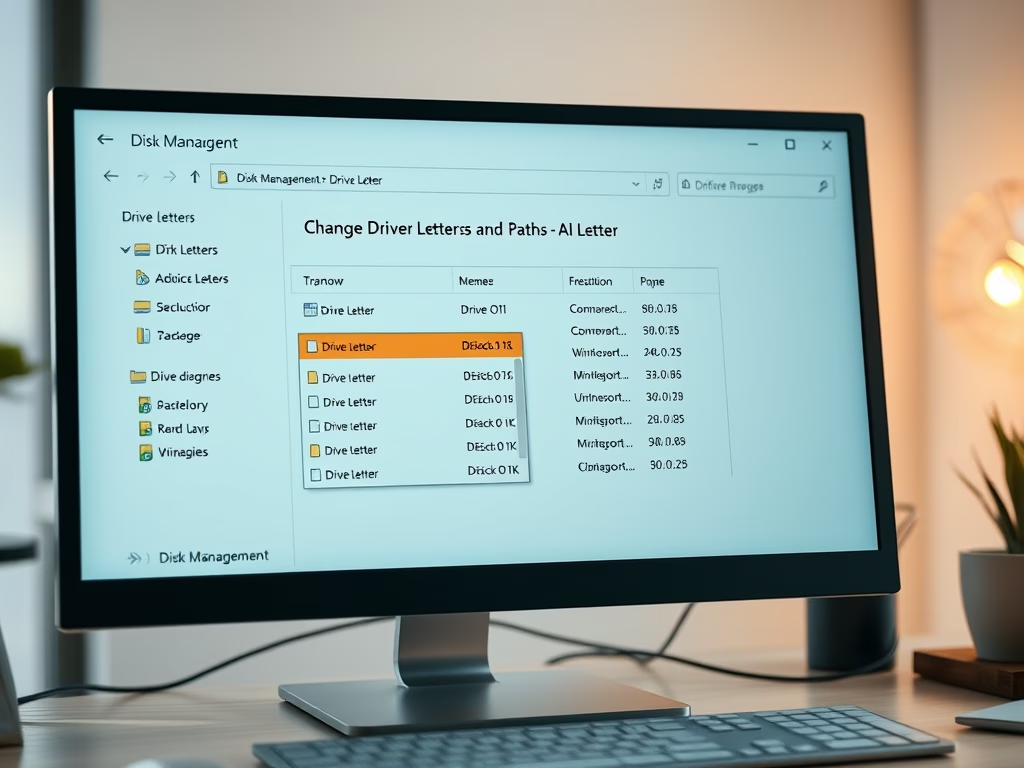
Option 1Change Drive Letter in Disk Management
- Open Disk Management (diskmgmt.msc). [Admin Required]
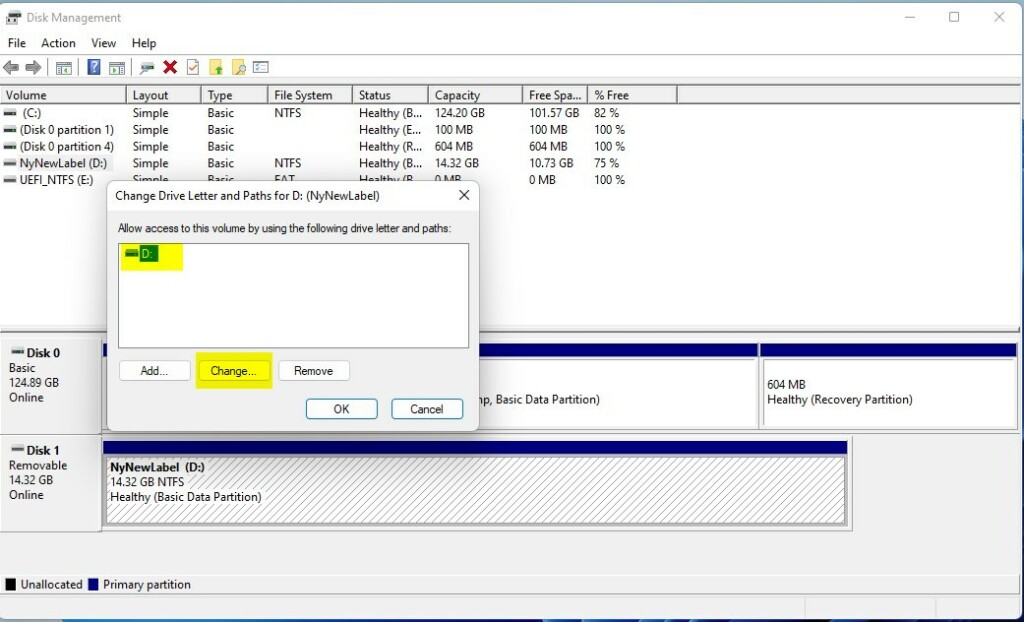
- Right click or press and hold on the drive you want to change the drive letter for, and click/tap on Change Drive Letter and Paths.
- Click/tap on Change.
- Click/tap on the Add button instead if the drive doesn’t currently have a drive letter assigned to it.
- Select an available drive letter you want to assign to this drive in the drop menu, and click/tap on OK.
- Click/tap on Yes to confirm.
- If prompted the drive is in use, click/tap on Yes to confirm.
- You can now close Disk Management if you like.

You can easily change a drive letter in Windows 11 using the Disk Management tool, which is a built-in graphical way to handle your computer’s storage.
You can easily change a drive letter in Windows 11 using the Disk Management tool, which is a built-in graphical way to handle your computer’s storage.
Option 2Change Drive Letter in Settings
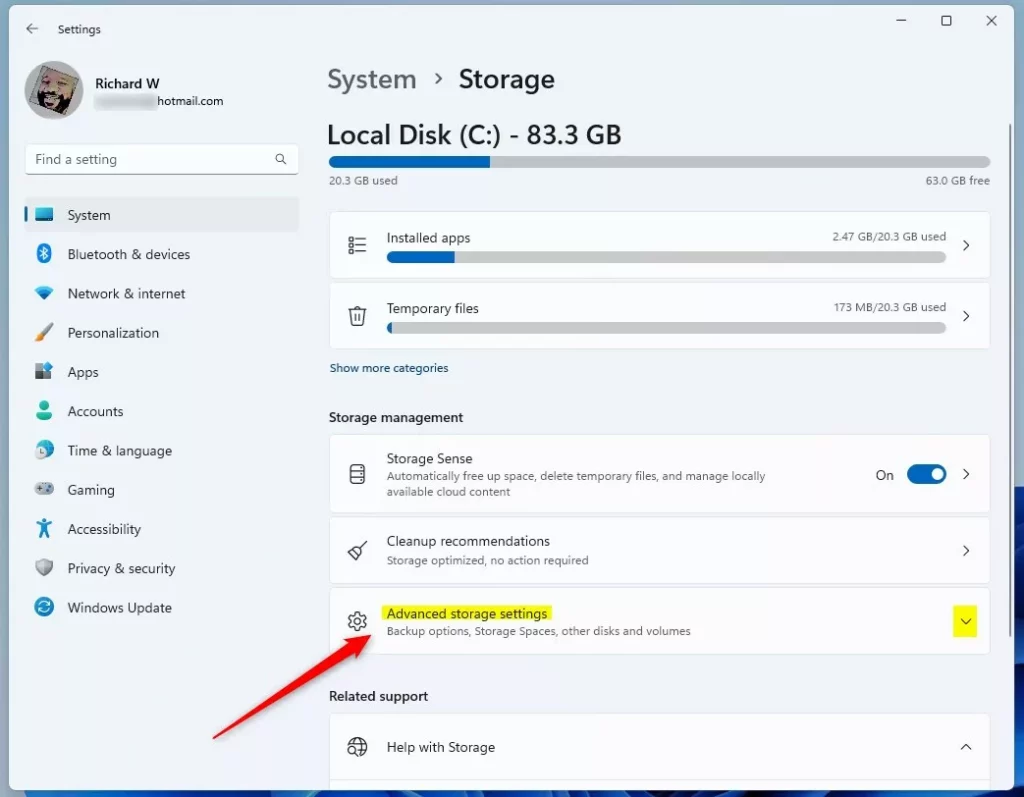
- Open Settings (⊞ Win+I).
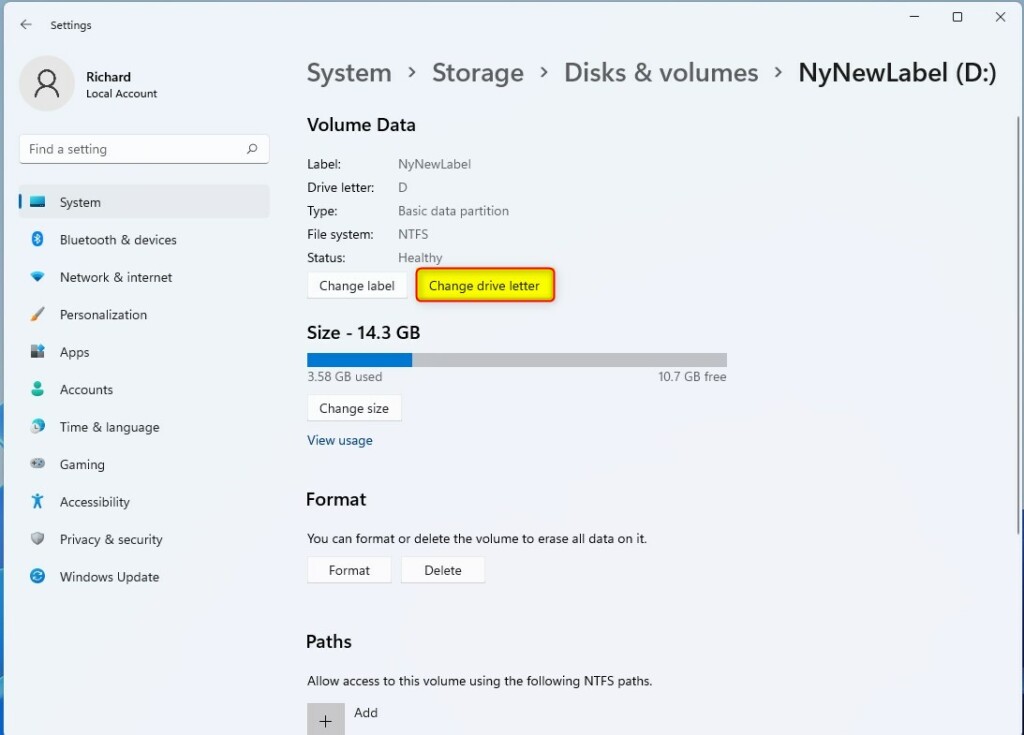
- Click/tap on System on the left side, and click/tap on Storage on the right side. Open Storage settings
- Click/tap on Yes if prompted by UAC. [Admin Required] Starting with Windows 11 build 26100.7705 (24H2) and build 26200.7705 (25H2), to help ensure that only authorized Windows users can access system files, Windows now displays a User Account Control (UAC) prompt when you open Storage settings (Settings > System > Storage).
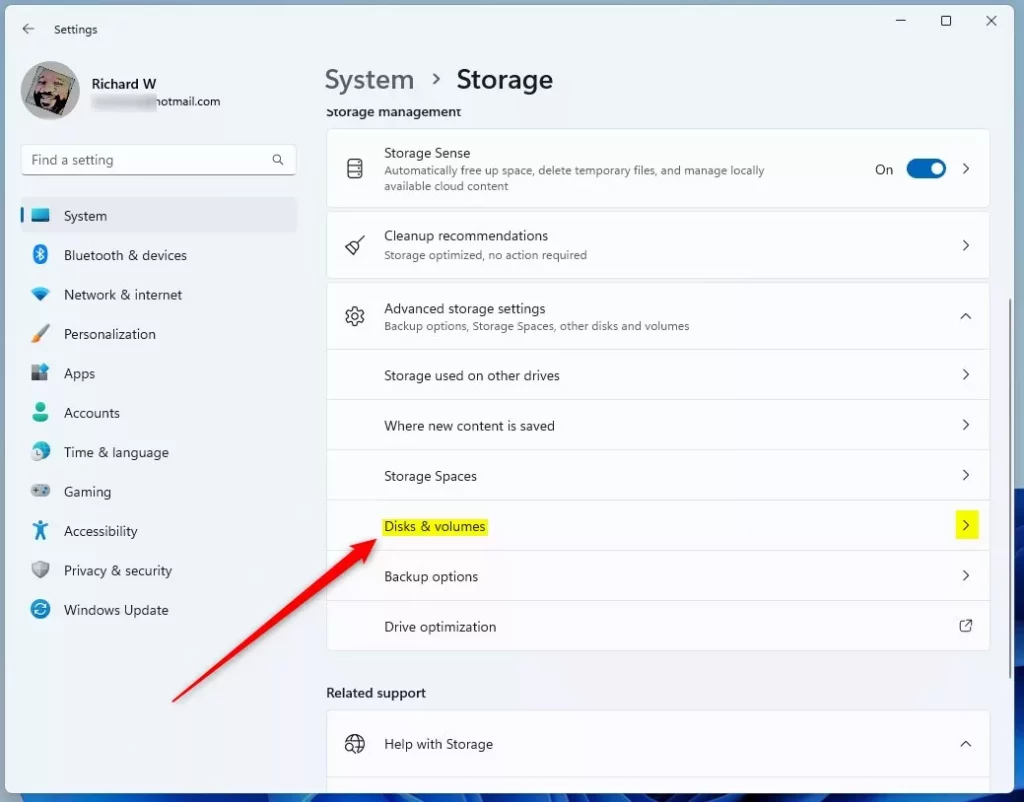
- Click/tap on Advanced storage settings to expand it open, and click/tap on Disks & volumes. Open Disks & volumes settings
- Click/tap on Properties for the drive (partition or volume) you want to change the drive letter for.
- Click/tap on the Change drive letter button.
- Select an available drive letter you want to assign to this drive in the drop menu, and click/tap on OK.
- You can now close Settings if you like.
Changing a drive letter in Windows 11 is also possible through the Settings app, offering another simple, visual method to manage your storage.

Changing a drive letter in Windows 11 is also possible through the Settings app, offering another simple, visual method to manage your storage.
Option 3Change Drive Letter Using “diskpart” Command
If you prefer using commands, you can change a drive letter in Windows 11 with the diskpart tool, which lets you manage drives directly from the command line.Option 4Change Drive Letter Using “Set-Partition” Command
Another command-line method to change a drive letter in Windows 11 involves using the ‘Set-Partition’ command in PowerShell. After opening Windows Terminal as an administrator, you’ll first list your partitions to find the one you need. Then, you can use ‘Set-Partition’ with the correct drive letter to make the change.Option 5Change Drive Letter in Registry Editor
Advanced users can change a drive letter in Windows 11 by directly editing the Registry Editor. This involves opening ‘regedit.exe’ as an administrator and navigating to a specific key where drive letter assignments are stored. You’ll then locate and rename the binary value associated with the current drive letter.Summary
Changing a drive letter in Windows 11 is simple, and you have multiple ways to do it, including graphical tools and command-line options.
Can you reassign drive letters in Windows?
You can modify a Windows drive letter using Disk Management or the command prompt. In Disk Management, right-click the drive, select Change Drive Letter and Paths, and click a new letter. Or, in the command prompt, use diskpart to manually assign or remove letters.
Was this guide helpful?

About the Author
Richard
Tech Writer, IT Professional
Richard, a writer for Geek Rewind, is a tech enthusiast who loves breaking down complex IT topics into simple, easy-to-understand ideas. With years of hands-on experience in system administration and enterprise IT operations, he’s developed a knack for offering practical tips and solutions. Richard aims to make technology more accessible and actionable. He's deeply committed to the Geek Rewind community, always ready to answer questions and engage in discussions.


No comments yet — be the first to share your thoughts!