How to Open Windows Terminal as Admin Automatically


Windows Terminal is an app that puts Command Prompt, PowerShell and other command-line shells in one window. It opens with standard user rights by default. If you often run commands that need full system permissions, you can make it start elevated every time instead of right-clicking the icon and choosing Run as administrator.
There are two ways to do it: the Settings screen, or the JSON settings file. Both give the same result and work the same on Windows 11 Home and Pro.
Open Windows Terminal, go to Settings , select Defaults under Profiles, and toggle “Run this profile as Administrator” to On. Save your changes to make it launch with admin privileges every time.
How to Make Windows Terminal Always Open as Admin
The Settings screen is the easier route. You turn on the admin option for the Defaults profile, so it applies to every profile that doesn’t override it.
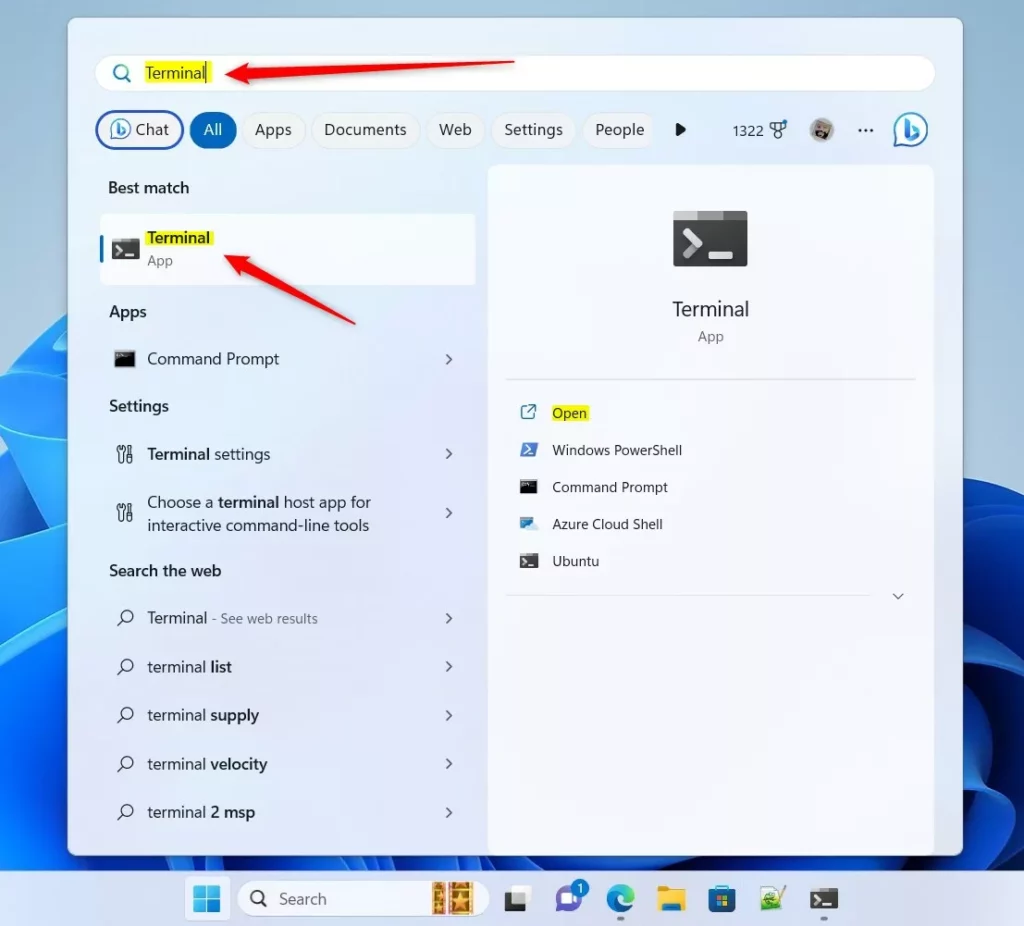
- Open the Windows Terminal app: Click the Start menu button, type Terminal in the search box, and then click Windows Terminal in the results. A terminal window opens with a tab at the top.
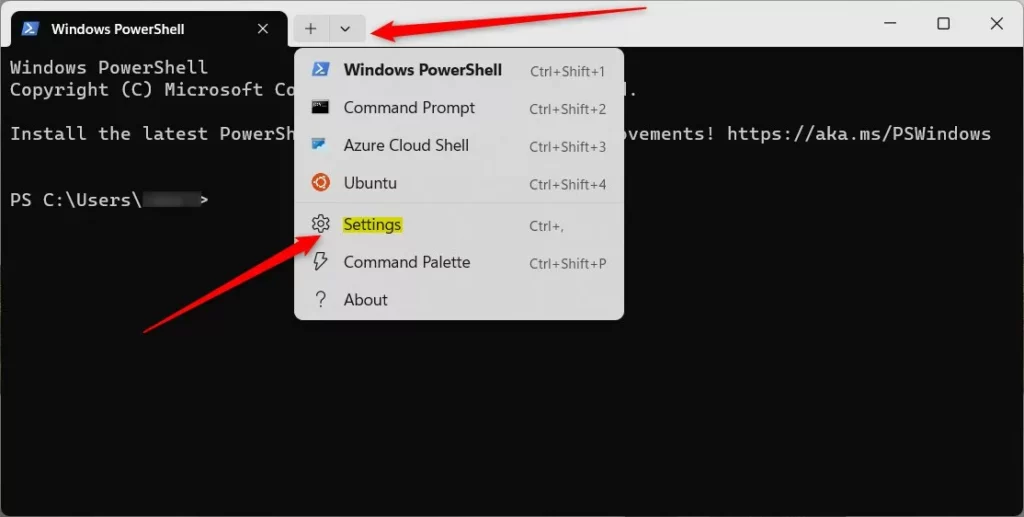
- Go to Settings : Click the down arrow next to the tabs at the top. Then click Settings (or press Ctrl + ,). The Settings screen opens with a sidebar on the left.
- Select Defaults under the Profiles section in the left sidebar. Settings here apply to all your profiles, such as PowerShell and Command Prompt, unless a profile has its own value for the same setting.
- Find the setting labeled “Run this profile as Administrator” and switch the toggle to On. It is usually under the additional settings for the profile, so scroll down if you don’t see it at first.
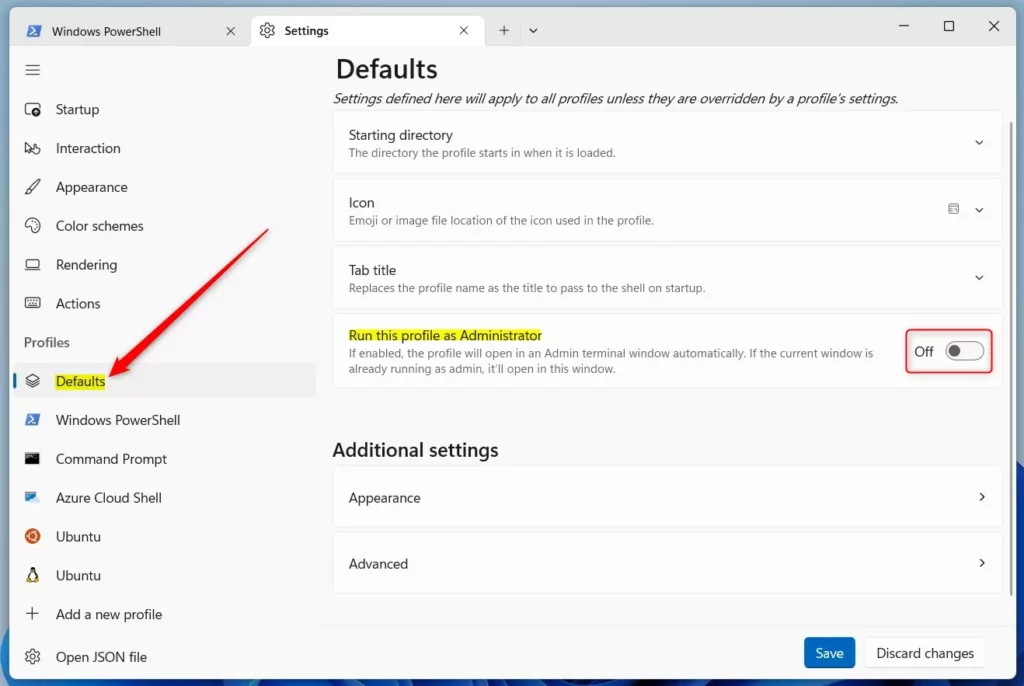
- Click the Save button at the bottom of the window. Terminal applies the change straight away.
Close Windows Terminal and open it again. Windows now shows a User Account Control prompt, because Terminal is asking for administrative access. Click Yes, and the window opens elevated. You can confirm this because the title bar shows “Administrator”.
The prompt appears every time. That is normal Windows behavior and not a fault in Terminal. If a profile still opens without admin rights, it probably has its own setting that overrides the default. Open that profile in Settings and turn on the same option there.
To undo the change, go back to Settings Defaults, switch the toggle to Off, and click Save.
Another Way: Use the JSON File to Make Terminal Run as Admin
If you prefer to work in code, you can set the same option by editing the settings file directly. This is also handy if you copy your Terminal configuration between PCs, because the option travels with the file.
Follow these steps:
- Open Windows Terminal and click the down arrow on the top bar, then click Settings.
- Click Open JSON file at the bottom left of the Settings screen. If Windows asks which app to use, pick a text editor such as Notepad.
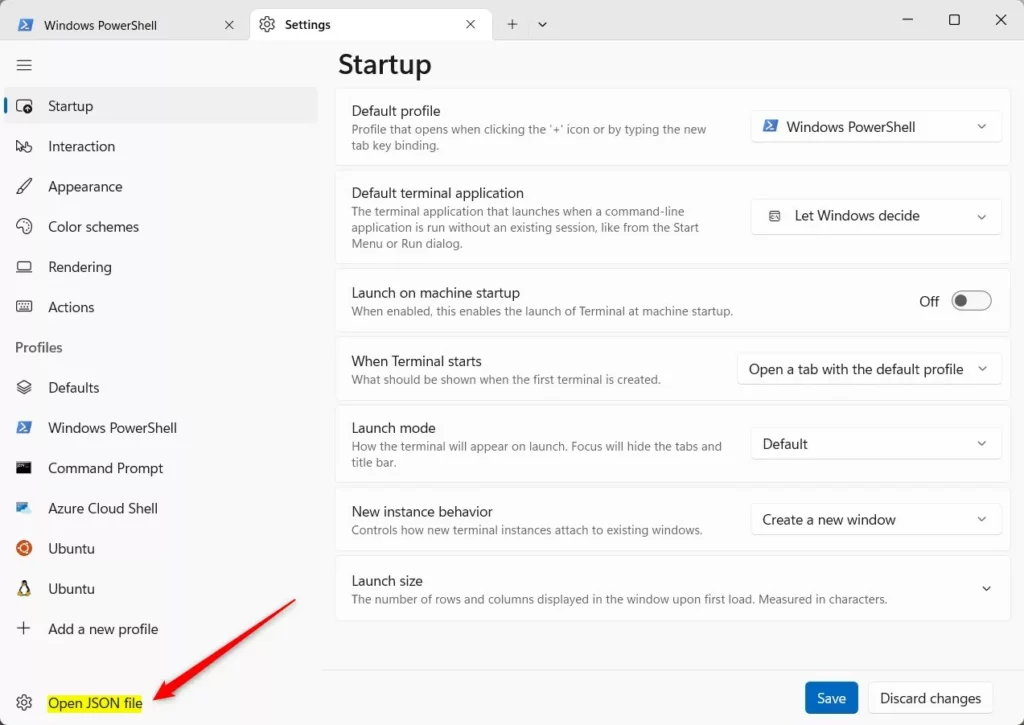
The JSON file opens in your default text editor. Look for the defaults section, which holds the settings shared by all profiles. Be careful with the commas and braces. A missing comma between two lines stops Terminal from reading the file correctly.
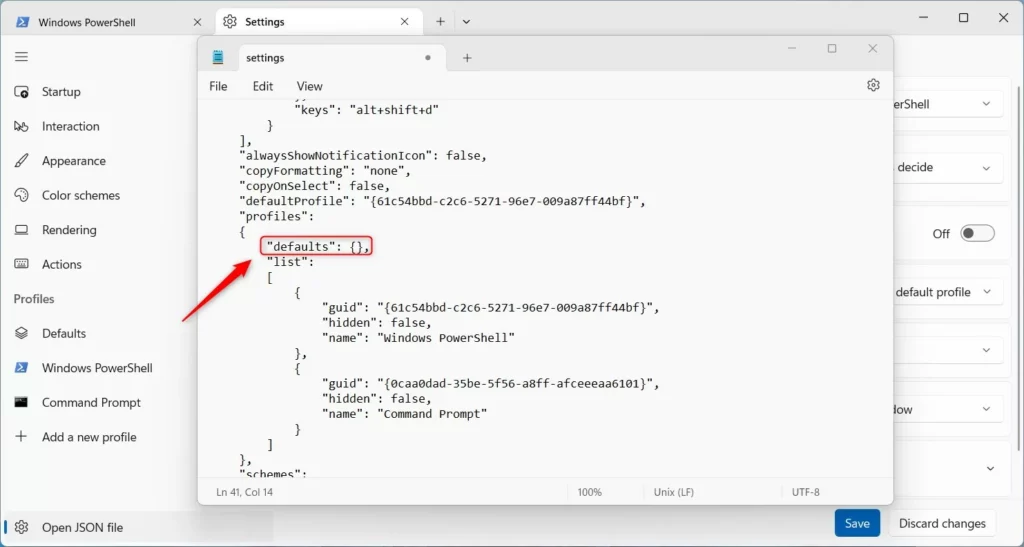
Add the following line inside the "defaults" block to enforce administrative privileges:
"elevate": true,To revert the behavior later, change the value:
"elevate": false,Here is how it looks in context:
"defaults": {
    "elevate": true
},
Save the file and close the editor. Each time you launch Windows Terminal from now on, it asks for admin rights whenever that line evaluates to true. You will see the same User Account Control prompt as with the Settings method. The two methods control the same option, so a change made in one shows up in the other.
Summary
- Windows Terminal lets you run command-line apps like PowerShell and Command Prompt in one window.
- You can set it to always open as administrator, so you don't have to right-click every time.
- Use the Settings screen or edit the JSON file to turn this on or off.
- Running Terminal as admin lets you run commands that need extra permissions. Windows will still ask you to confirm each launch.
Setting Windows Terminal to open as admin saves time if you regularly run commands that need extra system permissions. Use the Settings screen or the configuration file, and you won't need to right-click the app icon again. Since every command you type in an elevated window runs with full rights, turn the option off if you stop needing it.
Have a question about this guide?
Answered by AI from this guide. Good questions may be added to this page — please don't include personal details.
Did this guide fix your problem?

About the Author
Richard
Tech Writer, IT Professional
Richard is a writer at Geek Rewind who turns complex IT tasks into clear, step-by-step guides. He draws on years of hands-on experience in system administration and enterprise IT operations, focusing on Windows, Linux and WordPress: the problems people actually run into, and the fixes that work. His server and WordPress guides come from systems he runs himself. Richard builds and maintains the platform behind Geek Rewind, from its Ubuntu servers and Nginx configuration to its custom WordPress plugins. Many new tutorials start with readers' questions, and he's always glad to answer them in the comments.
No comments yet — be the first to share your thoughts!