How to Make Your Network Public or Private in Windows 11

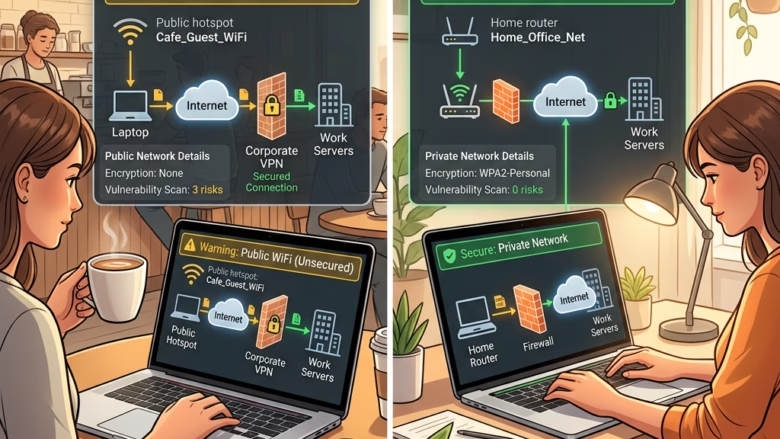
Switching your network profile in Windows 11 between Public and Private changes how your computer interacts with other devices on your Wi-Fi or Ethernet connection. A Private network lets your PC share files and printers with other machines. A Public network hides your computer so you stay safer on untrusted networks, such as in coffee shops.
Windows 11 usually sets new connections to Public as a safe default. If your PC cannot see your printer or other computers at home, changing the connection to Private usually fixes it. The change takes effect straight away. You do not need to restart, and you can switch back at any time.
Open Settings Network & internet Wi-Fi or Ethernet, then click your active network name and toggle the “Make this PC discoverable” switch to Private. The change takes effect immediately without restarting.
Why Does Network Type Matter?
Think of the network type as a privacy boundary for your computer on that one network. Windows uses it to decide how visible your PC is to other devices and which sharing features and firewall rules apply. The setting is saved per network. Your home Wi-Fi can be Private while the café Wi-Fi stays Public, and Windows remembers each choice.
Public Network: The “Keep to Myself” Option
The Public profile hides your computer from other devices on shared networks, such as those in coffee shops or airports. With Public selected, other computers on the network cannot see your files, printers or media. That keeps strangers on the same network away from your personal data.
The trade-off is that sharing files or printers with other devices on a Public network needs extra configuration. This profile is strong on security but gets in the way of local sharing.
Use this profile in these situations:
- When you connect to Wi-Fi in public places (like cafes, libraries, airports, hotels).
- On any network where you don’t know or trust all the devices.
- When your main goal is to keep your computer private and safe from other devices on the network.
- Connecting to public hotspots in cafes, libraries, airports, or hotels.
- Connecting to networks where you do not know or trust all devices.
- Keeping your machine hidden from other devices.
If you are not sure which profile to pick, choose Public. It is the safer option, and you can change it later.
Private Network: The “Open House” Option
The Private profile lets your computer talk to other devices on the same network, so you can share files and printers easily. With Private selected, your PC becomes visible to other trusted computers at home or in the office. That makes it simple to stream media and use shared network hardware.
If you set the Private profile on an untrusted network, other devices on it can see your PC and try to connect to it. Data sent over that connection also lacks the protection the Public profile provides.
When to use it:
- Your home network.
- A small office network where you know and trust everyone.
- Any network where you need to share things like printers or files with other devices.
- Connecting to your home network where you trust all connected devices.
- Connecting to an office network that requires local file and printer sharing.
In that case the option may be missing or the change may not stick. Ask your IT department before trying to override it.
How to Change Your Network’s Profile Type
Switching between profiles takes only a few seconds once you reach the right menu. Make sure you are connected to the network you want to change first, because the setting only appears for the active connection.
Step-by-Step Guide
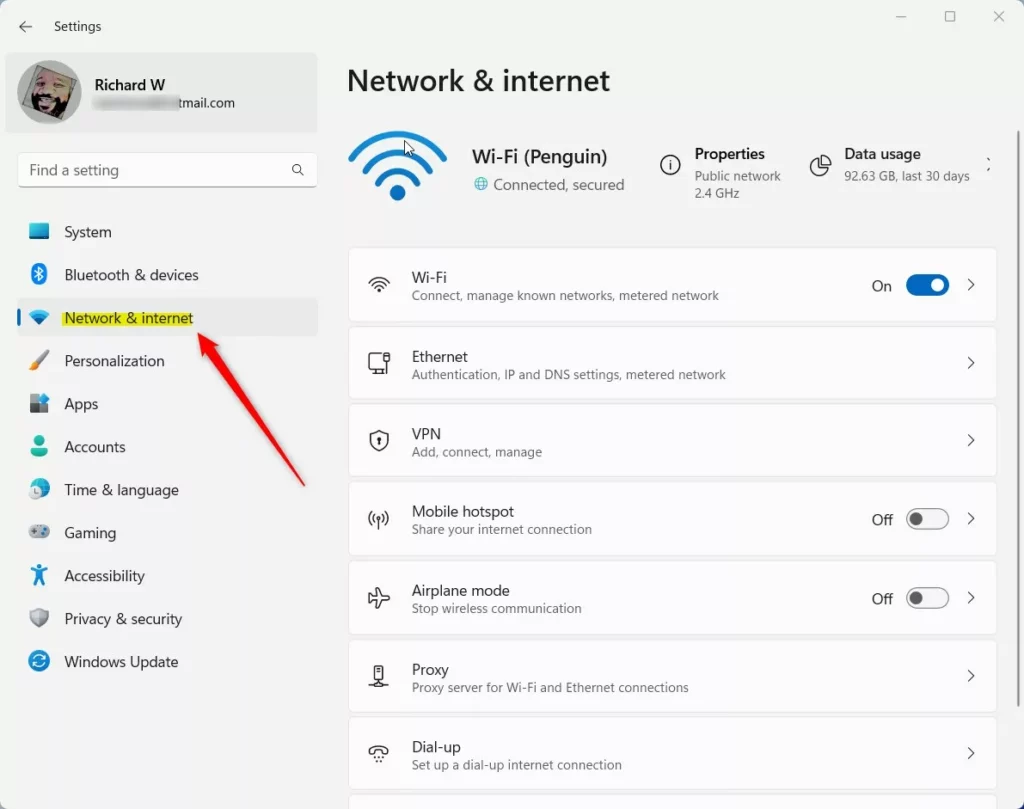
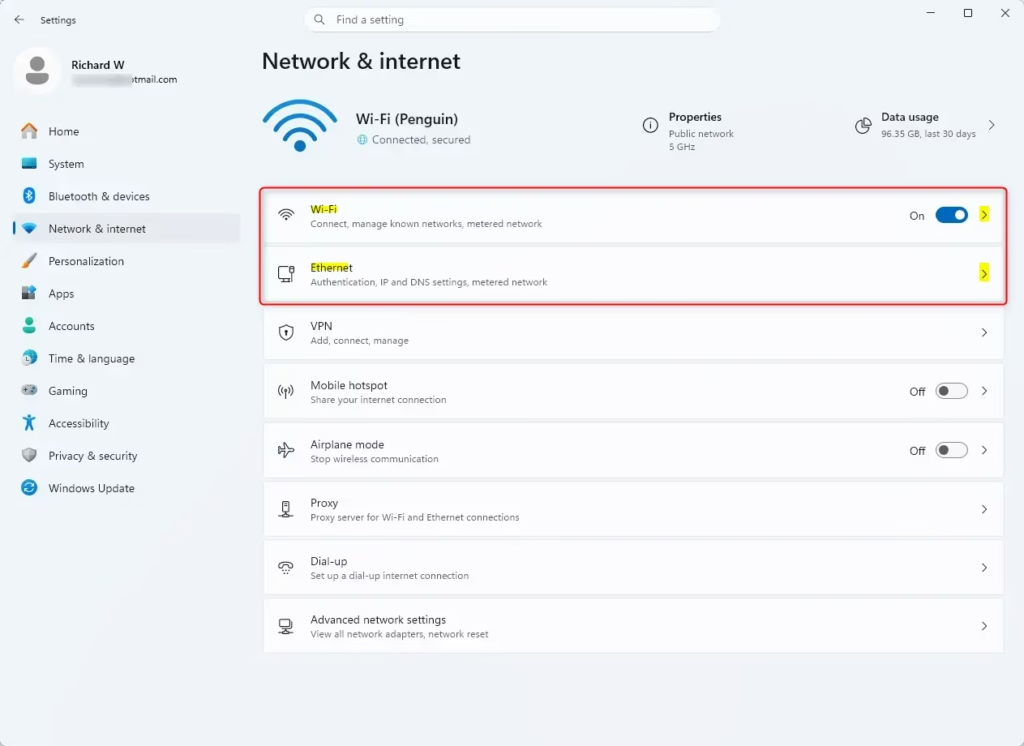
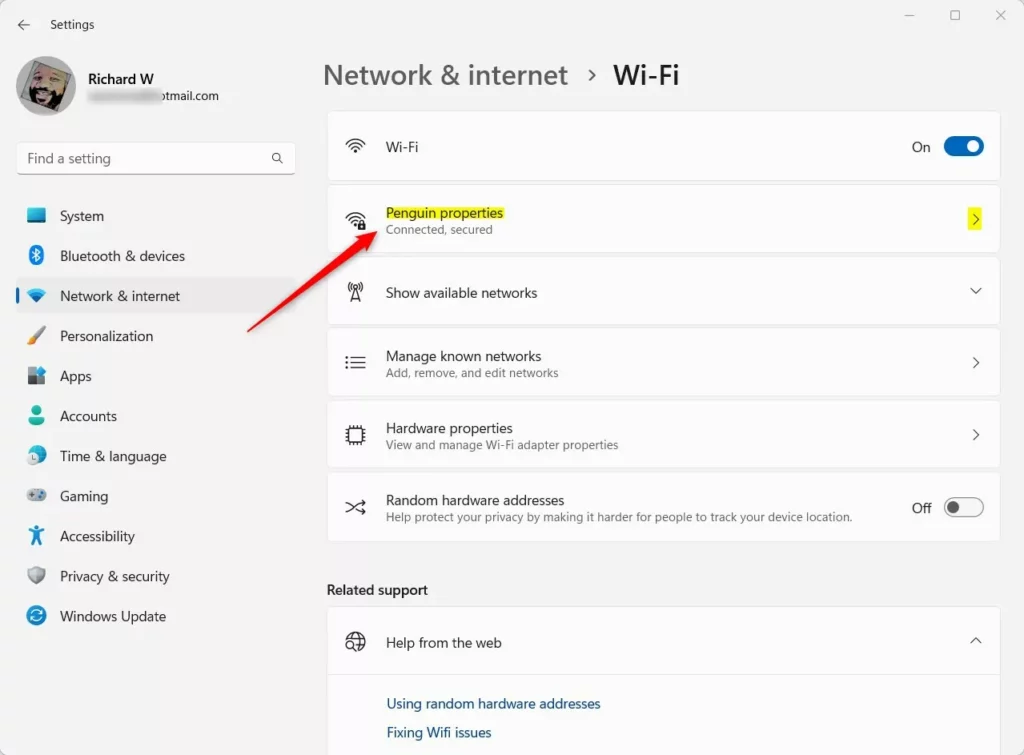
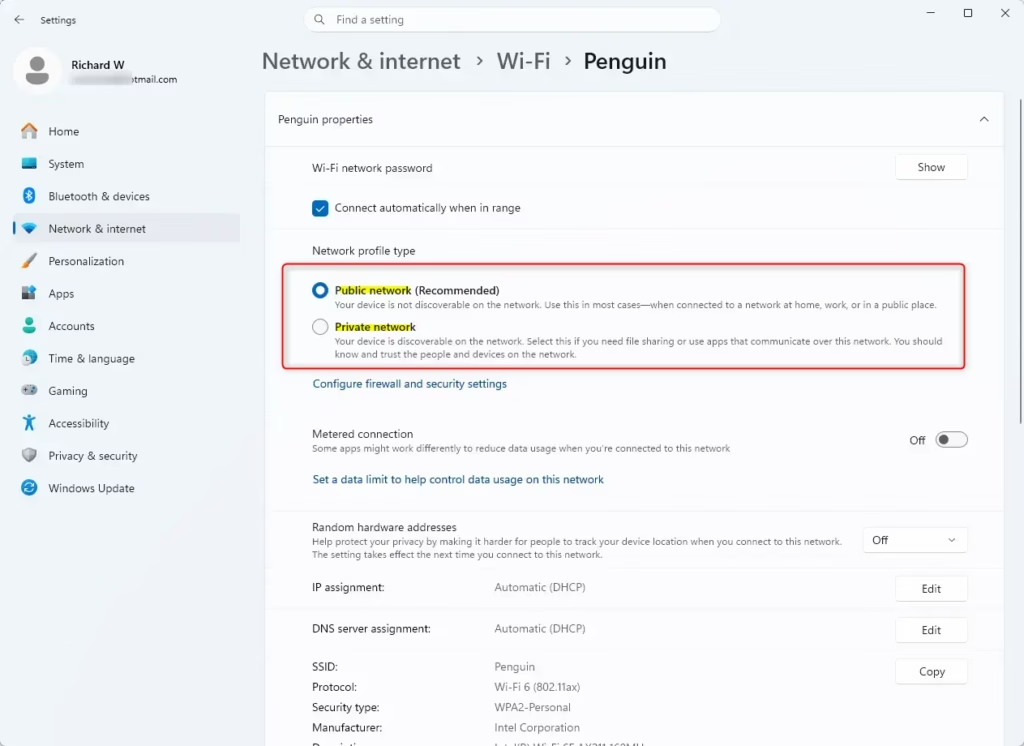
To change your Windows 11 network to Private, follow these steps. The screenshots below show each stage.
- Open the Settings app. Click the Start button and then the gear icon, or press Win+I. The Settings window opens.
- Click Network & internet in the left-hand list. The connection options appear on the right.
- Click Wi-Fi if you are on wireless, or Ethernet if you are on a cable.
- Click the properties entry for your connected network. For Wi-Fi this is the network name followed by “properties”. For Ethernet, click the connection itself. A page with the details of that connection opens.
- Find Network profile type and select Private network. The other choice is Public network (Recommended).
The change applies immediately. To reverse it, return to the same page and select the Public option again.
Summary
In short, choose Settings Network & internet Wi-Fi (or Ethernet), click your network, and select Private under Network profile type.
If your PC still cannot see a printer or other computers after you switch to Private, the profile is not the only factor. Check that the other device is on the same network and that sharing is turned on for it. You can also look at Settings Network & internet Advanced network settings Advanced sharing settings on your PC. Home and Pro editions of Windows 11 both have the Private and Public profiles.
Have a question about this guide?
Answered by AI from this guide. Good questions may be added to this page — please don't include personal details.
Did this guide fix your problem?

About the Author
Richard
Tech Writer, IT Professional
Richard is a writer at Geek Rewind who turns complex IT tasks into clear, step-by-step guides. He draws on years of hands-on experience in system administration and enterprise IT operations, focusing on Windows, Linux and WordPress: the problems people actually run into, and the fixes that work. His server and WordPress guides come from systems he runs himself. Richard builds and maintains the platform behind Geek Rewind, from its Ubuntu servers and Nginx configuration to its custom WordPress plugins. Many new tutorials start with readers' questions, and he's always glad to answer them in the comments.
No comments yet — be the first to share your thoughts!