How to Extend Storage Size in Windows 11


Extending storage size in Windows 11 lets you increase your available drive capacity by adding more physical hard drives to an existing virtual drive without losing your files. Windows 11 handles this process through Storage Spaces, a built-in feature that combines multiple physical disks into a single storage pool.
Planning ahead with a virtual drive that exceeds your current physical hardware capacity prevents sudden drive-full errors and keeps your PC organized. You can connect new drives to your system whenever your storage space runs low.
Open Settings , navigate to System Storage Advanced storage settings Storage Spaces. Select your storage pool, click Properties, then click Extend. Enter your desired new size and click OK.
Extend the Storage space size of a Storage pool.
To extend storage Windows 11 users can easily increase the size of an existing Storage pool virtual drive through the main system settings. Open Settings , go to System, and select Storage to access the advanced drive management menu where you can modify your pool capacity without losing any saved data.
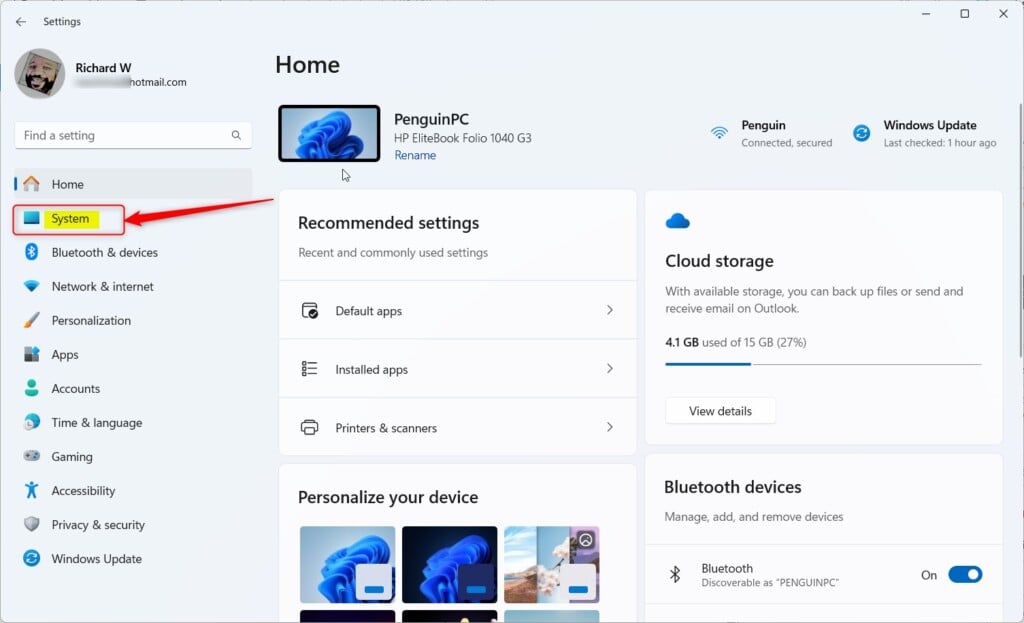
Press Win+I to open the Windows Settings app, then click System in the left sidebar.
Select Storage to open the drive management menu.
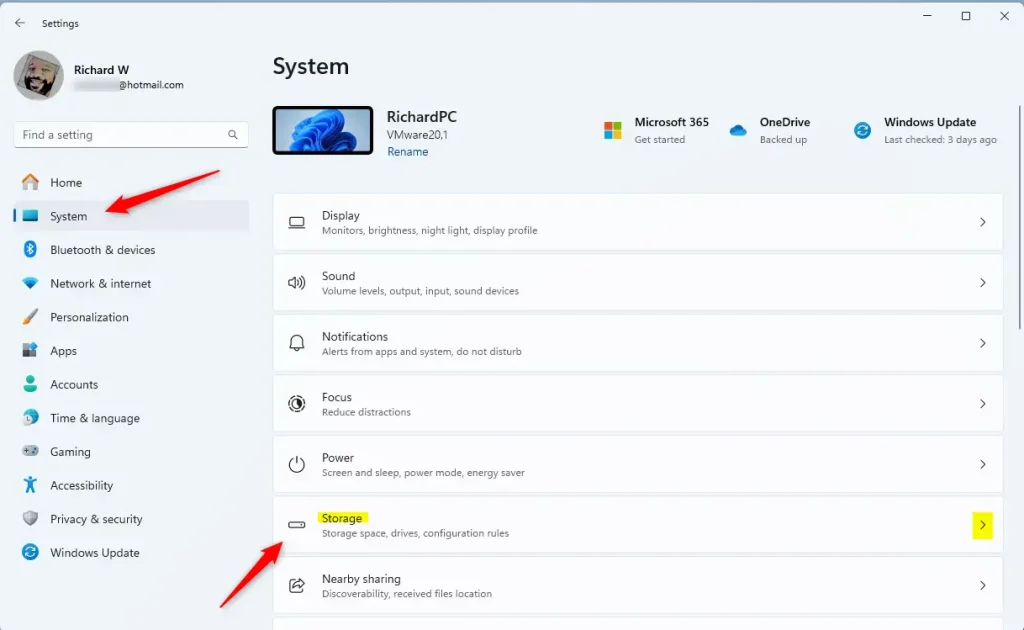
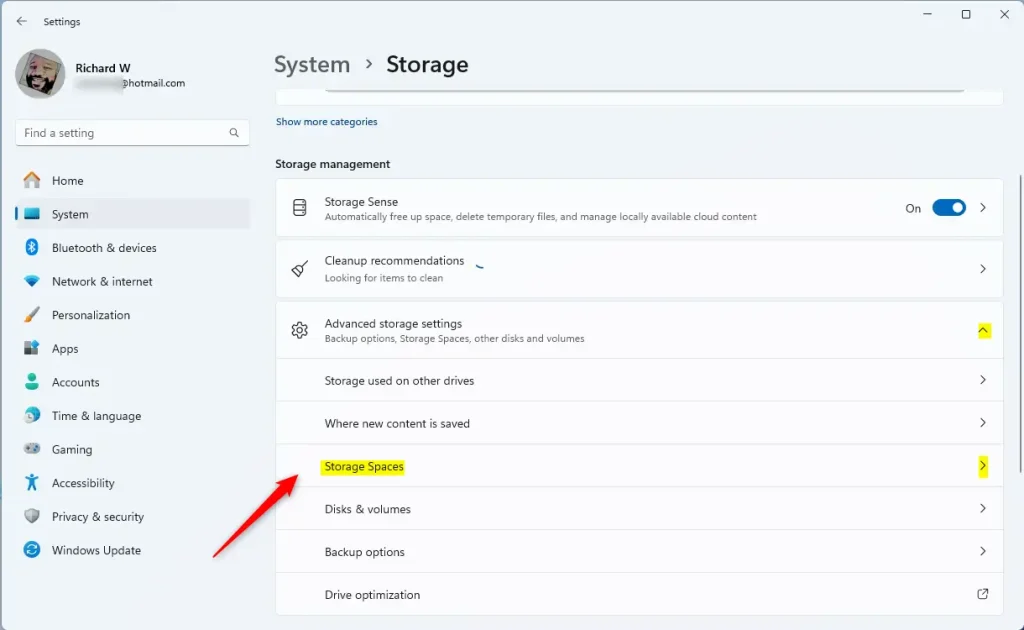
Press Windows key + I to open Settings, then click System in the left sidebar. Select Storage. Expand the "Advanced storage settings" section, and click the "Storage Spaces" tile.
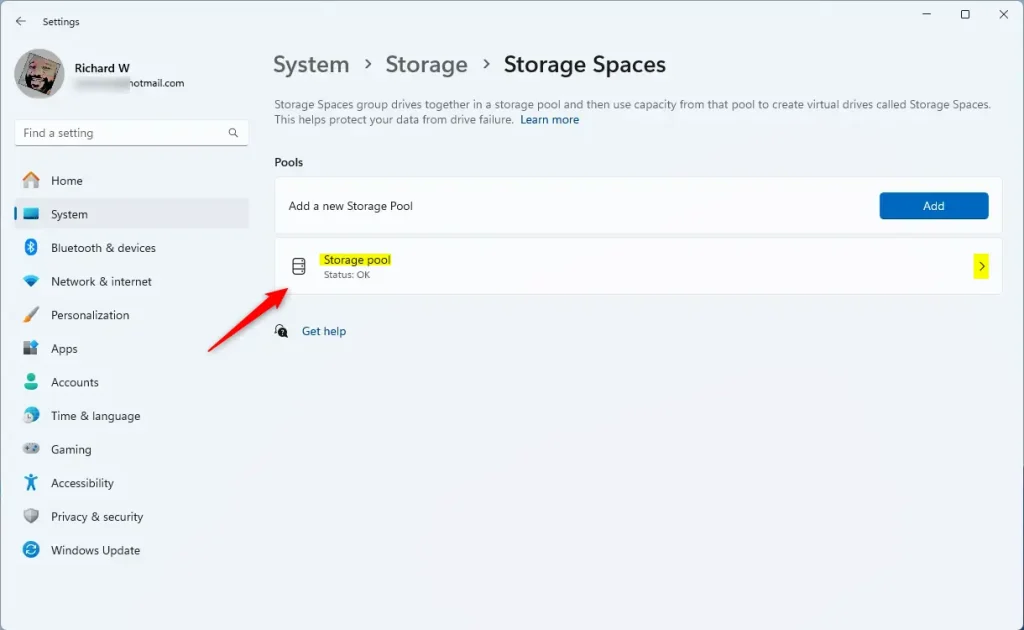
Select the "Storage pool" tile to view active drives.
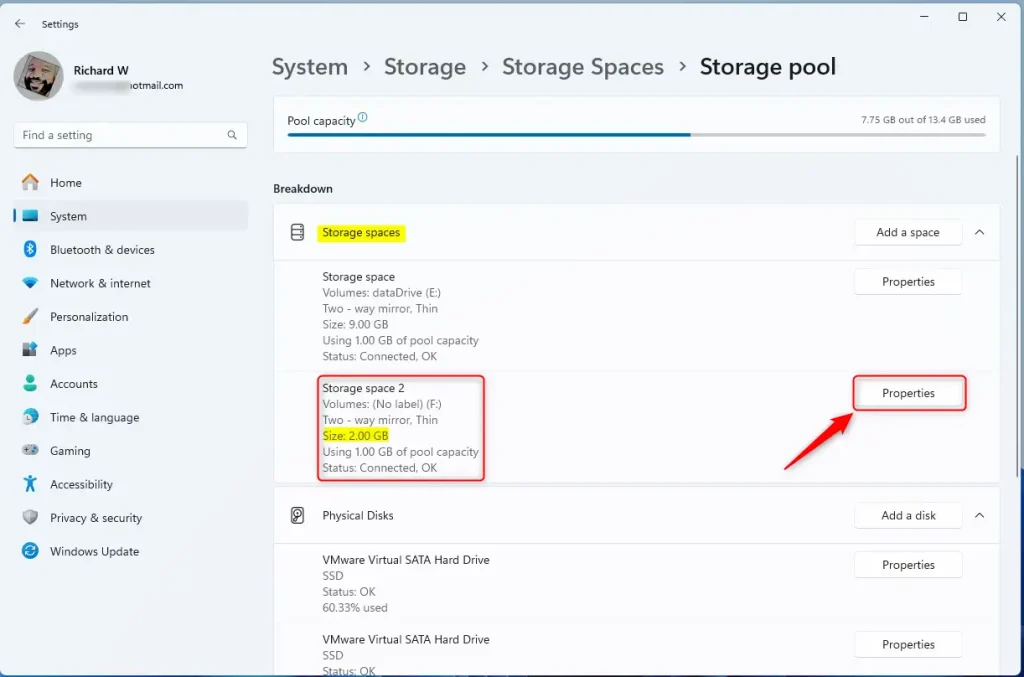
On the Storage pool status page, select the Storage space targeted for expansion, then click Properties.
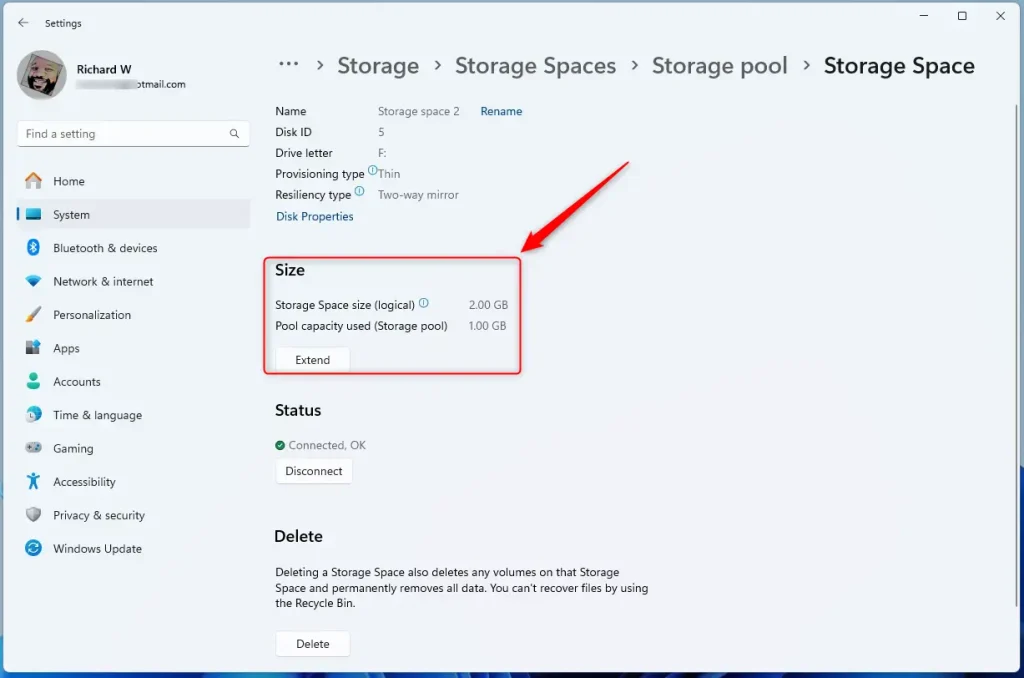
On the Storage space properties pane, click the Extend button under Size.
Enter the new size in the pop-up window and click OK to apply the changes.
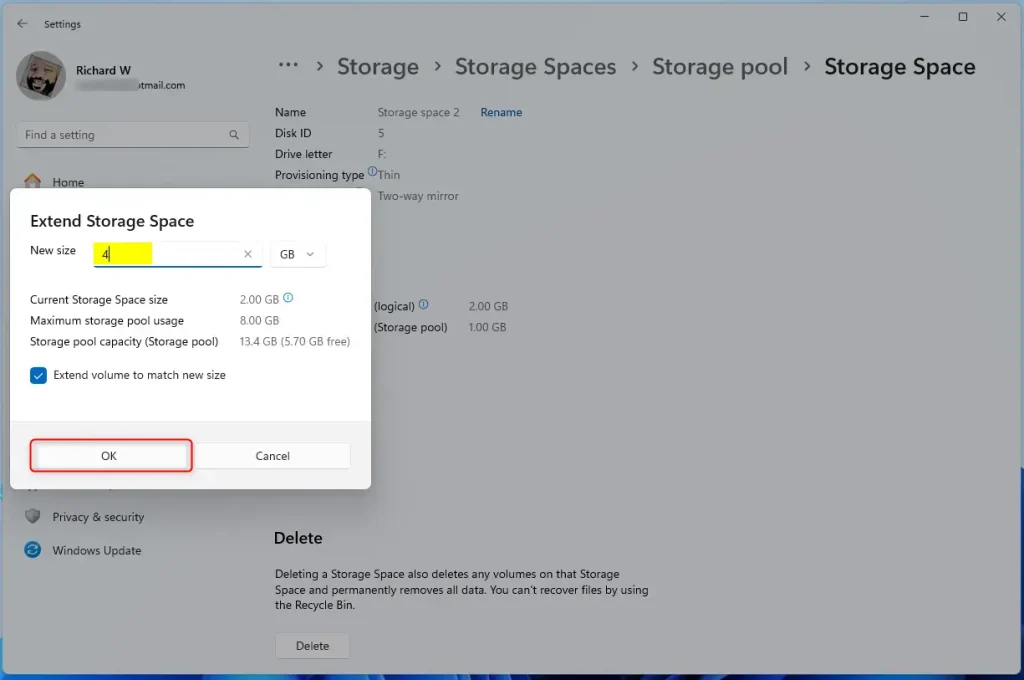
The new size must exceed current measurements. Configuring the Storage Space to surpass the storage pool's capacity requires adding more disks to accommodate the data.
That completes the process.
Conclusion:
- Extending the size of a Storage space in a Storage pool on Windows is a straightforward process that enhances the flexibility and scalability of your storage solution.
- Following the steps outlined in this article, you can ensure you have enough space to store all your files and applications without constantly deleting or moving them around.
- If you encounter any issues or have additional insights about extending Storage spaces, feel free to share your feedback in the comments section below.
Was this guide helpful?

About the Author
Richard
Tech Writer, IT Professional
Richard, a writer for Geek Rewind, is a tech enthusiast who loves breaking down complex IT topics into simple, easy-to-understand ideas. With years of hands-on experience in system administration and enterprise IT operations, he’s developed a knack for offering practical tips and solutions. Richard aims to make technology more accessible and actionable. He's deeply committed to the Geek Rewind community, always ready to answer questions and engage in discussions.



No comments yet — be the first to share your thoughts!