How to Add Storage Space to Windows 11 Pool

Adding storage to a Windows 11 Storage Pool lets you increase your computer’s total storage space by combining drives.
Storage Spaces is a Windows tool that lets you group several physical hard drives together. This makes them appear as one big drive, called a storage pool. It’s a smart way to create flexible and growing storage for your PC.
You can use Storage Spaces to create new pools, change their names, and add more physical drives to existing pools. This guide focuses on adding drives to a storage pool you already have in Windows 11.
Adding more drives to your storage pool directly boosts your available storage capacity. This is handy if you’re running out of space or want simpler management by having all your data in one place.
Navigate to Settings > System > Storage > Advanced storage settings > Storage Spaces. Select your pool, click “Add a space,” configure the size and resiliency, and then click Create. Format the new volume in File Explorer to finish.
Add Storage space to a Storage pool on 🪟 Windows 11
You can add “Storage space” to an existing “Storage pool” on Windows 11. Here’s how.
First, open the Windows Settings app.
Click the Start menu and select Settings. Alternatively, press the keyboard shortcut (Windows key + I) to launch the Settings app.
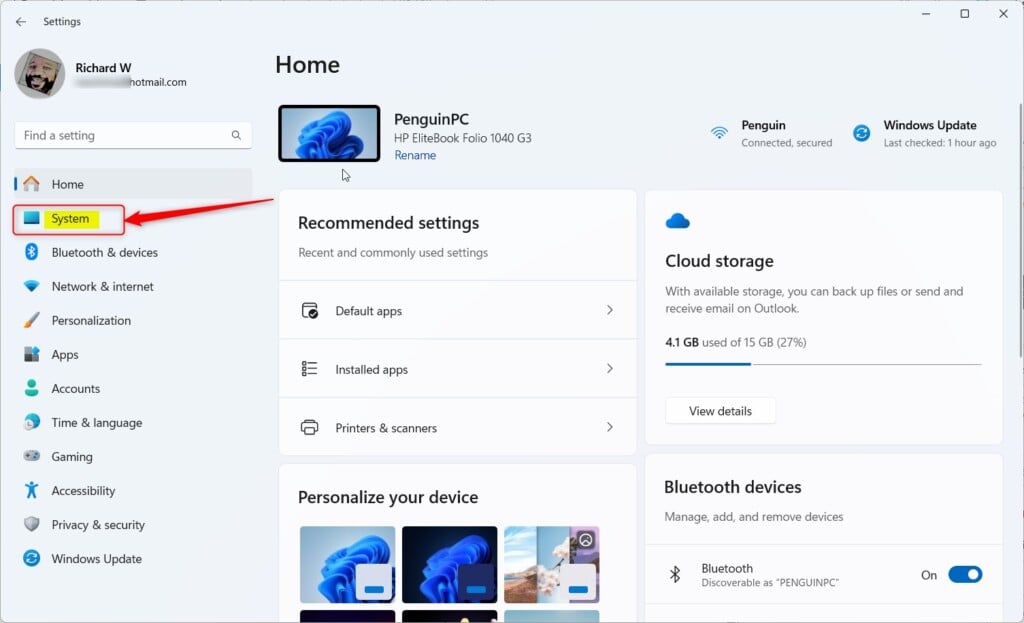
When the Settings app opens, click the System button on the left.
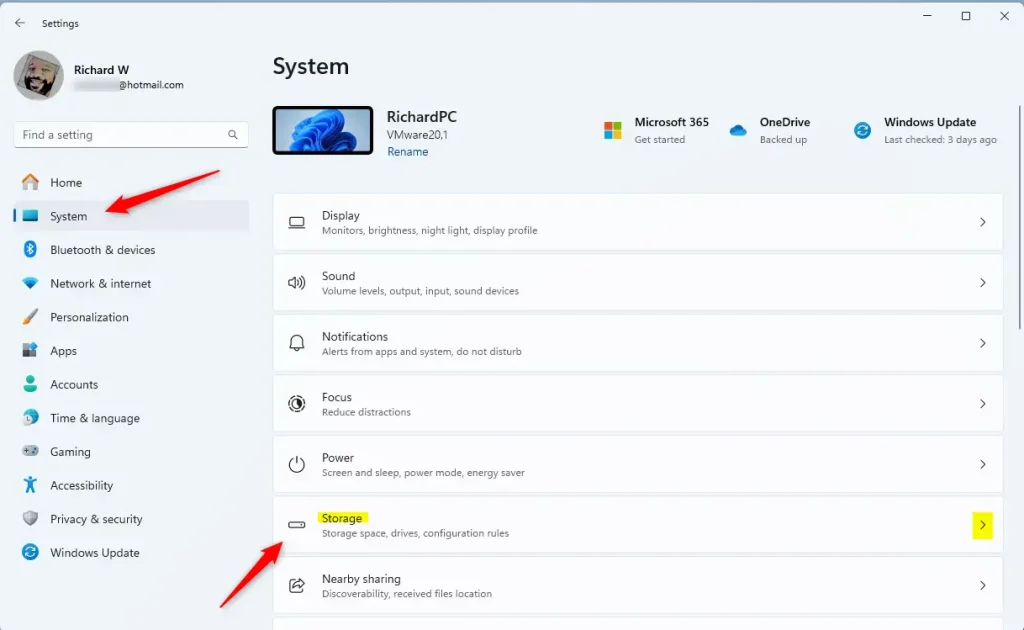
Select the Storage tile on the right to expand it.
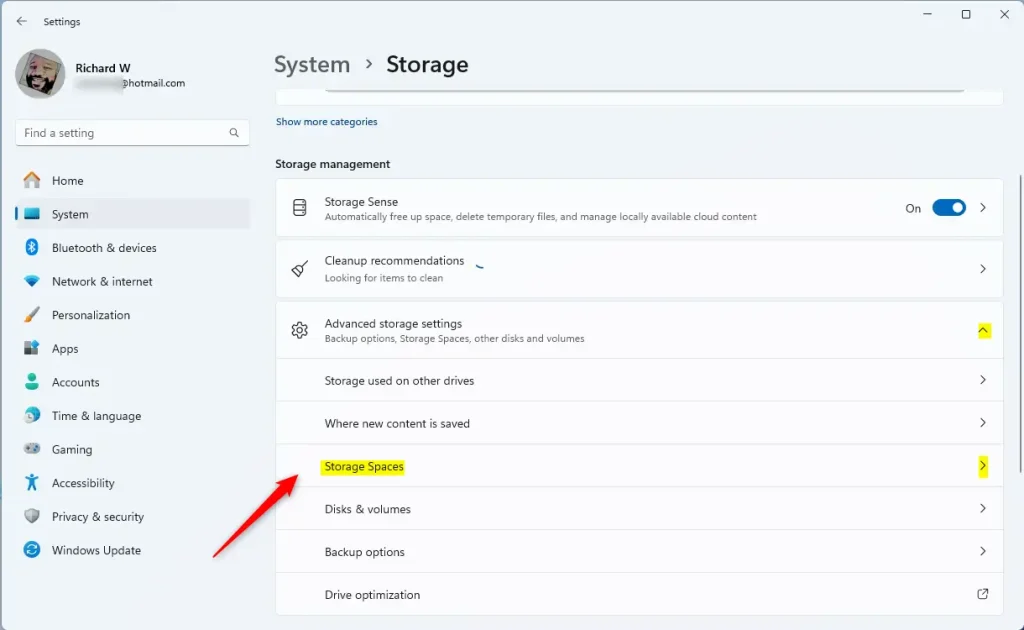
On the System -> Storage settings page, select and expand the Advanced storage settings tile, then click the Storage Spaces tile to expand it.
Next, select the Storage pool tile to expand it.
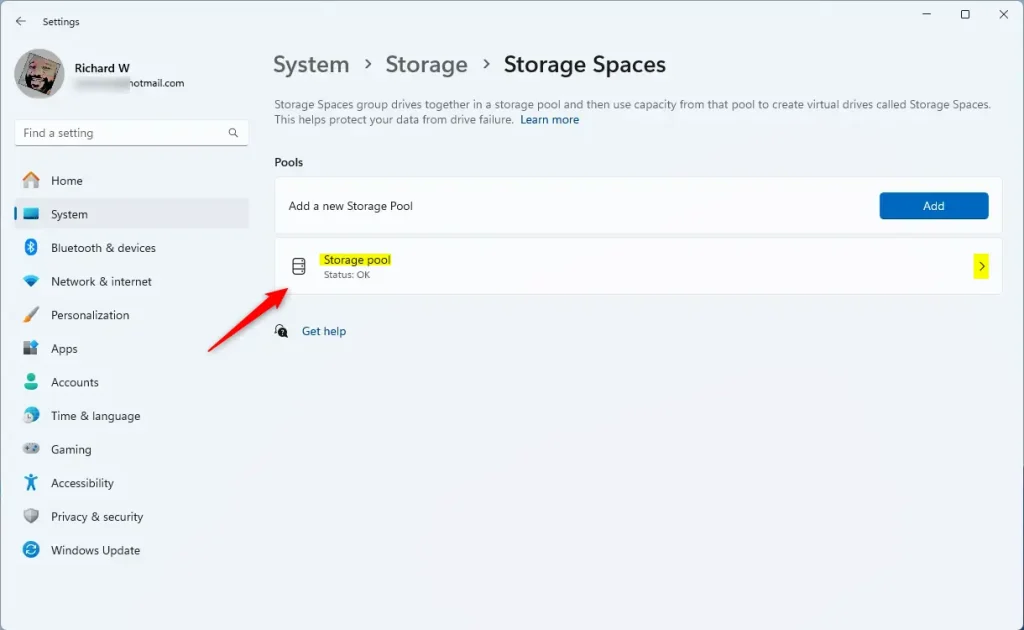
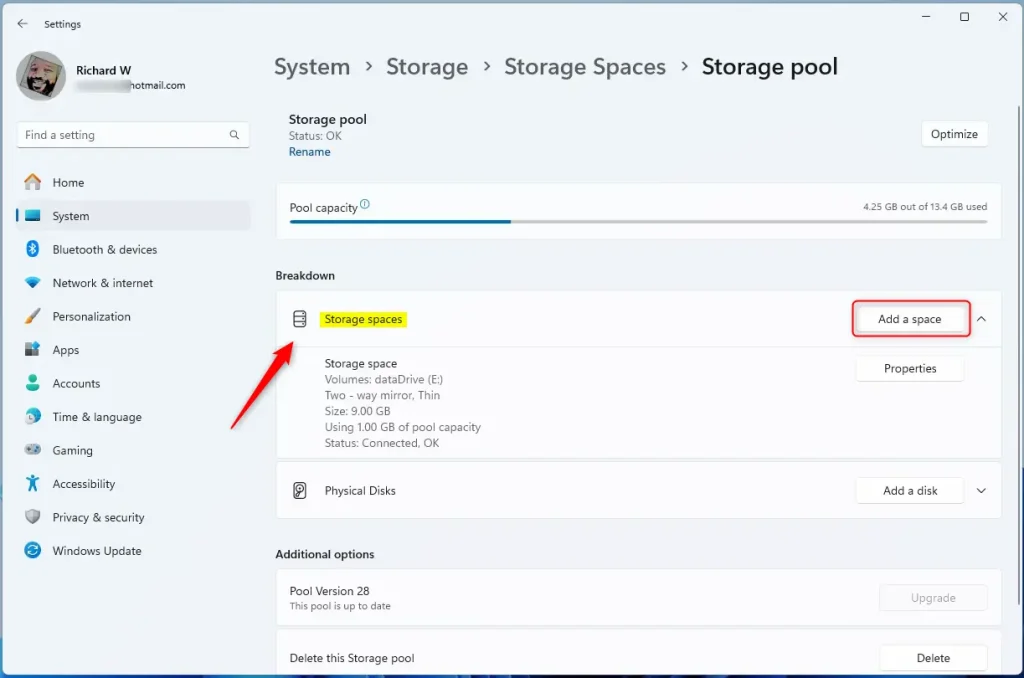
Next, select the Storage space tile, then click the Add a space button to add storage to the pool.
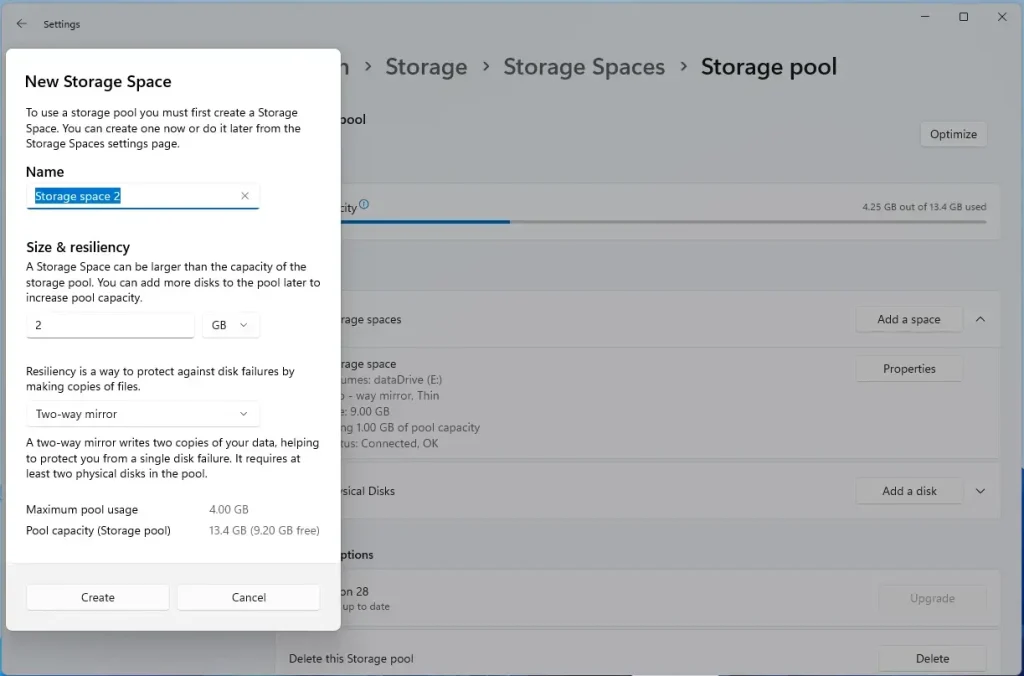
In the next window, type a name for the storage space, choose a size and resiliency option, and click Create.
Size & Resiliency options:
- Simple – requires at least two drives and provides no data protection.
- Two-way mirror – requires at least two drives, and there is data protection when a drive fails.
- Three-way mirror – requires at least five drives and provides data protection. It will withstand two drive failures.
- Parity – requires three drives with data protection and performance.
- Dual parity – requires at least seven drives and provides data protection and performance. It will withstand two drive failures.
Then click Create to make the new storage space.
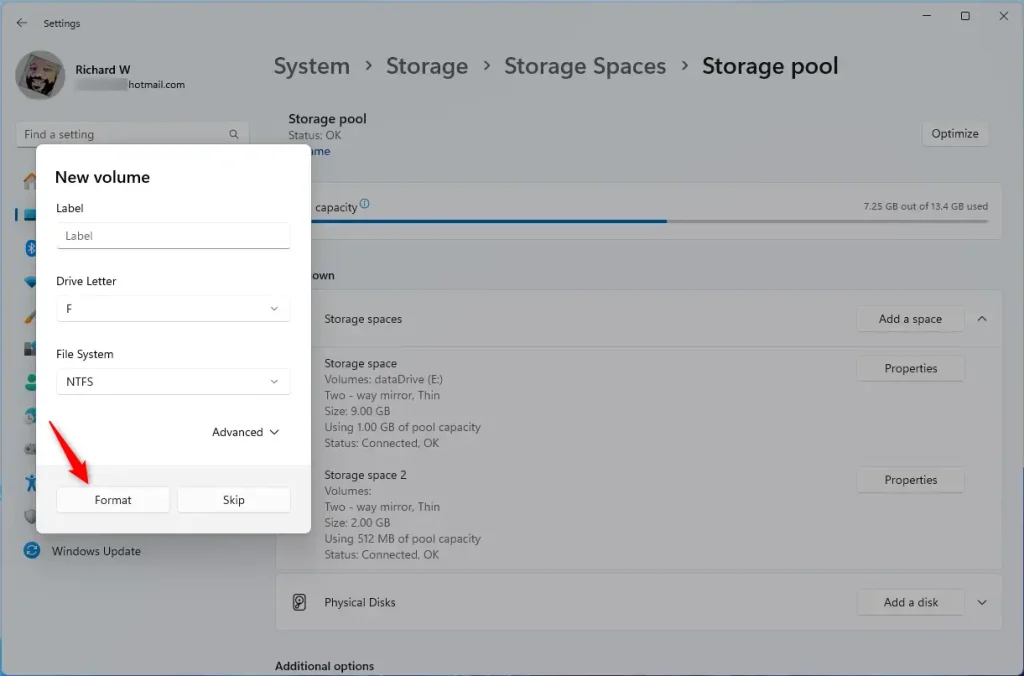
In the new volume window, provide a label name and drive letter, then format the new volume using NTFS or FAT32.
When done, click Format to create the new volume.
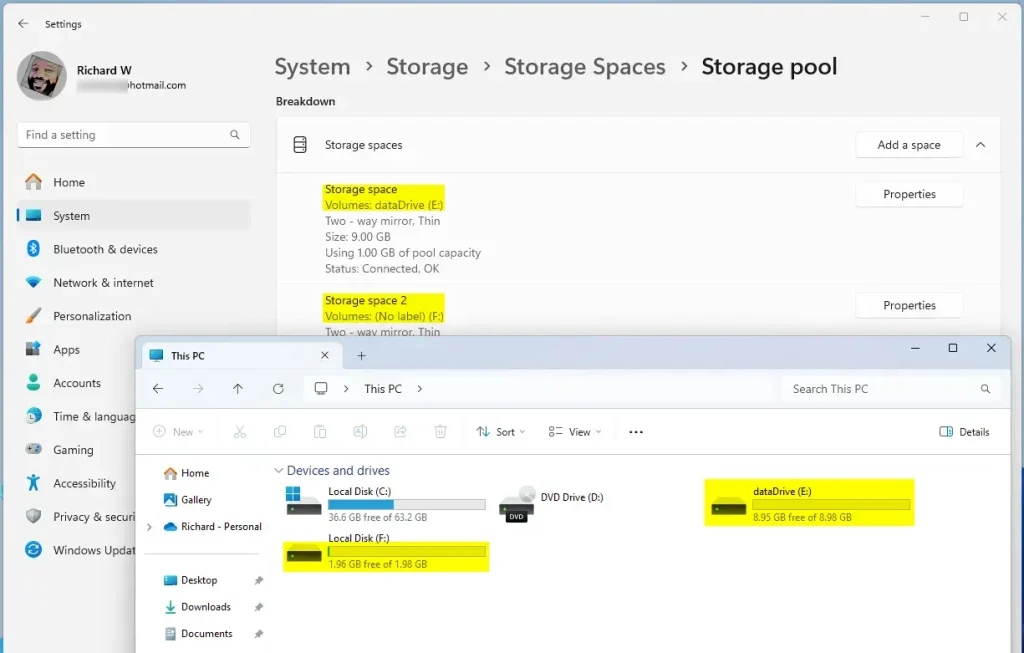
Once finished, a new drive or volume for the “Storage pool” should appear and be accessible via File Explorer.
That should complete the process!
You can close the Settings app now.
Conclusion:
- Increased Storage Capacity: Adding storage space to a Windows storage pool increases available storage capacity, providing a more flexible and scalable solution.
- Data Redundancy and Resiliency: Configuring the storage pool to mirror data across multiple physical drives can enhance data redundancy and resiliency, improving overall data protection.
- Simplified Storage Management: Consolidating data onto a single virtual drive can simplify storage management, which is especially beneficial for those with limited physical space or seeking a streamlined approach to data storage.
- Access and Utilization: Upon completion, the new storage space volume will be created and easily accessible via File Explorer, ready for utilization.
Was this guide helpful?

About the Author
Richard
Tech Writer, IT Professional
Richard, a writer for Geek Rewind, is a tech enthusiast who loves breaking down complex IT topics into simple, easy-to-understand ideas. With years of hands-on experience in system administration and enterprise IT operations, he’s developed a knack for offering practical tips and solutions. Richard aims to make technology more accessible and actionable. He's deeply committed to the Geek Rewind community, always ready to answer questions and engage in discussions.


[…] Storage spaces, you can create a Storage pool, rename it, add physical disk drives to it, add a Storage space to an existing Storage pool, optimize it, and […]