How to Partition a Hard Drive in Windows 11
Partitioning a hard drive in Windows 11 divides one physical drive into multiple smaller, independent storage spaces.
Think of it like splitting a big filing cabinet into several smaller ones, each labeled with its own drive letter. This helps you keep your operating system separate from your photos, videos, and documents.
For example, if your Windows 11 installation gets corrupted, your personal files on a different partition stay safe.
Windows 11 includes a built-in tool called Disk Management to do this without needing extra software.
Creating new partitions makes organizing files easier and can even help your computer run a bit faster by spreading out where data is stored.
Open Disk Management by typing diskmgmt.msc into the Start menu search. Right-click unallocated space on your drive, select “New Simple Volume,” and follow the wizard to set size, drive letter, and format.
Understanding Disk Management Concepts
Before you partition a hard drive in Windows 11, understanding terms like ‘unallocated space,’ ‘primary partitions,’ and ‘logical partitions,’ and knowing whether to choose GPT or MBR for your disk is helpful.
How to create a partition in 🪟 Windows 11
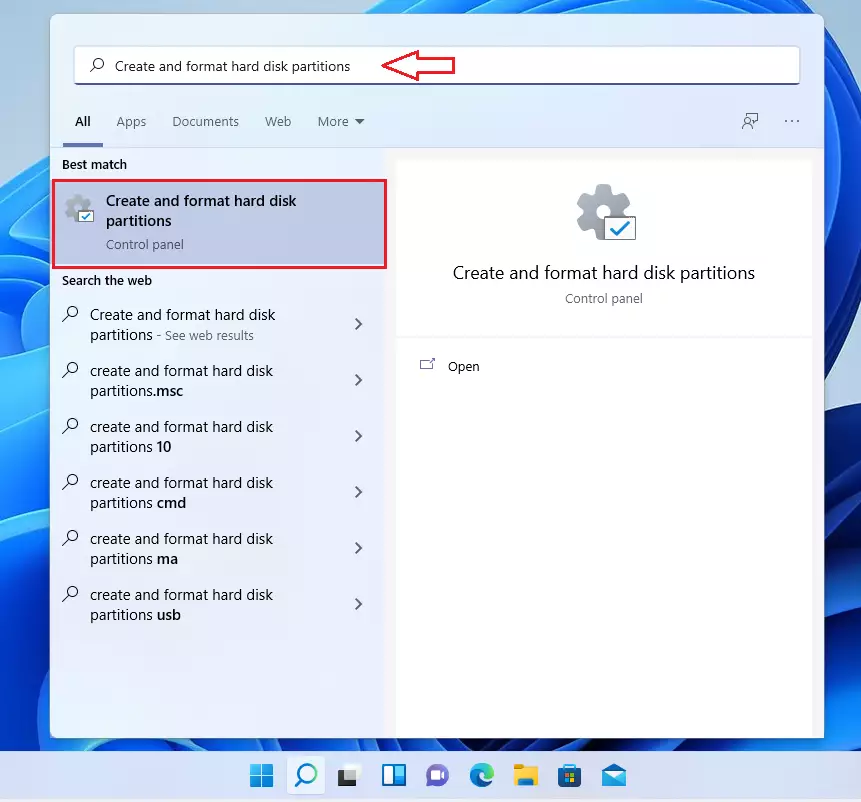
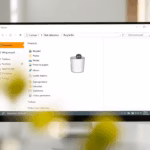
Creating a partition in Windows 11 is done using the built-in Disk Management tool. Click the Start menu and type ‘Create and format hard disk partitions’. Selecting the matching result opens the tool.
- Click the Start menu and type
diskmgmt.mscorCreate and format hard disk partitions. - Select the result that matches to open the tool.
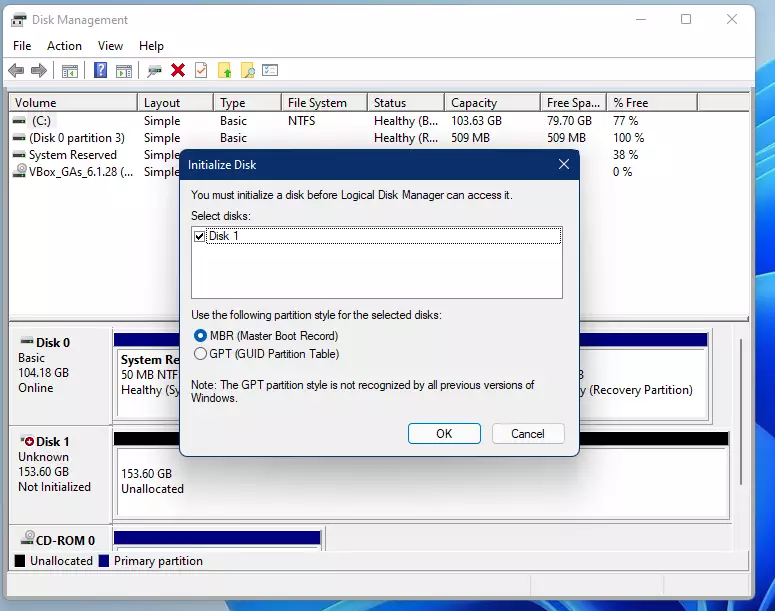
The tool will show your current drives. If a drive is brand new, Windows usually labels it as ‘Unallocated’ or ‘Not Initialized.’
How to create a new simple partition
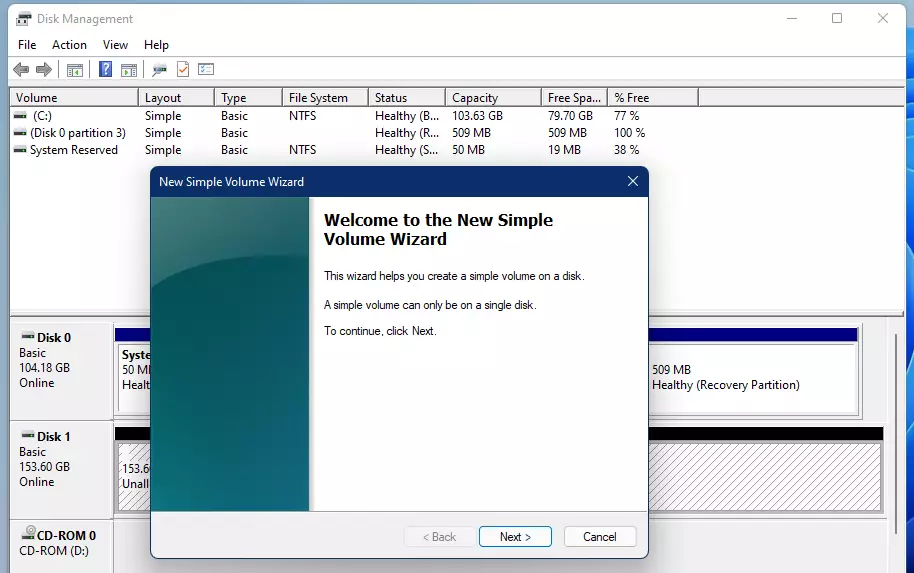
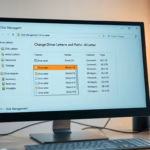
- Right-click the area labeled
Unallocatedon your drive. - Select New Simple Volume from the menu. Official Microsoft Documentation

- A wizard will appear. Click Next to start.
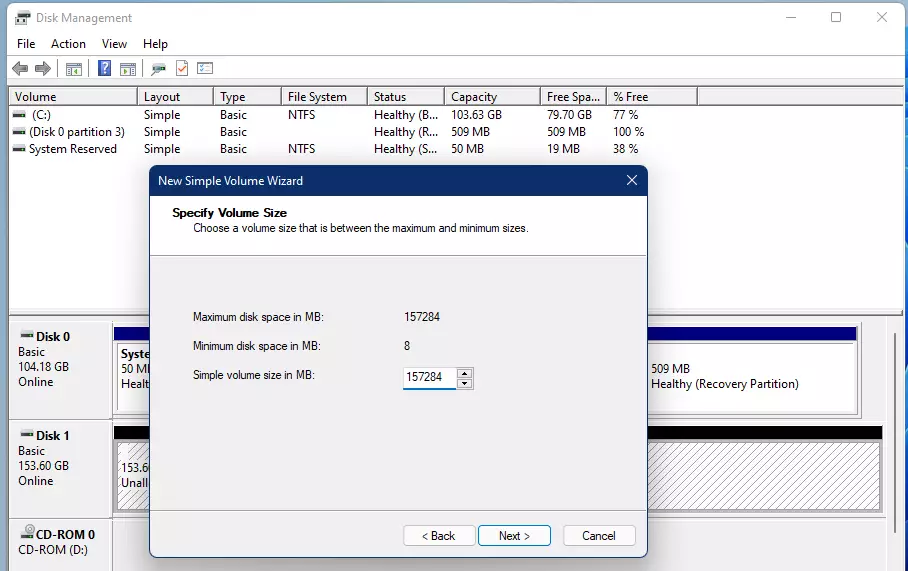
- Choose how big you want the partition to be. The default uses all available space. If you want multiple sections, type a smaller number in MB.
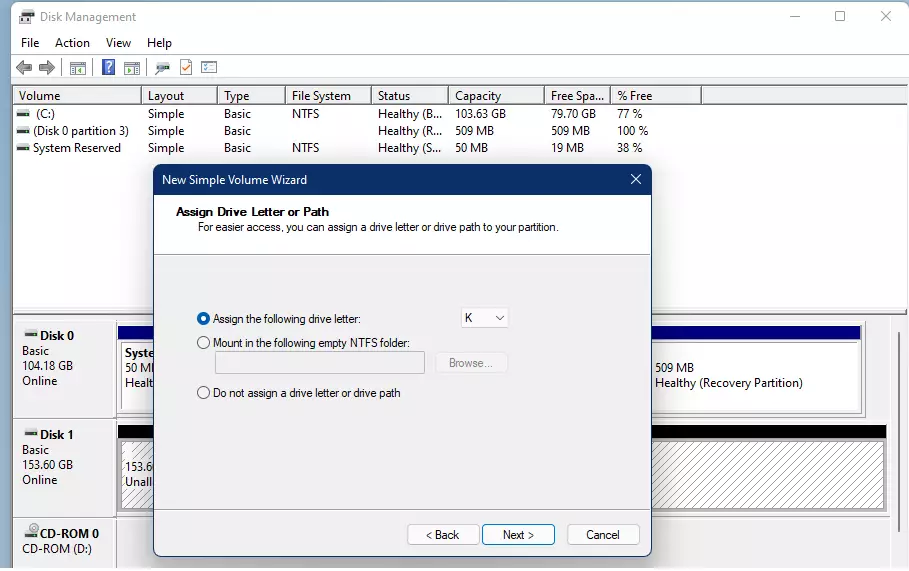
- Pick a drive letter for your new section and click Next.
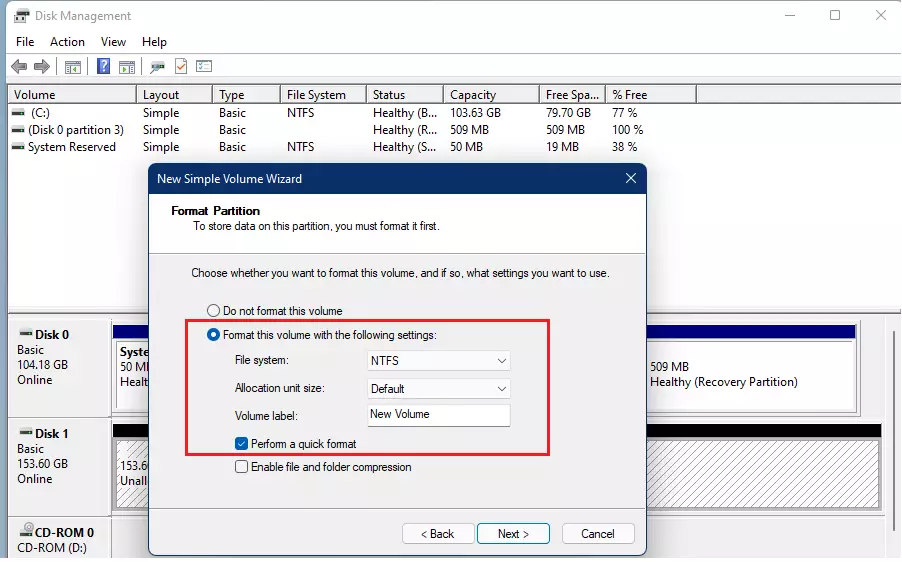
- Make sure the format is set to NTFS for Windows compatibility. You can give the partition a name here if you like. Click Next.
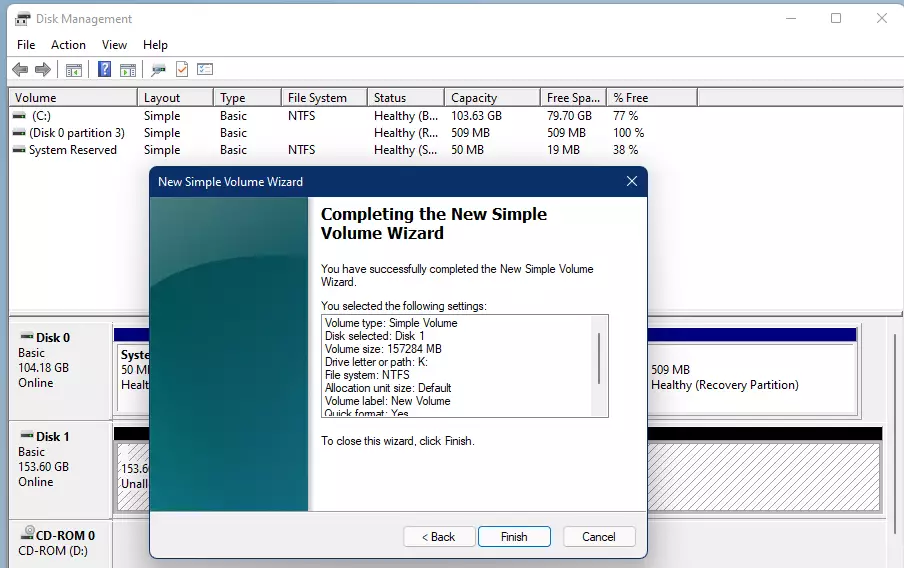
- Click Finish.
Let’s create a new simple partition in Windows 11. Start by right-clicking the unallocated space shown in Disk Management. Then, select ‘New Simple Volume’ from the menu that appears to launch a setup wizard that guides you through the process.

Advanced Disk Management and Troubleshooting
For advanced disk management in Windows 11, the diskpart command-line tool offers more control, and troubleshooting issues like a greyed-out ‘Extend Volume’ option often relates to adjacent unallocated space.
Summary
Partitioning your hard drive in Windows 11 helps organize storage, keeping data safe and systems running efficiently by creating separate areas for files using the Disk Management tool.
Can I partition a drive without formatting?
Yes, you can shrink an existing partition to create unallocated space without formatting the original data. However, creating a new partition from that space requires formatting the new section with a file system like NTFS or exFAT so Windows can store files on it.
What is the difference between shrinking a volume and creating a new one?
Shrinking a volume reduces the size of an existing partition to free up space. Creating a new volume uses that freed-up unallocated space to build a separate, usable drive letter. You must shrink a drive first if you do not have any empty, unallocated space available.
Is it safe to partition my C: drive while Windows is running?
Windows allows you to shrink the C: drive while the system is running. However, you cannot delete or format the partition currently running your operating system. Always ensure you have a full system backup before modifying the system partition to prevent potential boot issues or data loss.
Was this guide helpful?

About the Author
Richard
Tech Writer, IT Professional
Richard, a writer for Geek Rewind, is a tech enthusiast who loves breaking down complex IT topics into simple, easy-to-understand ideas. With years of hands-on experience in system administration and enterprise IT operations, he’s developed a knack for offering practical tips and solutions. Richard aims to make technology more accessible and actionable. He's deeply committed to the Geek Rewind community, always ready to answer questions and engage in discussions.


No comments yet — be the first to share your thoughts!