How to Show or Hide Drive Letters in Windows 11 File Explorer

Drive letters are the labels like C: and D: that File Explorer shows next to your drives under This PC. Showing them helps you tell several drives apart, especially USB sticks and external disks. Hiding them leaves just the drive names, which looks cleaner.
You can switch this on or off at any time, and you don’t need administrator rights. The setting applies to your user account only. Both Windows 11 Home and Pro have it.
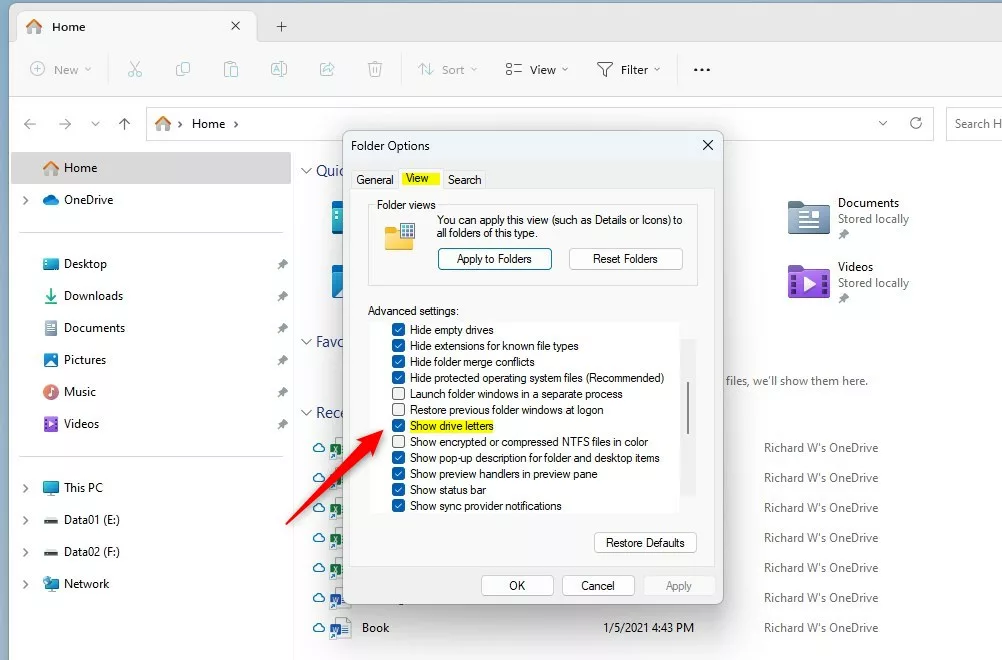
Open File Explorer Options by pressing Win+S, typing File Explorer Options, and clicking the result. Click the View tab, scroll down to Show drive letters, and uncheck the box. Click Apply then OK. The letters disappear from your drives in File Explorer immediately.
What Are Drive Letters?
Windows gives each storage volume, such as an internal hard drive, a USB stick or an external drive, a letter from A to Z. The main operating system partition usually gets C:. Windows and the programs you run use these letters to find specific volumes, and so do you when you type a path.
Hiding the letters in File Explorer only changes what you see. The drive keeps its letter, and your programs and shortcuts keep working.
Where Do You See Drive Letters?
By default, File Explorer shows the letter after the drive name for every volume under This PC, for example “Local Disk (C:)”. If the letters are missing on your PC, the setting below has probably been turned off, either by you or by another person who uses the computer.
How to Show or Hide Drive Letters Using File Explorer Settings
The setting is called Show drive letters and sits in the Advanced settings list.
- Press Windows + S to open Search.
- Type File Explorer Options and click the matching result. The File Explorer Options window opens. (Another route: in File Explorer, click the See more button (three dots) on the toolbar, then click Options.)
- Click the View tab at the top of the window. You will see a list called Advanced settings.
- Scroll down the list until you find Show drive letters.
- To show the letters, tick the box. To hide them, clear the box.
- Click Apply, then click OK.
Learn more about opening File Explorer Options
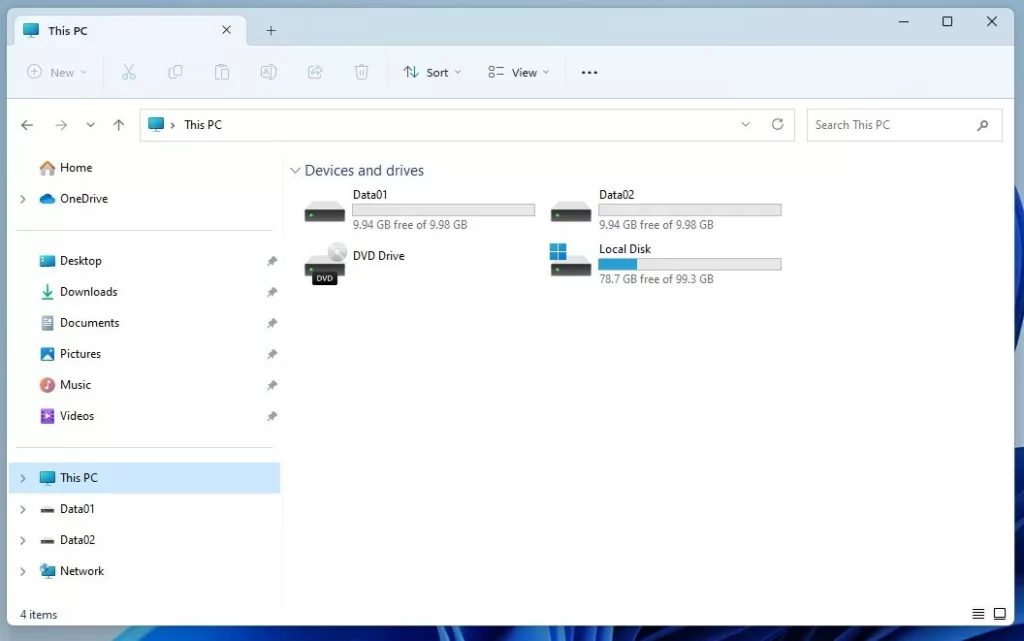
Open This PC and look at your drives. With the box ticked, the letter appears in brackets after each drive name. With it cleared, you see only the names. If an open window still shows the old view, press F5 to refresh it.
To undo the change, open the same window and set the box back the way it was. No restart is needed.
How to Show or Hide Drive Letters Using the Windows Registry (Advanced)
Use this method if the File Explorer Options box doesn't give you the result you want. The value you set here is the same one the checkbox controls. A wrong edit can cause problems, so follow each step exactly. Before you start, you can back up the registry in Registry Editor with File Export.
- Press Windows + R to open the Run box.
- Type
regeditand press Enter. If Windows asks Do you want to allow this app to make changes to your device?, click Yes. Registry Editor opens. - In the left pane, go to this path:
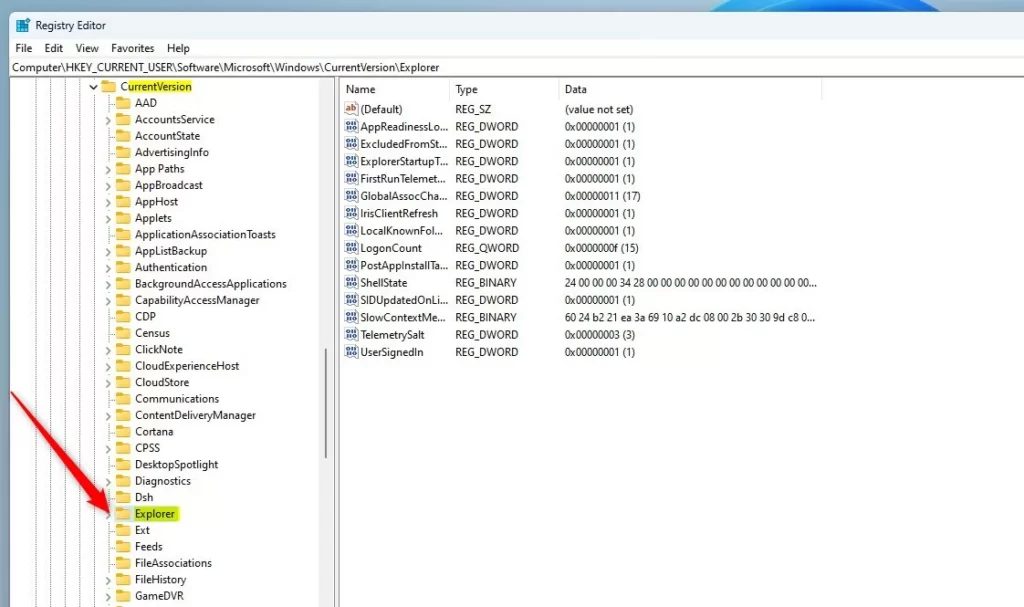
HKEY_CURRENT_USER\Software\Microsoft\Windows\CurrentVersion\Explorer - If the Explorer key isn't there, right-click CurrentVersion, choose New Key, and name it Explorer. It normally exists already.
- Click the Explorer key. Its values appear in the right pane.
- If ShowDriveLettersFirst is already in the right pane, skip to step 8. If not, right-click an empty area of the right pane and choose New DWORD (32-bit) Value.
- Name the new value ShowDriveLettersFirst.
- Double-click ShowDriveLettersFirst. The Edit DWORD (32-bit) Value box opens.
- In the Value data field, enter 0 to show drive letters, or 2 to hide them.
- Click OK and close Registry Editor.
- Restart your computer so the change applies everywhere.
After the restart, open This PC and check your drives. To undo the change, set the value back to 0, or delete the ShowDriveLettersFirst value, and restart again.
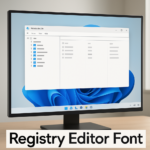
Example of the Registry Editor window:
What It Looks Like Without Drive Letters
Summary
- You can show or hide drive letters in Windows 11 File Explorer to suit how you work.
- The simplest way is File Explorer Options View tab > Show drive letters. It takes effect right away.
- The Registry Editor gives the same result through the ShowDriveLettersFirst value. Set it to 0 to show letters or 2 to hide them, and be careful with every edit.
- If the change doesn't appear, press F5 in File Explorer first. If it still hasn't appeared, restart your PC.
Windows 11 gives you two ways to do this. Use the built-in view setting for a quick change, or edit the registry value if you prefer that route or the checkbox doesn't do what you need. Either way you can reverse the change in a minute.
Was this guide helpful?

About the Author
Richard
Tech Writer, IT Professional
Richard is a writer at Geek Rewind who turns complex IT tasks into clear, step-by-step guides. He draws on years of hands-on experience in system administration and enterprise IT operations, focusing on Windows, Linux and WordPress: the problems people actually run into, and the fixes that work. His server and WordPress guides come from systems he runs himself. Richard builds and maintains the platform behind Geek Rewind, from its Ubuntu servers and Nginx configuration to its custom WordPress plugins. Many new tutorials start with readers' questions, and he's always glad to answer them in the comments.

No comments yet — be the first to share your thoughts!