How to Mount Drives as Folders in Windows 11
Mounting a drive as a folder in Windows 11 lets you access its contents through a folder path instead of a traditional drive letter like C: or D:. This process makes your drive appear as a regular folder on your system.
When you mount a drive this way, the actual files remain on the physical drive. You simply access them by opening the designated folder. Any files you save within this folder are then stored directly on the mounted drive.
You can only mount drives into empty folders. These folders must be on basic or dynamic NTFS volumes. If a folder already has files in it, Windows will not let you mount a drive there.
Assign a drive’s contents to an empty folder through Disk Management. Right-click the partition, select “Change Drive Letter and Paths,” then “Add,” and choose “Mount in the following empty NTFS folder,” browsing to your desired folder. This integrates the drive’s files into that folder’s location.
How to mount a drive as a folder rather than a letter in 🪟 Windows 11
As described above, users can mount an external or internal drive as a folder rather than a letter in Windows. This makes the drive appear as another folder and can be accessed via a folder path.
When you insert a drive, Windows automatically assigns a letter to it. An example below:
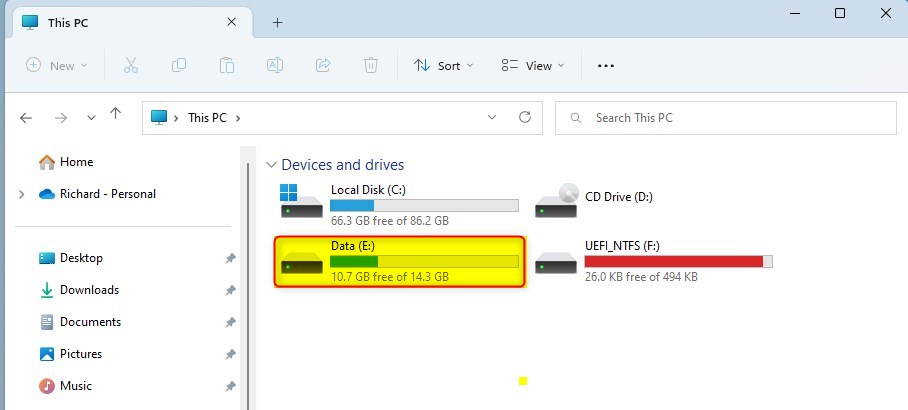
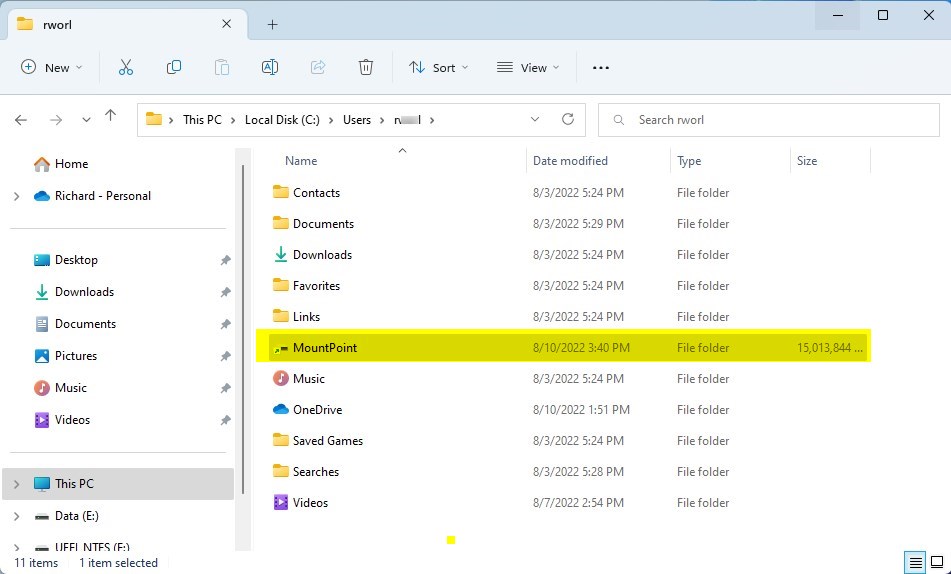
This drive can also be mounted in a folder. To do that, create an empty folder.
Next, go to Windows Settings app.
Windows 11 has a centralized location for the majority of its settings. As a result, everything can be done, from system configurations to creating new users and updating Windows from its System Settings pane.
To get to System Settings, you can use the Windows key + I shortcut or click on Start ==> Settings, as shown in the image below:

Alternatively, you can use the search box on the taskbar and search for Settings. Then select to open it.
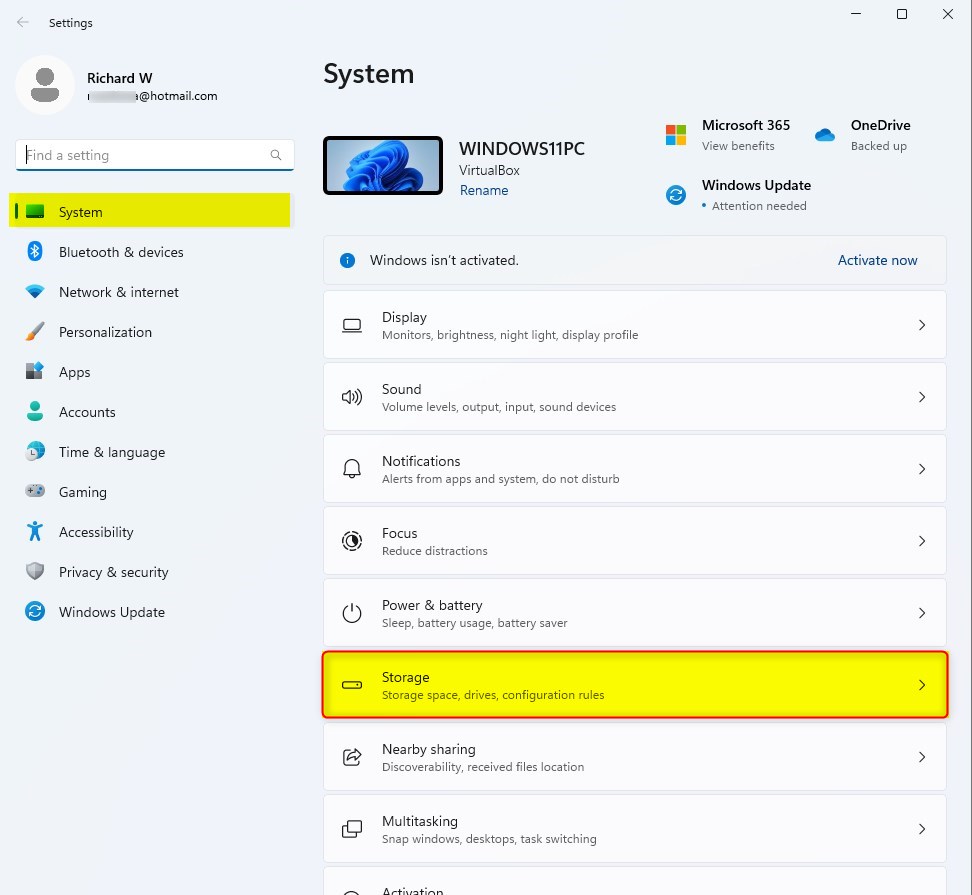
Windows Settings pane should look similar to the image below. On the Windows Settings app, click the System on the left, then select the Storage tile on the right pane, as highlighted in the image below.
Select the Advanced storage settings tile on the System > Storage settings pane to expand.

Next, select Disk & volumes tile as highlighted below.

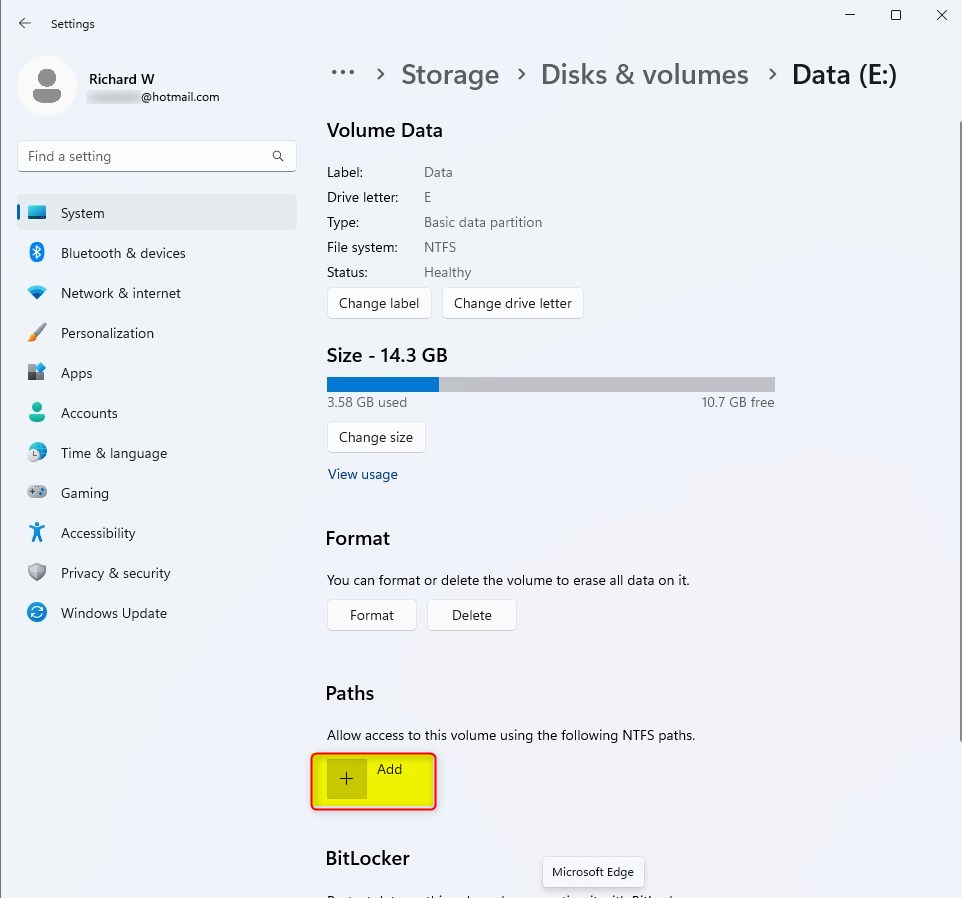
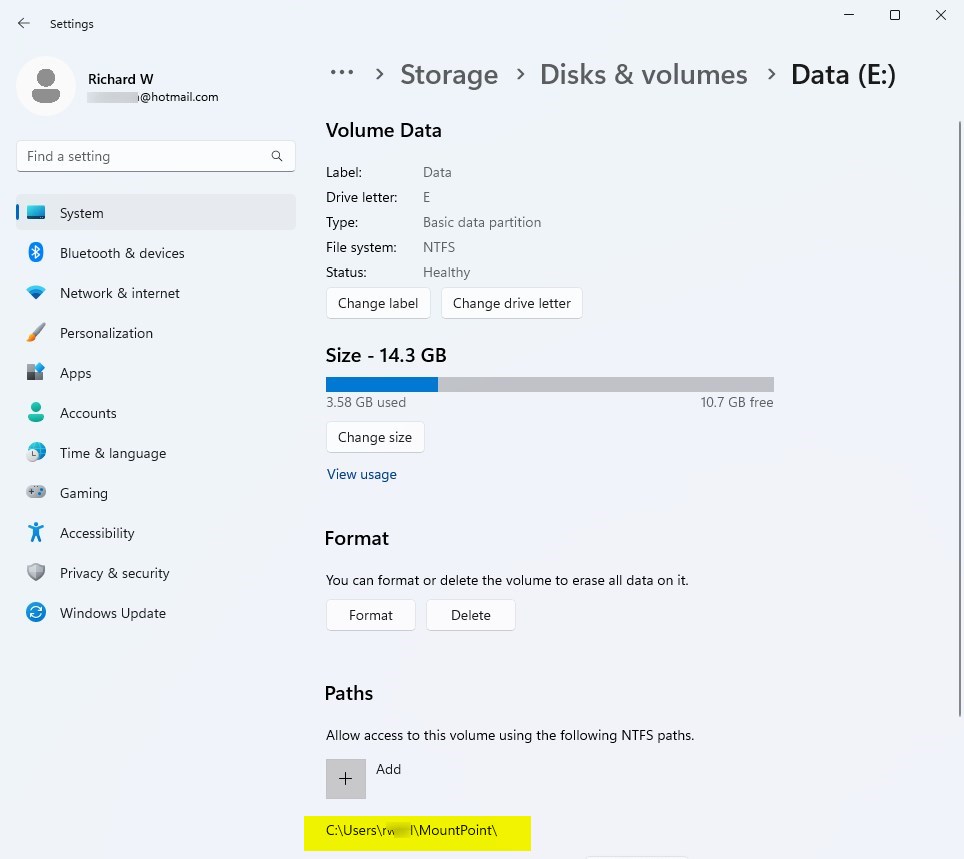
On System => Storage => Disk & volumes settings pane, select the drive you want to be able to mount in a folder. Then click the Properties button for the drive.

On the Properties window, under Paths, click the add button.
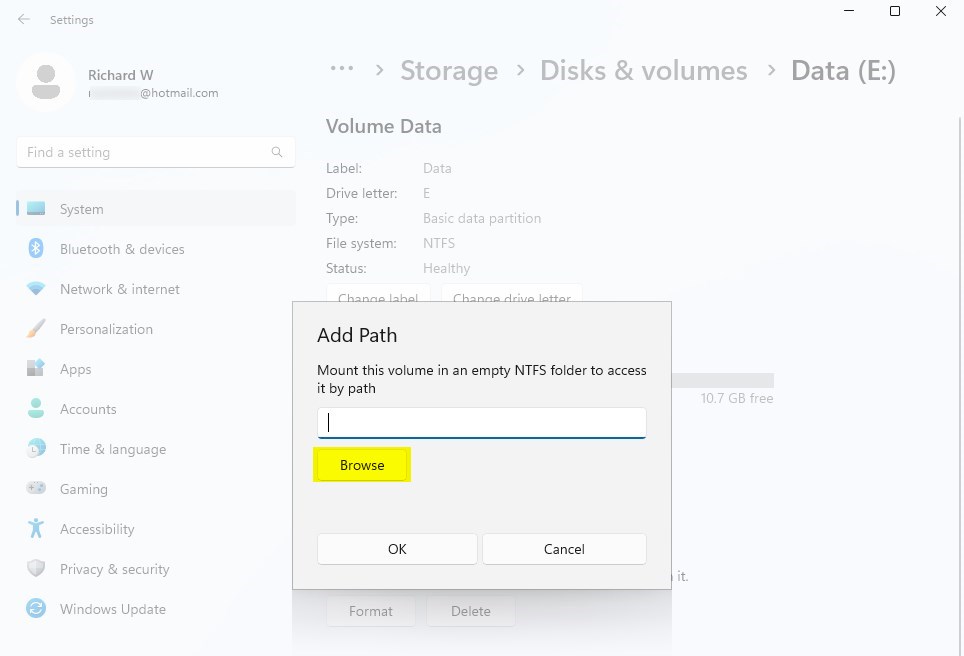
Type the folder path or click the Browse button to locate the folder.
The empty folder should now be accessible via the path. Anything you save in the folder is saved to the drive.
Alternatively, one can use Disk Management in Windows to perform the same actions above.
- In Disk Manager, right-click the partition or volume with the folder in which you want to mount the drive.
- Click Change Drive Letter and Paths and then click Add.
- Click Mount in the following empty NTFS folder.
- Type the path to an empty folder on an NTFS volume or click Browse to locate it.
From Windows Terminal with Command Prompt, do this:
- Open a command prompt and type diskpart.
- At the DISKPART prompt, type list volume, making a note of the volume number you want to assign the path to.
- At the DISKPART prompt, type select volume <volumenumber>, specifying the volume number that you want to assign the path to.
- At the DISKPART prompt, type assign [mount=<path>].
The drive is now mounted in a folder.
That should do it!
Conclusion:
- Mounting a drive as a folder in Windows 11 allows access to the drive’s content through an easily accessible folder path.
- Whether utilizing Windows Settings, Disk Management, or the command prompt, the process allows for efficient organization and utilization of storage resources.
- Following the outlined steps, users can seamlessly mount internal or external drives as folders, offering convenience and enhancing file management capabilities.
Frequently Asked Questions
How do I mount a drive as a folder in Windows 11?
Can I mount a drive in a folder that already contains files?
What types of drives can be mounted as folders in Windows 11?
Is it possible to use Disk Management to mount a drive as a folder?
What happens to the files saved in the mounted folder?
Was this guide helpful?

About the Author
Richard
Tech Writer, IT Professional
Richard, a writer for Geek Rewind, is a tech enthusiast who loves breaking down complex IT topics into simple, easy-to-understand ideas. With years of hands-on experience in system administration and enterprise IT operations, he’s developed a knack for offering practical tips and solutions. Richard aims to make technology more accessible and actionable. He's deeply committed to the Geek Rewind community, always ready to answer questions and engage in discussions.

[…] we showed you how to mount an external or internal drive in a folder rather than a drive letter. This makes the drive appear as just another […]