How to Create and Close a Desktop on Windows 11

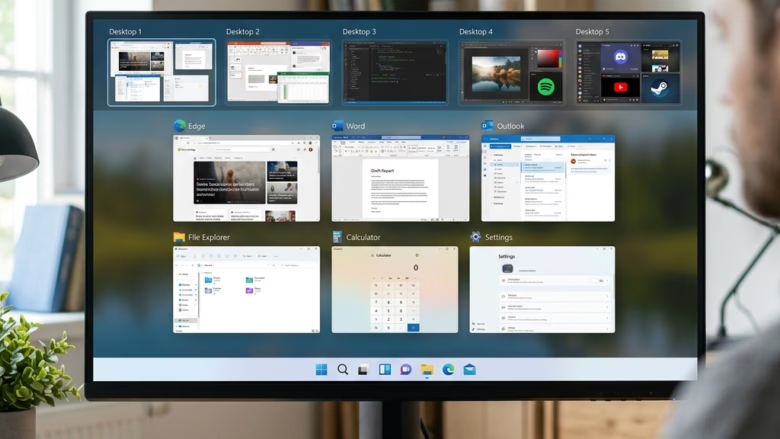
Virtual desktops in Windows 11 let you set up several separate workspaces on one computer, so you can keep different projects apart. Each workspace is an extra desktop with its own set of open windows. You might keep work apps on one and personal browsing on another, and your display stays uncluttered. The feature is built into both Windows 11 Home and Pro, so there is nothing to install or enable.
Press Win+Tab on your keyboard to open Task View, which is where you create, switch between and close desktops.
Press Win+Tab to open Task View, then click the + New desktop button in the bar at the bottom. A new empty desktop appears. Switch to it by clicking its preview, then open the apps you want there. To close a desktop, right-click its preview in Task View and select Close.
Step 1Open Task View
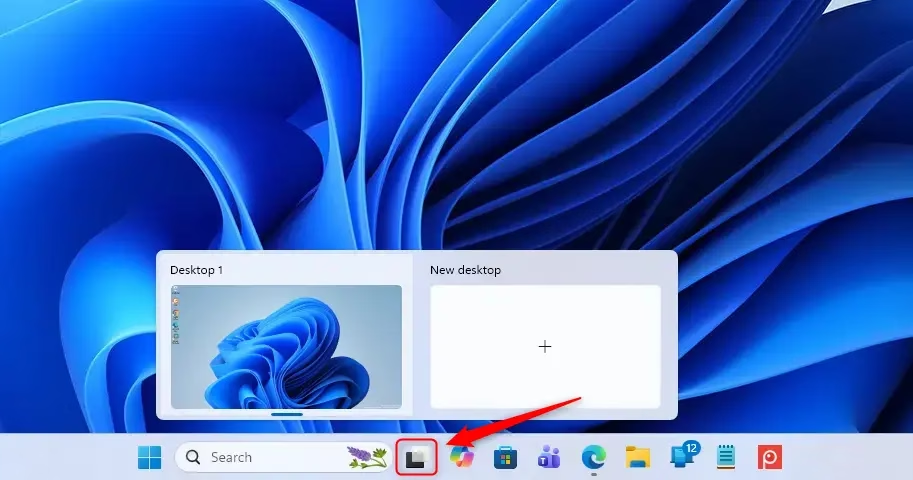
Task View shows all your running windows, and it is also where you manage your virtual desktops. There are two ways to open it. You can use the keyboard shortcut, or you can click the Task View button on the taskbar , which looks like two small overlapping squares.
How to open Task View:
- Press the Win and Tab at the same time. You should see your open windows spread out as thumbnails, with a bar of desktops along the bottom of the screen on most current Windows 11 builds.
- Or look at the taskbar for the Task View button, the icon of two squares stacked on each other, near the Start button and Search. Hover over it and the tooltip reads “Task view”. Click it to open the same screen.
- To leave Task View without changing anything, press Esc.
Then turn on the Task view toggle. Turn it off again if you would rather keep the taskbar tidy. The keyboard shortcut works either way.
Step 2Create a New Desktop
A new desktop gives you an empty workspace, so you can separate your open windows and keep things organized. You create one from inside Task View.
To make a new desktop:
- Open Task View with Windows key + Tab.
- Find the button labelled + New desktop. It sits in the desktop bar next to the small previews of your existing desktops.
- Click + New desktop. A new preview is added to the bar.
It creates one and switches to it without going through Task View.
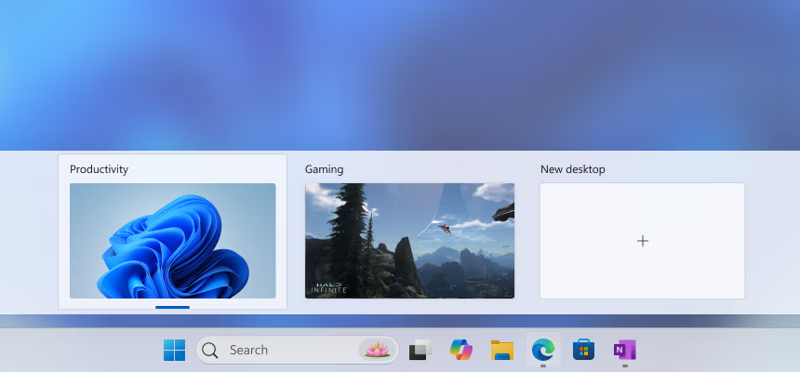
After you click, a new preview, most likely named "Desktop 2", appears in the bar. This desktop is empty and ready for whatever programs you want to open on it. Your first desktop is untouched. It stays open with all its original apps, and nothing has moved or closed.
Clicking an existing desktop preview does not create anything new. It switches your view to that desktop. This is how you move between desktops you have already set up. You can also switch without opening Task View by pressing Ctrl + Windows key + Left arrow or Right arrow.
Step 3Add Apps to Your New Desktop
To put apps on a new desktop, switch to it and open the programs you want there. Each desktop keeps its own set of open windows, so different projects or tasks stay completely separate.
This works best when you launch the apps from the new desktop itself. Say you create a desktop for work. Open your email program or project management software while you are on that desktop, and not on another one. That way each task has its apps in one place and you can find them quickly.
- Open Task View and click the preview of your new desktop (for example "Desktop 2"). The screen switches to that empty desktop.
- Open any apps you want to use on this desktop, the same way you normally would, from the Start menu, the taskbar or a shortcut.
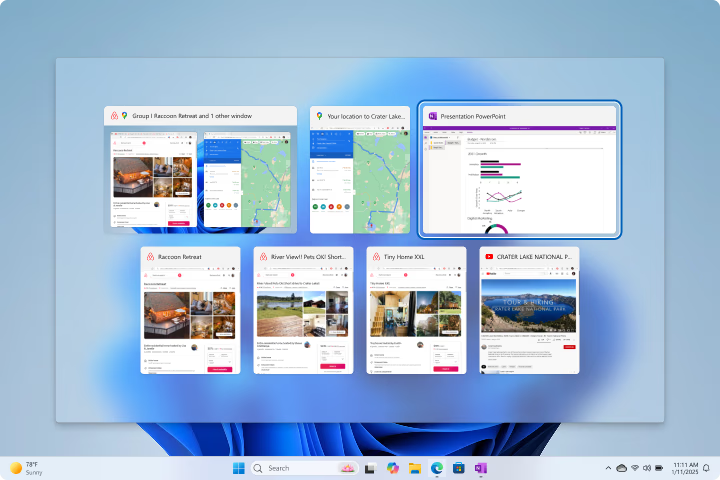
These apps now show up only on this desktop. Other desktops won't list them on their taskbar. If you open Task View on another desktop, you won't see these windows there. One exception: if an app is already open on another desktop, launching it again may take you back to that existing window instead of opening a new one.
Step 4Close a Desktop
When you no longer need a desktop, you can close it from Task View. Closing a desktop does not close the apps on it, so you won't lose work on your other desktops.
- Open Task View with Windows key + Tab.
- Move your mouse over the preview of the desktop you want to close.
- Click the small X that appears in the top corner of that preview. The preview disappears from the bar.
Any apps you had open on that desktop move to another desktop automatically, usually the one next to it. They keep running, and their unsaved work is still there. Afterwards, switch to the desktop where they landed and move or close them as needed.
Tip: To close the desktop you are currently on without opening Task View, press Ctrl + Windows key + F4. Closing a desktop cannot be undone, but you can create a new one at any time. You would have to move your windows back by hand.
Reference:
Summary
Virtual desktops in Windows 11 give you separate workspaces, so your apps and tasks stay organized. Open Task View, add a desktop, open your apps on it, and close it when you are done.
Was this guide helpful?

About the Author
Richard
Tech Writer, IT Professional
Richard is a writer at Geek Rewind who turns complex IT tasks into clear, step-by-step guides. He draws on years of hands-on experience in system administration and enterprise IT operations, focusing on Windows, Linux and WordPress: the problems people actually run into, and the fixes that work. His server and WordPress guides come from systems he runs himself. Richard builds and maintains the platform behind Geek Rewind, from its Ubuntu servers and Nginx configuration to its custom WordPress plugins. Many new tutorials start with readers' questions, and he's always glad to answer them in the comments.

No comments yet — be the first to share your thoughts!