How to Use Your SIM for Cellular Data in Windows 11

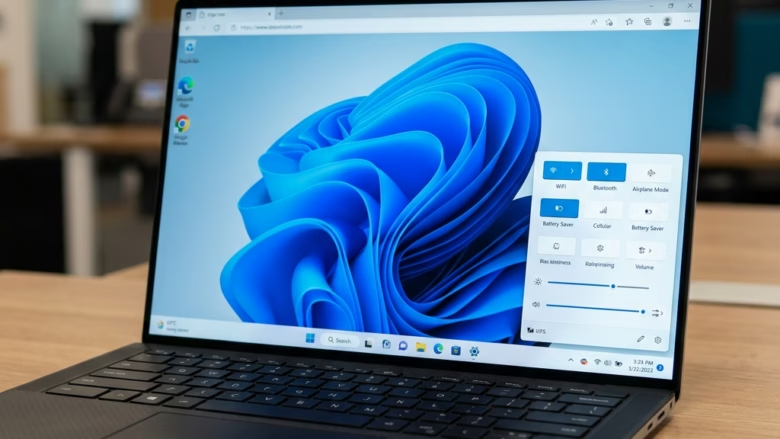
Cellular data in Windows 11 lets you connect a laptop or tablet to a mobile phone network when Wi-Fi is out of reach. It works with a physical SIM card or an eSIM, which is a digital SIM built into many devices made after 2018.
This keeps you online at airports, in parks or in remote locations. You insert a mobile operator SIM or download an eSIM profile and use the connection like any other network. One limit applies up front: only devices with a built-in cellular modem can do this. A laptop with just Wi-Fi and Bluetooth has no cellular option, whatever SIM you own.
Insert your SIM card or set up your eSIM. Click the Network icon, then turn on the Cellular quick setting. Select “Connect” under Cellular settings or ensure “Let Windows keep me connected” is active. Enter your phone company’s details if prompted.
Insert Your SIM Card (or Check Your eSIM)
Before you start, make sure the SIM is physically in place or the eSIM is ready:
- Power the device off if the SIM tray is accessible. Insert the physical SIM card into the slot. Check the diagram printed near the slot, or in the device manual, for the correct orientation.
- If you use an eSIM, confirm with your mobile provider that the profile is active on your account. A profile that is downloaded but not activated will not connect.
- Check that your data plan is active and covers the device. Some carriers sell separate plans for phones and for laptops or tablets.
Access Cellular Settings
To reach the cellular controls in Windows 11, use the quick settings menu:
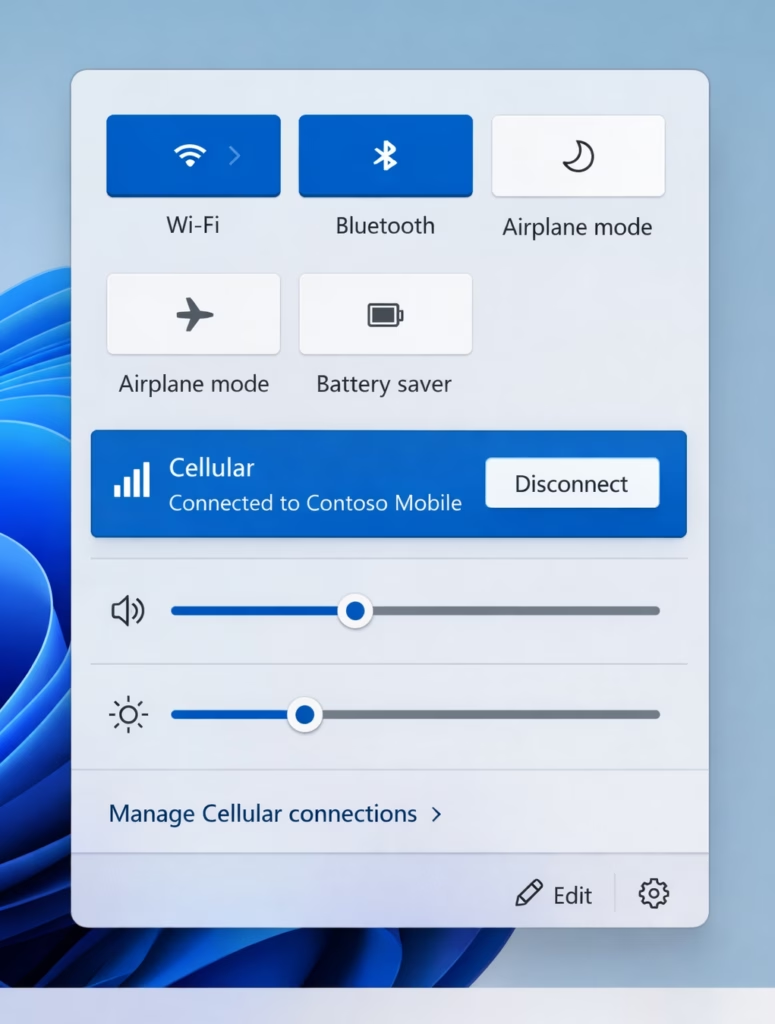
- Click the Network icon in the bottom-right corner of the taskbar . The quick settings panel opens.
- Find the Cellular button. If you have dual-SIM hardware, this is also where you move between network profiles.
- Click Cellular to turn it on. The tile should change colour to show it is active.
If you do not see the Cellular tile, click the pencil icon (Edit quick settings) at the bottom of the panel, then choose Add and look for it in the list. If it is not there at all, the device has no cellular modem or the modem driver is missing. Check Device Manager and your manufacturer’s support page.
Also check that Airplane mode is off, since it can switch cellular off too. Turn Cellular on before you troubleshoot anything else.
Initiate the Connection
Once the connection is set up, finish like this:
- Confirm the Cellular setting is on.
- Click Connect if Windows does not link to your mobile network automatically. After a few seconds the Network icon should change to show a cellular signal, and the tile should show the carrier name.
If the connection fails, check that the SIM is seated correctly and the plan is active. A restart is not normally required, but it can help if the modem does not pick up a newly inserted SIM.
Enter Your Details (If Asked)
Some carriers need specific credentials before the connection works. If Windows prompts you, enter the following exactly as your mobile carrier supplied them:
- The username
- The password
- The APN (Access Point Name)
Copy these from the carrier’s support page or welcome message. A single wrong character in the APN is a common reason a SIM shows signal but has no internet.
Managing Your SIM for Cellular Data
Some devices can handle both a physical SIM card and an eSIM. On these, you choose which one carries cellular data. This helps travelers who keep separate data plans or profiles for different regions, such as a home plan on the physical SIM and a local eSIM for the trip.
Choosing Your SIM Slot
Choosing the primary cellular data source helps you avoid unwanted roaming charges and lets you pick the network with the best coverage. Before you travel, check what your carrier charges for roaming. Switch to the local profile if it is cheaper.
Navigate to Cellular Settings
To open the cellular settings page:
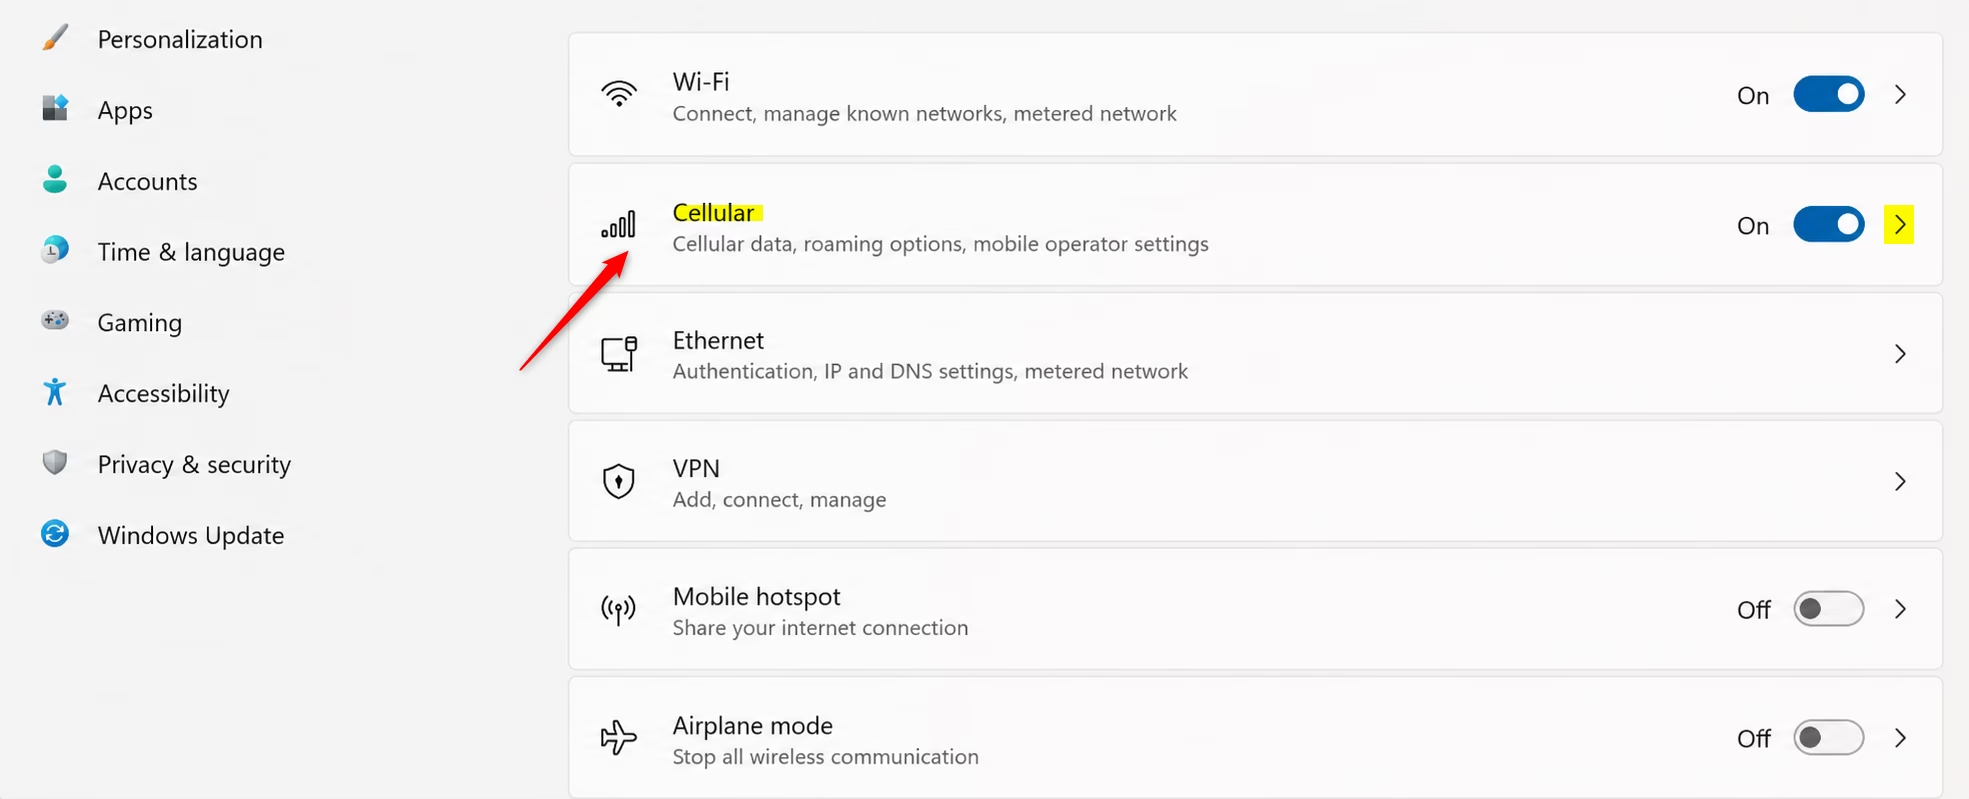
- Open the Start menu and type “Settings”. Open the Settings app from the results.
- Go to Settings Network & internet Cellular
You should see the cellular page for your device. If there is no Cellular entry in the list, the device has no cellular modem, or Windows has not detected it.
Select the SIM
To select the SIM for Windows 11 cellular data:
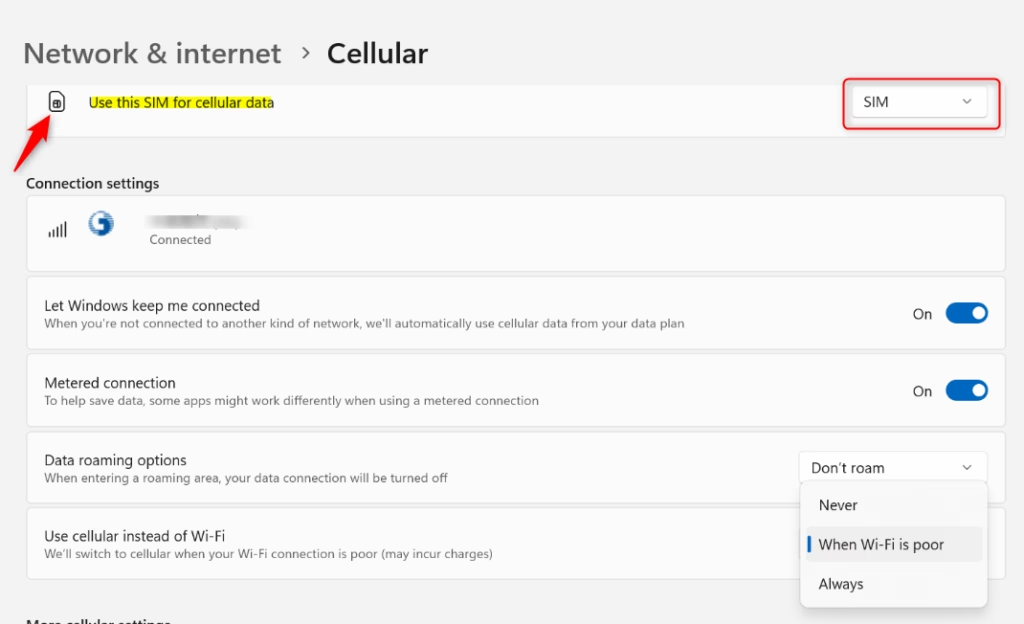
- On the Cellular page, find the Use this SIM for cellular data option.
- Open the list and pick the profile you want. Windows now sends cellular data through that SIM.
This option only appears if the computer supports two SIMs at once, for example a physical SIM plus an eSIM. To go back, open the same list and choose the original profile.
The option stays hidden unless the device supports both a physical SIM and an eSIM.
Reference:
Summary
Setting up cellular data with a SIM or eSIM keeps Windows 11 online away from routers. Insert the SIM or activate the eSIM profile, turn on Cellular in quick settings, and choose the preferred network source in Settings. If something does not work, check the plan with your mobile operator first, then the APN details.
Have a question about this guide?
Answered by AI from this guide. Good questions may be added to this page — please don't include personal details.
Did this guide fix your problem?

About the Author
Richard
Tech Writer, IT Professional
Richard is a writer at Geek Rewind who turns complex IT tasks into clear, step-by-step guides. He draws on years of hands-on experience in system administration and enterprise IT operations, focusing on Windows, Linux and WordPress: the problems people actually run into, and the fixes that work. His server and WordPress guides come from systems he runs himself. Richard builds and maintains the platform behind Geek Rewind, from its Ubuntu servers and Nginx configuration to its custom WordPress plugins. Many new tutorials start with readers' questions, and he's always glad to answer them in the comments.
No comments yet — be the first to share your thoughts!