How to Enable or Disable Automatically Find Additional Relevant Search Index Locations in Windows 11


Automatically find additional relevant search index locations in Windows 11 is a built-in search feature that watches your file activity and adds folders outside your usual spots to the search index. This background tool speeds up content searches for documents, pictures, and other items by cutting out the need to manually add every single folder.
Recent updates to Windows 11 include this automatic discovery option so you can find files faster without extra setup. You can turn this search feature on or off at any time depending on whether you want Windows scanning your extra drives and folders.
To enable or disable automatic search indexing, go to Settings Privacy & security Search. Toggle the “Automatically find additional relevant locations for what you want” option on or off. This feature expands Windows search to include more file locations based on your usage.
Turning On Automatic Search Indexing
Want Windows to offer more assistance with your searches? Here’s how to enable the feature that automatically finds important file locations.
Step 1Open Windows Settings
Press the Win+I to open Settings .
Alternatively, click the Start button (typically a Windows logo in the bottom-left corner) and then select the Settings gear icon. It might appear on the Start menu , or you may need to click “All apps” to find it.

Step 2Go to Privacy & Security
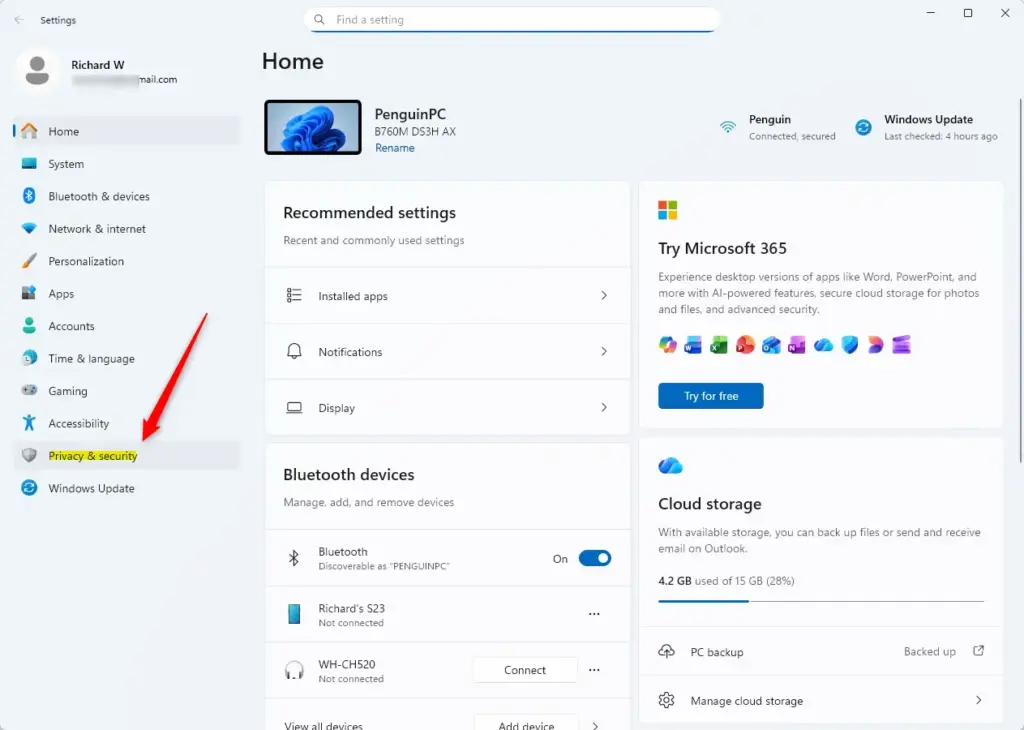
Click Privacy & security on the left menu.
Step 3Find the Search Settings
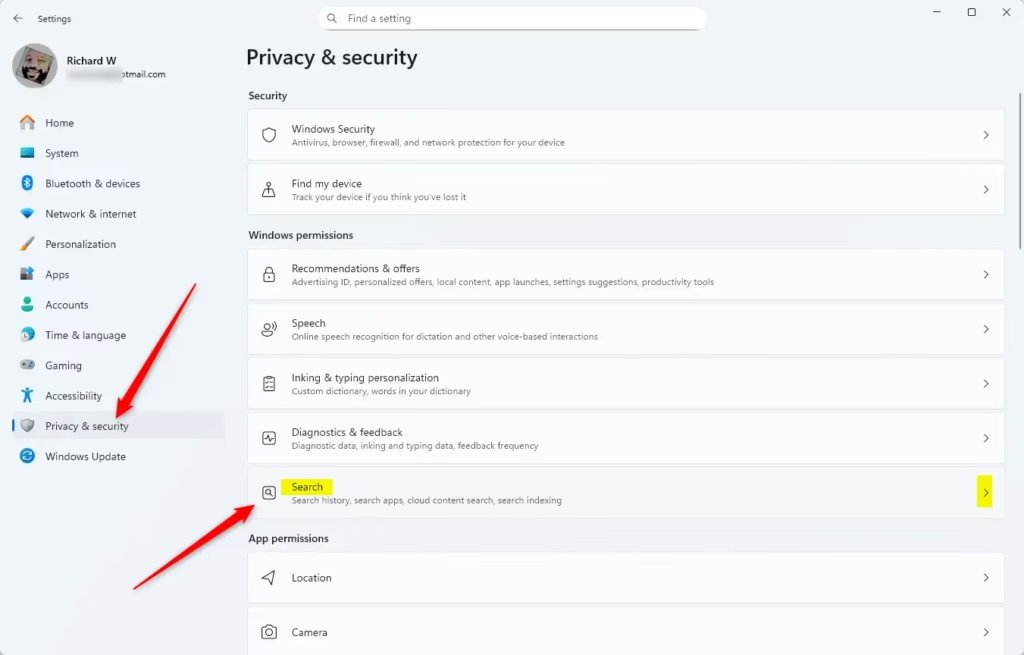
After you click Privacy & security in the Settings window, scroll down the list of options on the right side to find and click Search. This opens the specific settings for Windows search functionality.
Step 4Activate Automatic Indexing
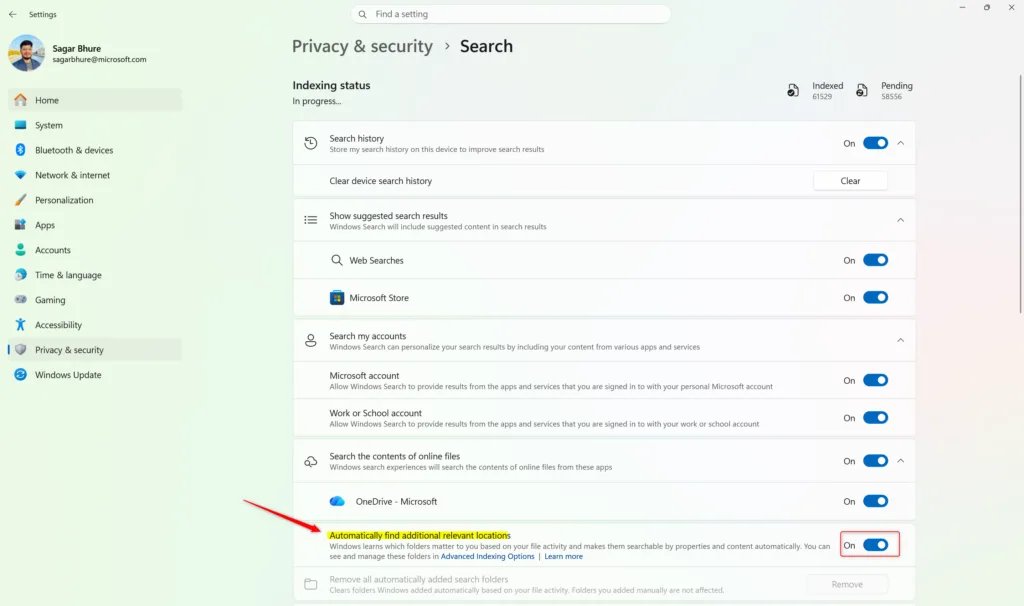
Windows 11 search indexing lets your PC automatically find additional relevant locations to make file searching faster and more thorough. You can turn this feature on by opening Windows Search settings and switching the automatic indexing option to on. This helps your computer check more folders on your hard drive when you look for files.
This setting is usually turned On by default in newer versions of Windows 11. If it's already on, your PC works to expand its search index based on your activity. If you want to turn it on and it's off, click the switch so it shows On.
This search setting allows Windows to review your file activity to make searching faster. If you have privacy concerns about this data collection, leave this setting Off.
Step 5Close Settings
After you set the switch to your preference (On or Off), close the Settings window. Your changes apply immediately.
References:
Summary
Windows 11 can automatically index more file locations based on how you use your PC, making searches faster and easier. To control this feature, go to Settings Privacy & security Search and toggle the Automatically find additional relevant locations for what you want option on or off.
Was this guide helpful?

About the Author
Richard
Tech Writer, IT Professional
Richard is a writer at Geek Rewind who turns complex IT tasks into clear, step-by-step guides. He draws on years of hands-on experience in system administration and enterprise IT operations, focusing on Windows, Linux and WordPress: the problems people actually run into, and the fixes that work. His server and WordPress guides come from systems he runs himself. Richard builds and maintains the platform behind Geek Rewind, from its Ubuntu servers and Nginx configuration to its custom WordPress plugins. Many new tutorials start with readers' questions, and he's always glad to answer them in the comments.


No comments yet — be the first to share your thoughts!