How to Enable or Disable Folder Options in Windows 11
This guide explains how to turn the File Explorer Folder Options on or off in Windows 11. These steps are for Windows 11 version 22H2 and newer.
Open File Explorer, click the three-dot menu, and select Options. To disable Folder Options, use the Group Policy Editor or Registry Editor to set specific policies or registry values.
How to Access Folder Options in 🪟 Windows 11
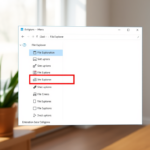
You can easily access Folder Options in Windows 11 to change how your files and folders look and work. This lets you do things like show hidden files or decide how items open. To open Folder Options, just open File Explorer, click the three dots (…) at the top, and then pick Options from the menu.
To open Folder Options, follow these steps:
- Open File Explorer from your taskbar.
- Click the three-dot menu (…) at the top of the window.
- Select Options from the dropdown list.
- The Folder Options dialog box will appear.
For more details on basic navigation, visit the official Microsoft support page.
Why is the Folder Options menu missing?
The Folder Options menu might be missing or grayed out in Windows 11 if a system administrator has restricted access, often as a security policy on work or school computers.
How to fix Folder Options not opening
If your Folder Options menu isn’t opening in Windows 11, you can often fix it by checking and correcting specific registry settings, but be sure to back up your registry first.
Method 1Disable or Enable Folder Options Using Group Policy Editor
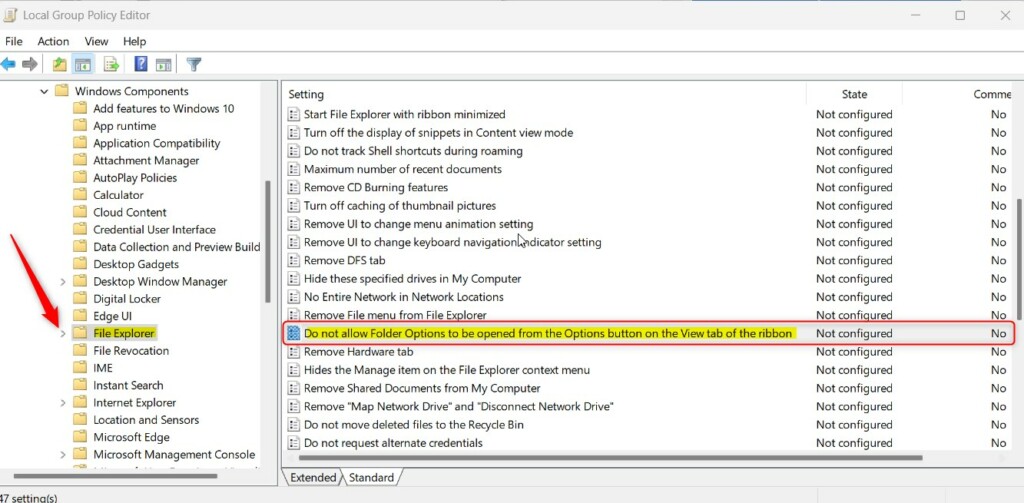
You can disable or enable Folder Options in Windows 11 using the Group Policy Editor, which is helpful if you manage a computer with multiple users. This method lets you control access to Folder Options. To start, press ⊞ Win+R, type gpedit.msc, and press Enter to open the editor, then go to User Configuration\Administrative Templates\Windows Components\ File Explorer.
- Press ⊞ Win+R, type
gpedit.msc, and press Enter. - Navigate to:
User Configuration\Administrative Templates\Windows Components\File Explorer. - Locate Do not allow Folder Options to be opened from the Options button on the View tab of the ribbon.
- Double-click it. Select Enabled to hide the menu or Disabled to show it.
- Click OK.
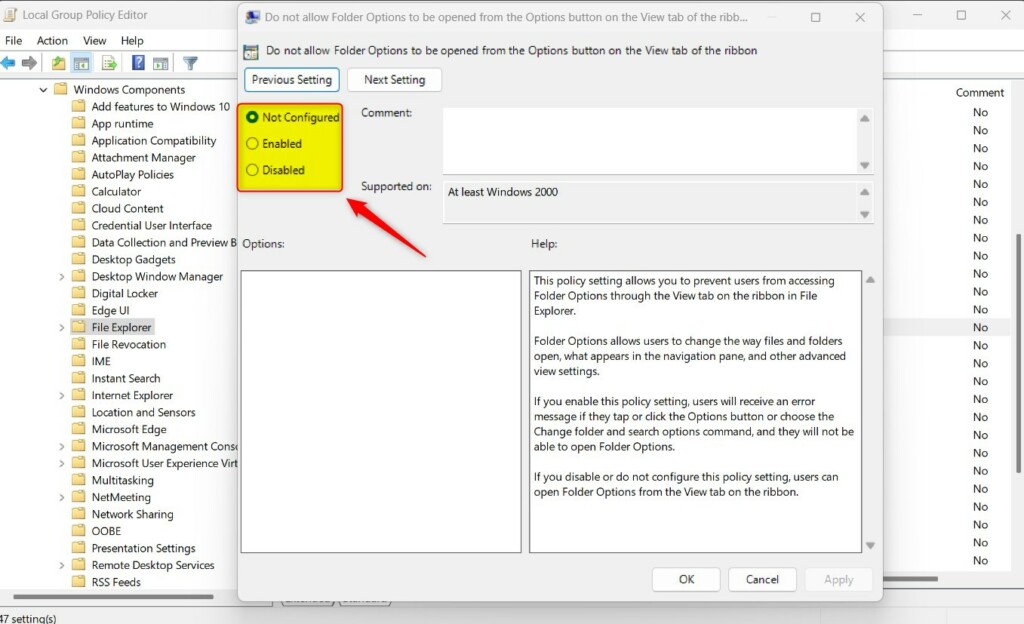
What happens when done: The Folder Options menu will either appear or vanish from the File Explorer ribbon immediately.
Method 2Disable or Enable Folder Options Using Registry Editor
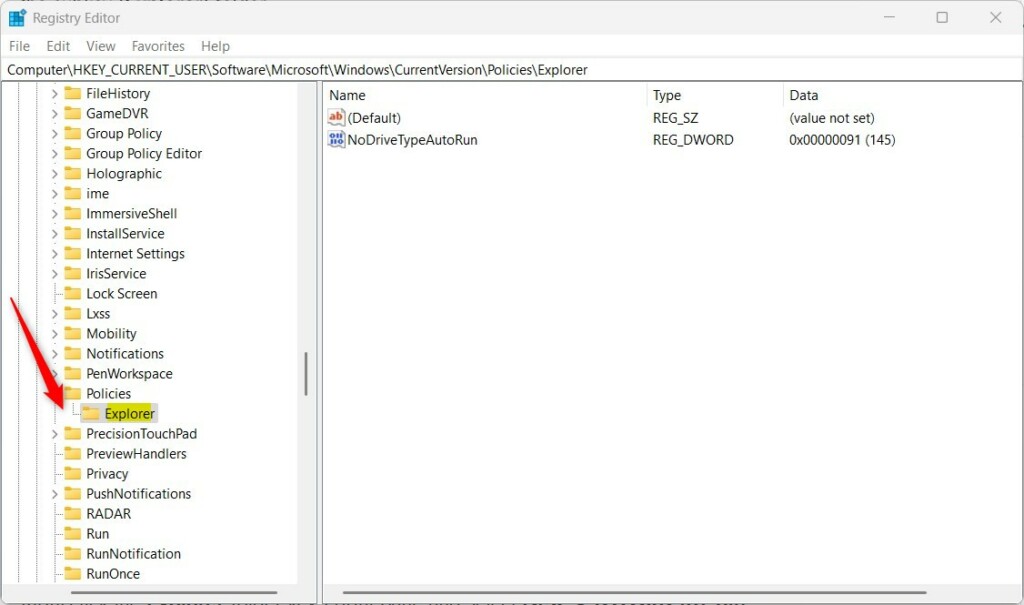
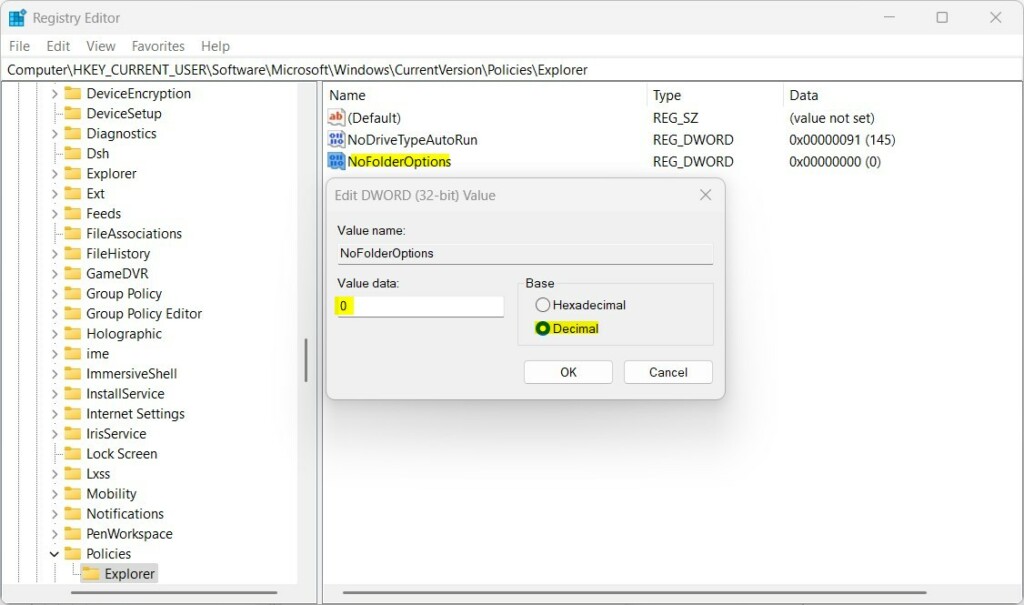
If the Group Policy Editor isn’t available, you can disable or enable Folder Options in Windows 11 using the Registry Editor, but you’ll need administrator rights. This method involves making changes to specific registry keys. To begin, press ⊞ Win+R, type regedit, and press Enter, then navigate to 🗝️HKEY_CURRENT_USER\Software\Microsoft\Windows\CurrentVersion\Policies\Explorer.
- Press ⊞ Win+R, type
regedit, and press Enter. - Go to:
HKEY_CURRENT_USER\Software\Microsoft\Windows\CurrentVersion\Policies\Explorer. - If the Explorer key is missing, right-click Policies, select New > Key, and name it
Explorer. - Right-click the right pane, select New > DWORD (32-bit) Value, and name it
NoFolderOptions. - Double-click
NoFolderOptionsand set the value to0to enable or1to disable.
What happens when done: Your changes will apply after you restart your PC or restart the Windows Explorer process via Task Manager.
Summary
This guide showed you how to turn Folder Options on or off in Windows 11 using the Group Policy Editor or Registry Editor, giving you control over file view settings.
How do I show hidden files if Folder Options is disabled?
If Folder Options is disabled by an administrator, you cannot easily toggle hidden files through the menu. You may need to contact your system administrator to request access. Alternatively, if you have administrative rights, you can re-enable the menu using the Registry Editor or Group Policy steps provided above.
Was this guide helpful?

About the Author
Richard
Tech Writer, IT Professional
Richard, a writer for Geek Rewind, is a tech enthusiast who loves breaking down complex IT topics into simple, easy-to-understand ideas. With years of hands-on experience in system administration and enterprise IT operations, he’s developed a knack for offering practical tips and solutions. Richard aims to make technology more accessible and actionable. He's deeply committed to the Geek Rewind community, always ready to answer questions and engage in discussions.


[…] can also use open the File Explorer Options to adjust these settings. Open File Explorer, select the View tab, and check or uncheck the box […]