How to Open and Edit Windows 11 Registry

You open and edit the Windows 11 Registry using the built-in Registry Editor application to modify system settings and configurations.
The Registry is a hierarchical database that stores low-level settings for the Microsoft Windows operating system and for applications that opt to use the registry. It acts as the central nervous system for your PC, controlling everything from appearance to advanced system functions.
You might need to access the Registry to troubleshoot persistent issues, unlock hidden Windows 11 features, or fine-tune performance. For instance, a specific tweak might involve changing a value under `🗝️HKEY_CURRENT_USER\Control Panel\Desktop`.
Remember, the Registry is incredibly powerful and can destabilize your system if you edit incorrect entries. Always create a backup of your Registry before making any changes to ensure you can restore your PC if something goes wrong.
Open Registry Editor by searching for it in the Start menu. Navigate to the desired key using the folder structure or the address bar. Double-click a value to edit it, or select it and press Del to remove it.
How to open the Registry Editor
To open the Registry Editor on Windows 11, simply click the Start button and type ‘Registry Editor’ into the search box. The app will appear in the search results, and you can click on it to open the editor window.
- Click the Start menu.
- Type Registry Editor in the search bar.
- Click the Registry Editor app from the results.
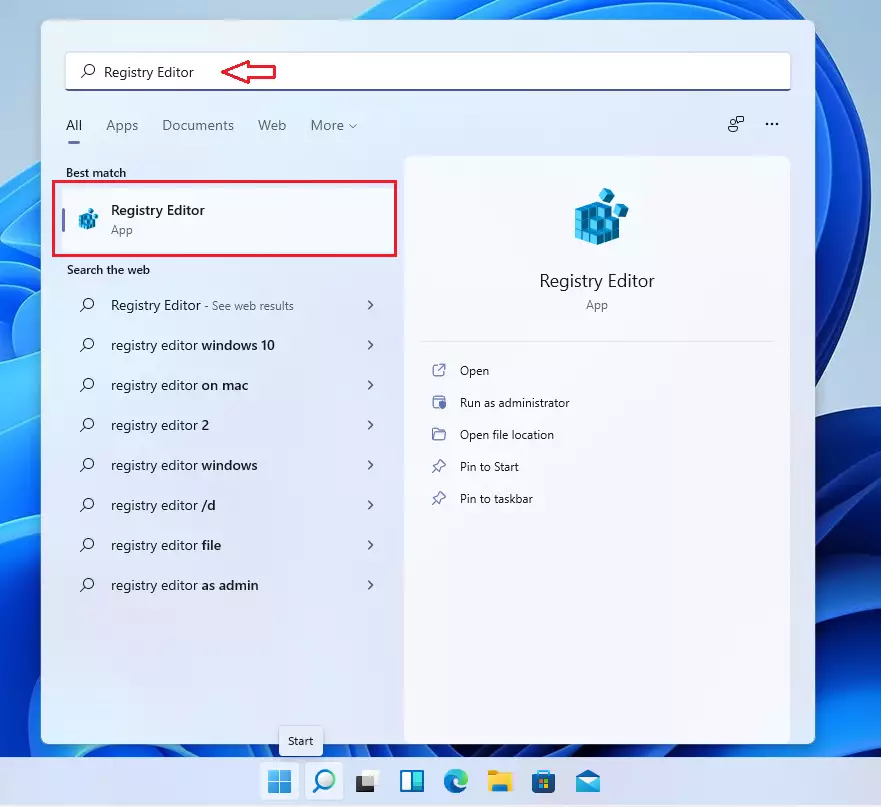
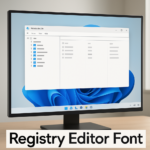
The editor window will open. It will look like a set of folders on the left side of your screen.
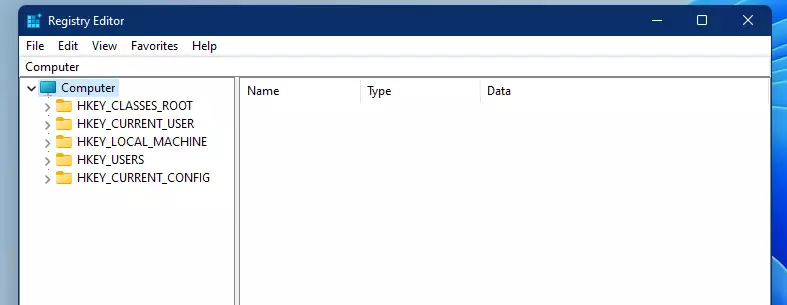
How to browse the registry
Browsing the Windows 11 registry involves navigating through its folder-like structure to find specific settings. You can manually click through the folders or, for quicker access, paste a direct registry path like `HKEY_CURRENT_USER\Software\Microsoft\Windows\CurrentVersion\Run` into the address bar at the top and press Enter to go straight to that location.
Users can copy and paste the registry path `HKEY_CURRENT_USER\Software\Microsoft\Windows\CurrentVersion\Run` into the navigation bar of the Registry Editor and then press Enter to access startup program settings. This action allows immediate access to a specific section of the Windows 11 Registry.
Computer\HKEY_LOCAL_MACHINE\SOFTWARE\Microsoft\Windows NT\CurrentVersion\SoftwareProtectionPlatform
Registry folders contain lists of values. These values represent actual computer settings. Changing these settings can alter how Windows 11 works. For example, a specific value might control whether a certain feature is turned on or off.
How to edit or delete a value
- To edit: Double-click the name of the setting you want to change. A box will pop up where you can type your new value.
- To delete: Click the item name once to highlight it, then press the DELETE key on your keyboard.
Summary
How do I get to the registry editor in 🪟 Windows 11?
To open the Registry Editor, click the Start button and type 'Registry Editor' in the search bar. Then, click on the 'Registry Editor' app that appears in the search results. This will open the tool where you can view and change system settings.
How do I edit a Windows registry?
You edit the Windows registry using the Registry Editor tool. Navigate to the specific setting you want to change by clicking through the folders. Double-click the item you want to modify, enter the new value, and click 'OK'. Always back up your registry first.
Why can't I find the registry editor?
The Registry Editor is usually found by searching for 'Registry Editor' in the Start menu. If you can't find it, it might be an issue with your Windows installation. Ensure you are searching correctly. It's a powerful tool, so it's not always prominently displayed.
How to correct registry errors in 🪟 Windows 11?
Windows 11 does not have a built-in tool to automatically correct registry errors. It is generally recommended to avoid editing the registry unless you know exactly what you are doing. If you suspect errors, restoring from a backup or reinstalling Windows might be necessary.
Was this guide helpful?
0% of readers found this helpful (1 votes)

About the Author
Richard
Tech Writer, IT Professional
Richard, a writer for Geek Rewind, is a tech enthusiast who loves breaking down complex IT topics into simple, easy-to-understand ideas. With years of hands-on experience in system administration and enterprise IT operations, he’s developed a knack for offering practical tips and solutions. Richard aims to make technology more accessible and actionable. He's deeply committed to the Geek Rewind community, always ready to answer questions and engage in discussions.

No comments yet — be the first to share your thoughts!