How to Hide Office.com Files in Windows 11 File Explorer
Hiding Office.com files in Windows 11 File Explorer’s Home view removes clutter by stopping it from showing files saved online with your Microsoft account.
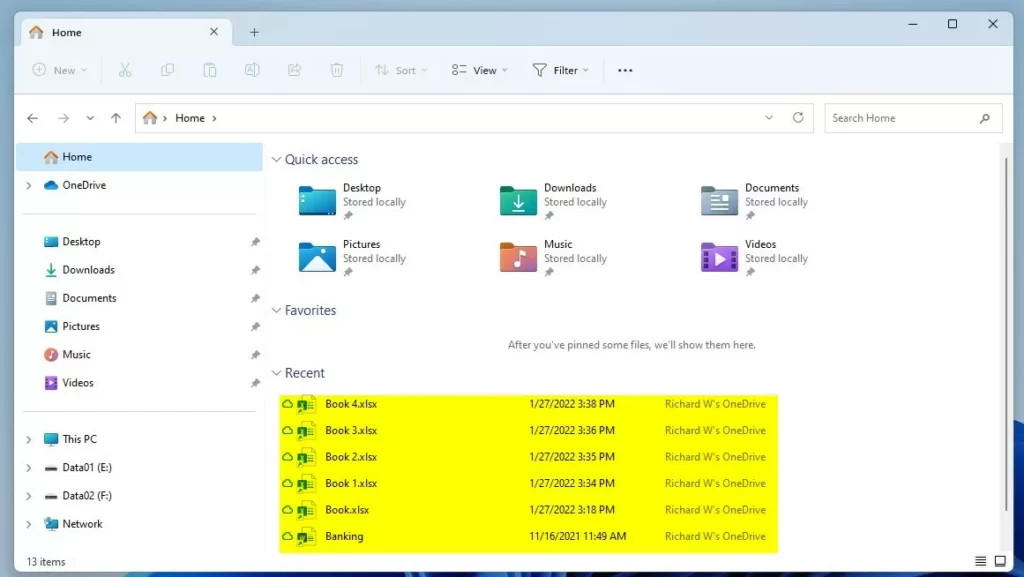
File Explorer’s Home screen often shows recent documents from both your PC and cloud storage, which can make it harder to find what you need. Windows 11, by default, displays these cloud files prominently.
You can easily change this setting to make your file view cleaner. This tutorial shows you how to turn off this feature so only your local files appear in the Home view.
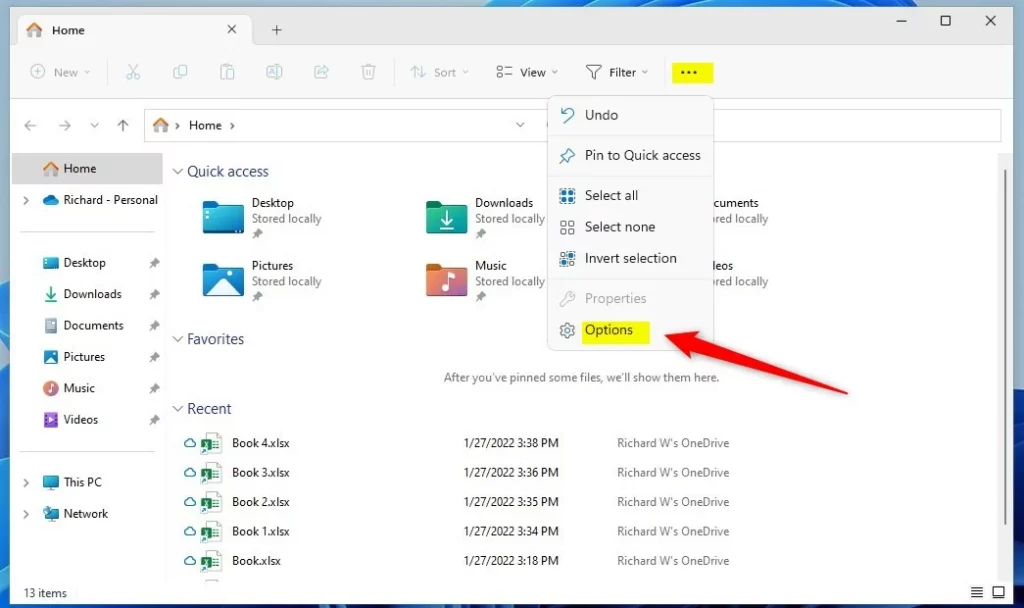
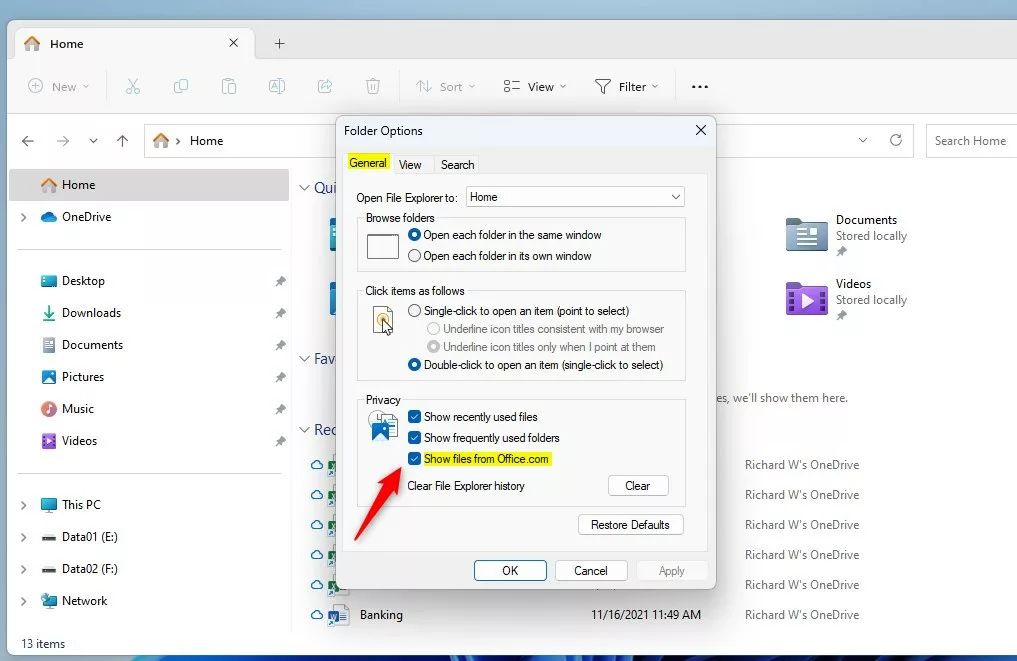
To hide Office.com files in Windows 11 File Explorer, open File Explorer, click the three dots (…), select Options, and uncheck “Show files from Office.com” under the Privacy section. Save the changes by clicking OK.
Why Manage Office.com Files?
Windows 11 File Explorer’s Home view often shows cloud-based file suggestions from your Microsoft 365 account. While helpful for some, others might find it distracting or a privacy concern. Adjusting these settings lets you clean up your workspace and keep your personal and work files separate.
What happens when you are done?
Disabling the Office.com file settings prevents Office.com files from appearing on your File Explorer Home page. This action does not delete files from the cloud. Instead, it stops Windows from showing suggestions for these files within your local file manager.
Method 1Using Folder Options
You can hide Office.com files in Windows 11 File Explorer for your account by adjusting a setting in Folder Options. This method controls the visibility of Office.com files without affecting other users on the computer, keeping your File Explorer view cleaner.
- Open File Explorer.
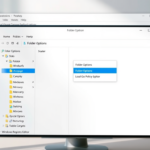
- Click the three dots (...) in the top menu and select Options.
- Under the General tab, look for the Privacy section.
- Check or uncheck the box labeled Show files from Office.com.
- Click OK to save.
Method 2Using Local Group Policy Editor (Admin Required)
To hide Office.com files in File Explorer for all users on a computer, you can use the Local Group Policy Editor, which requires administrator access. This setting change applies system-wide, ensuring that Office.com files are not shown for anyone logged into the PC.
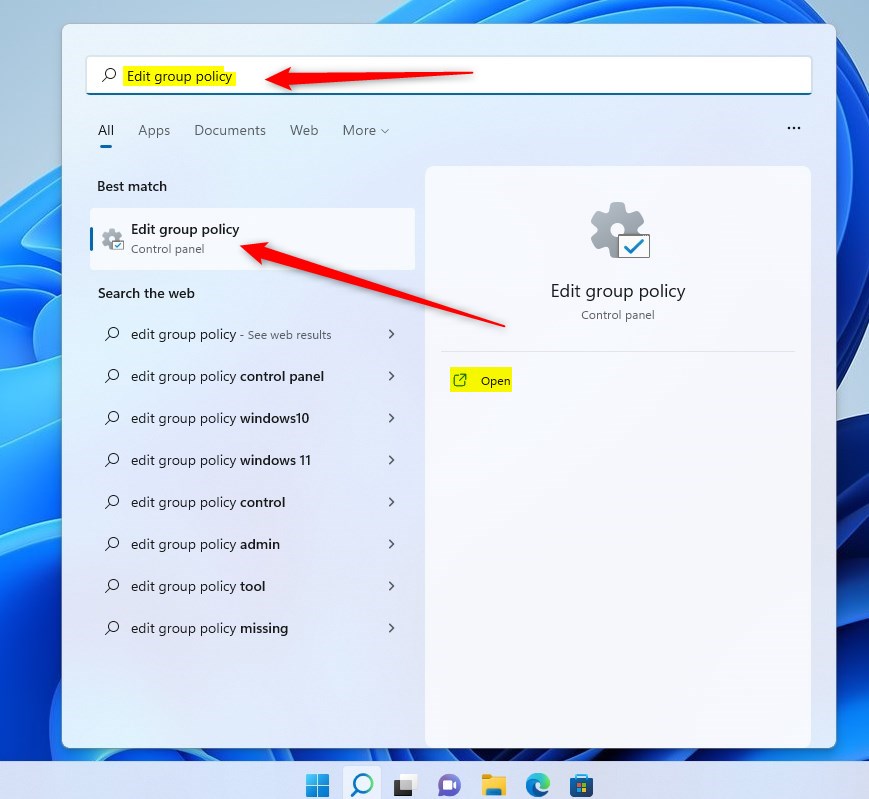
- Press the Windows key and search for Edit group policy. Select the result.
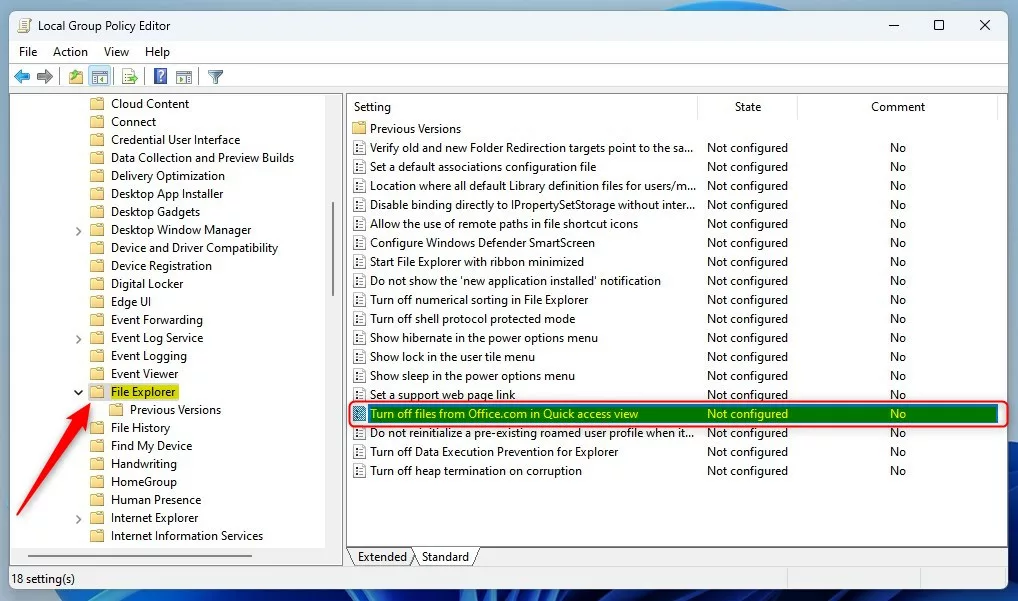
- Navigate to: Computer Configuration > Administrative Templates > Windows Components > File Explorer.
- Find the setting named Turn off files from Office.com in Quick access view and double-click it.
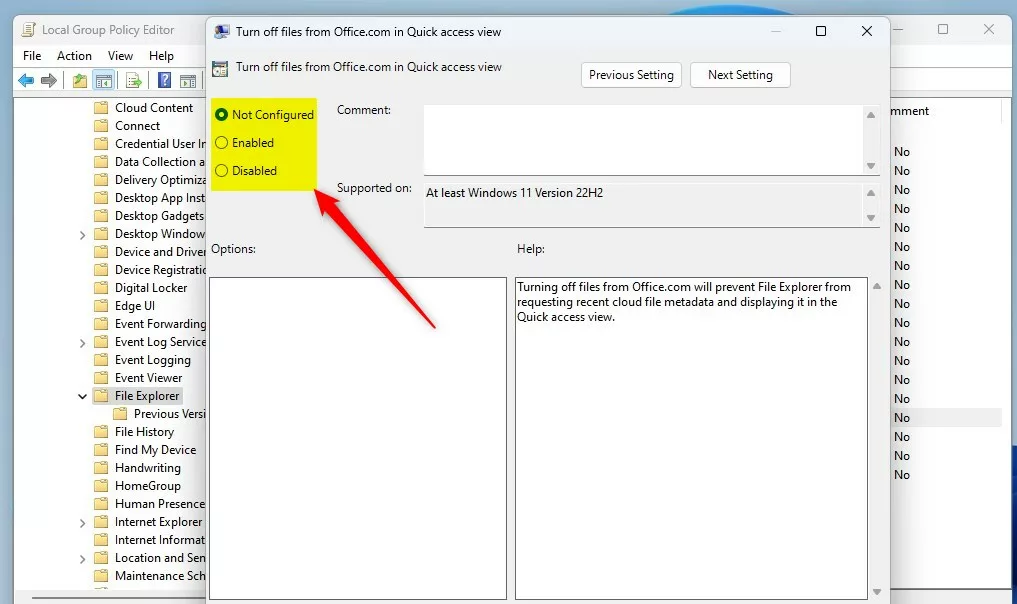
- Choose Enabled to hide the files or Disabled to show them.
- Click OK and restart your computer.
Method 3Using the Windows Registry (Admin Required)
To hide Office.com files in File Explorer when the Group Policy Editor is unavailable, you can make a change in the Windows Registry, which requires administrator rights. This registry change offers an alternative method to manage Office.com files when Group Policy is not an option, providing control over file visibility within File Explorer.
- Press the Windows key, type
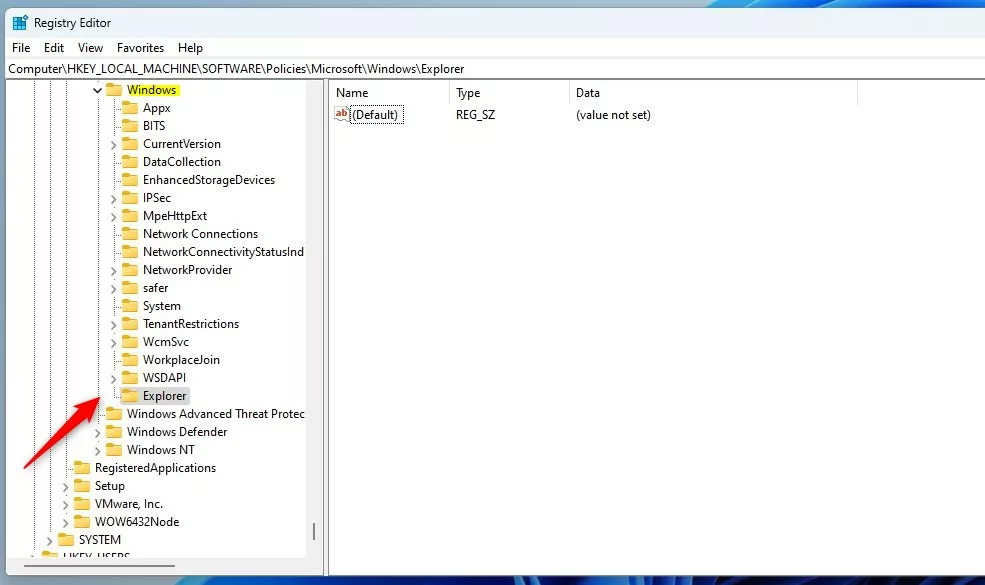
regedit, and press Enter to open the Windows Registry. - Go to the following path:
HKEY_LOCAL_MACHINE\SOFTWARE\Policies\Microsoft\Windows\Explorer - If the Explorer folder does not exist, right-click the Windows folder, select New > Key, and name it
Explorer. - Right-click in the empty space on the right, select New > DWORD (32-bit) Value, and name it
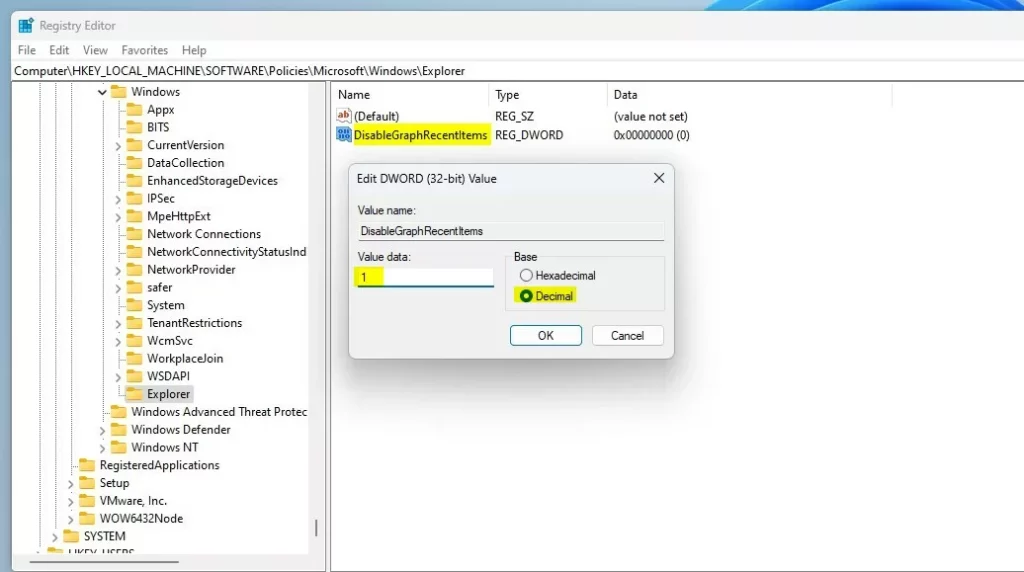
DisableGraphRecentItems. - Double-click
DisableGraphRecentItems. Set the value to1to hide the files, or0to show them. - Restart your computer to apply the changes.
Troubleshooting Sync and Updates
Sometimes, Office.com files might reappear in File Explorer after a Windows update because your settings get reset.
Summary
You can manage Office.com files in Windows 11 File Explorer to keep your Home view clean and organised.
Does disabling Office.com files delete the files from the cloud?
No, disabling this setting does not delete your files. It only removes the shortcut links from your File Explorer Home view. Your documents remain safely stored in your OneDrive or SharePoint cloud storage, and you can still access them through your web browser or the Office application.
Is this setting specific to Microsoft 365 Personal or Business accounts?
This setting applies to both Microsoft 365 Personal and Business accounts. If you are signed into Windows with a Microsoft account, the File Explorer Home page will attempt to show recent cloud-based file recommendations regardless of the subscription tier, provided the integration is enabled in your privacy settings.
Was this guide helpful?

About the Author
Richard
Tech Writer, IT Professional
Richard, a writer for Geek Rewind, is a tech enthusiast who loves breaking down complex IT topics into simple, easy-to-understand ideas. With years of hands-on experience in system administration and enterprise IT operations, he’s developed a knack for offering practical tips and solutions. Richard aims to make technology more accessible and actionable. He's deeply committed to the Geek Rewind community, always ready to answer questions and engage in discussions.

No comments yet — be the first to share your thoughts!