How to Show or Hide File Extensions in Windows 11 File Explorer
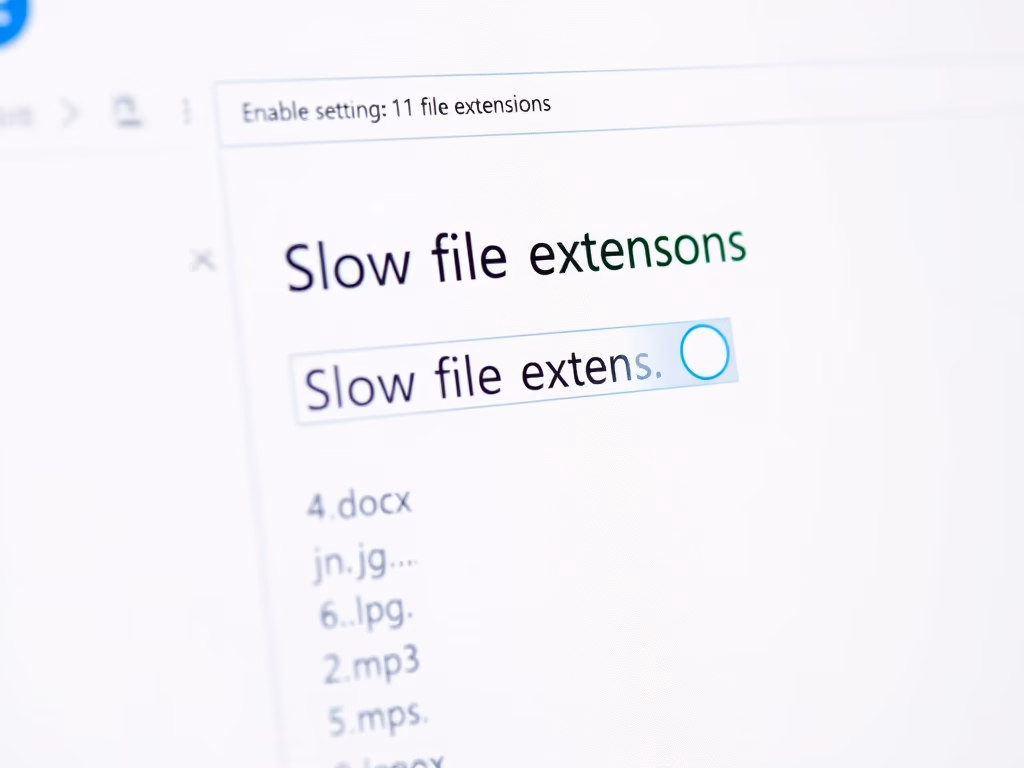
Showing or hiding file extensions in Windows 11 lets you see those little dots and letters at the end of filenames, like “.txt” or “.jpg”. These extensions tell you what kind of file it is and which program opens it. For example, a photo might show as “Holiday.jpg” instead of just “Holiday”.
By default, Windows 11 hides these extensions to keep things tidy. However, showing them, like “.exe” for programs, can help you avoid mistakes. Renaming a file extension by accident could stop the file from opening.
You can easily change this setting in the File Explorer’s View options.
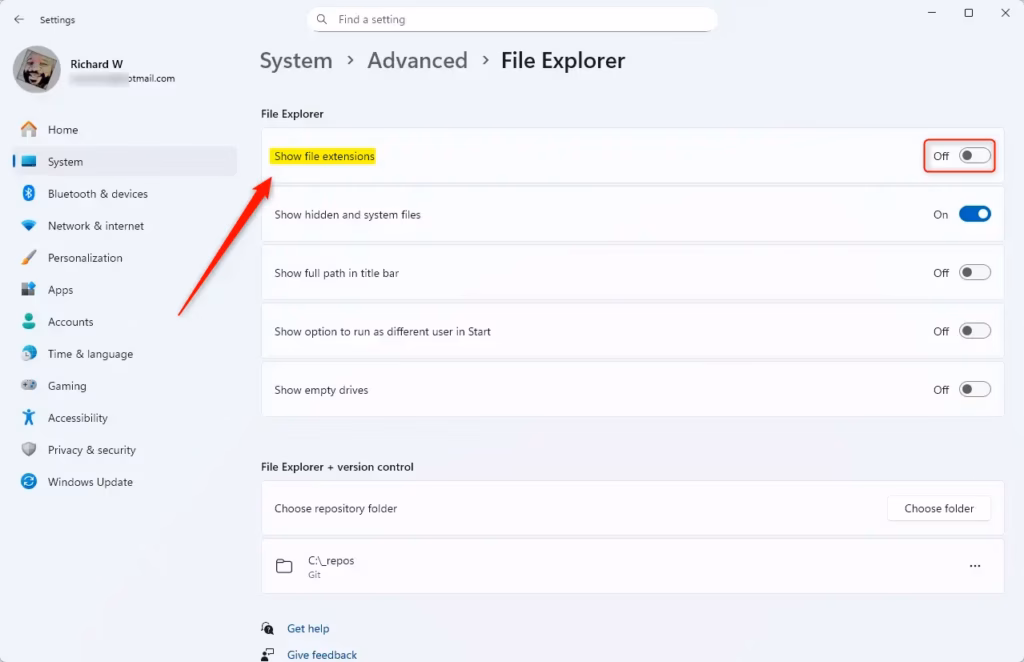
Open Settings, navigate to System > Advanced > File Explorer, and toggle on “Show file extensions.” This simple adjustment displays the file type, like .docx or .jpg, directly in File Explorer.
What is File Explorer?
File Explorer is the application for finding and organizing your computer’s files and folders. It also helps you open drives, USB sticks, and even shared folders on your network.
How to Show File Extensions Using Settings
Windows 11 File Explorer offers a setting to show or hide file extensions. Turning on file extensions reveals the actual file type, such as `.txt` for text files or `.docx` for Word documents, which helps users identify files more accurately. This setting is found within the Windows 11 Settings app.
Step 1 Open Settings
- Click the Start button (the Windows logo) at the bottom-left of your screen.
- Click Settings.
Or press the Windows key + I on your keyboard to open Settings quickly.
Step 2Go to System > Advanced
- In the Settings window, click System from the menu on the left.
- Scroll down on the right side.
- Click Advanced to open more options.
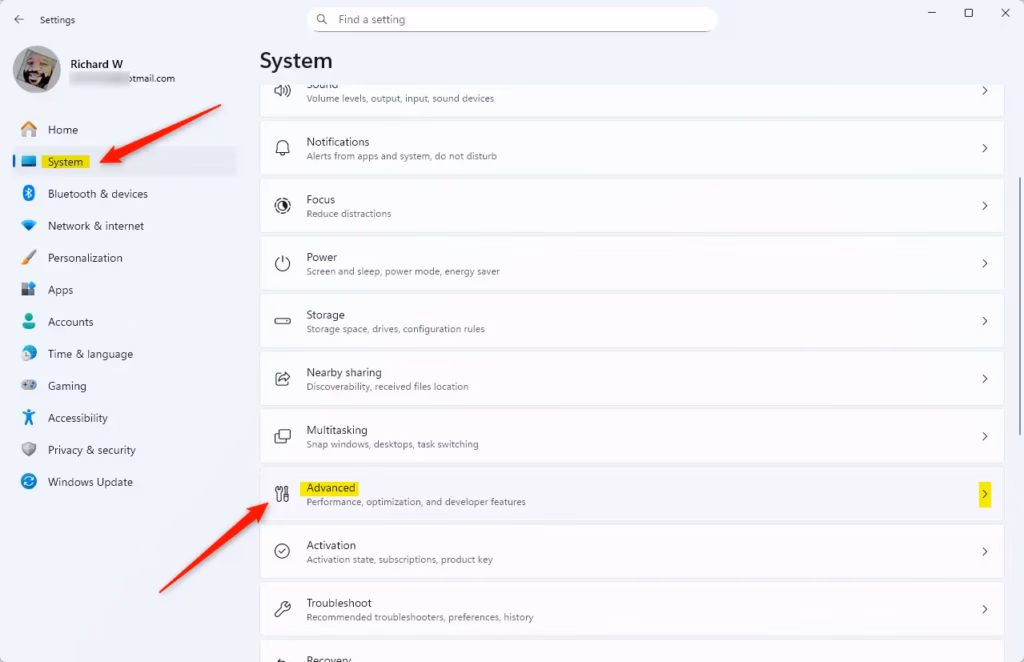
Step 3Find File Explorer Settings
- Under Advanced, look for File Explorer.
- Click to expand it.
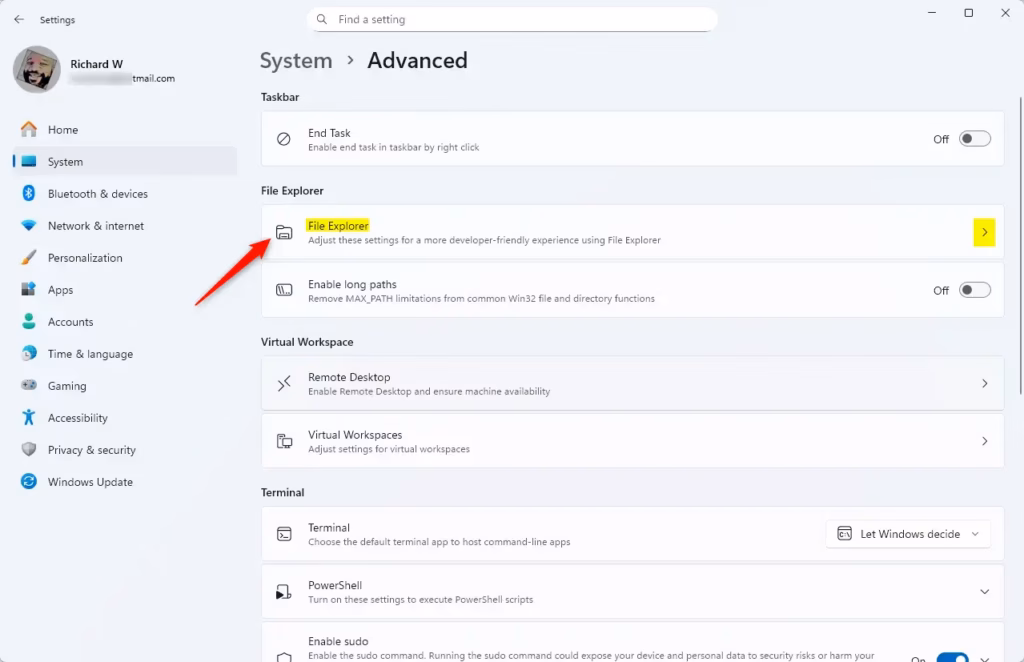
Step 4Turn On File Extensions
- Look for the option labeled “Show file extensions.”
- Click the switch to turn it On.
Step 5Close Settings
That’s it! You should now see file extensions right in File Explorer.
Other Ways to Show File Extensions
You can show or hide file extensions directly within Windows 11 File Explorer settings. This method lets you easily see what type of file you’re dealing with, like a document or a program, helping you manage your files better.
Why Show File Extensions?
Showing file extensions in Windows 11 helps you understand exactly what kind of file you’re dealing with. Knowing if a file is a picture, document, or program is important for avoiding mistakes and keeping your computer secure. This change makes it easier to identify files correctly. Let’s look at how to make it happen.- File extensions tell you exactly what type of file you’re looking at (like a picture, document, or program).
- It helps avoid confusion, so you don’t accidentally open the wrong kind of file.
- It makes managing your files easier and safer.
- Using the Settings app is quick and easy for anyone using Windows 11.
Summary
Showing file extensions in Windows 11 is quick. Open Settings, navigate to System > Advanced > File Explorer, and toggle on “Show file extensions.” Now you’ll see the type of each file, which helps you stay organized and safe. It only takes a few clicks!
How to force 🪟 Windows 11 to show file extensions?
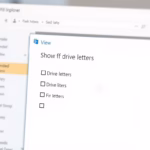
On your taskbar’s search box, type ‘ File Explorer.’ Then, in the results, select it. Once File Explorer is open, click ‘View,’ then ‘Show,’ and finally ‘File name extensions.’
How to add file extensions on 🪟 Windows 11?
To show file extensions on Windows 11, start by running the Windows File Explorer application. Then, select “View” → “Show” and ensure the “File name extensions” option is checked. With this option selected, you should be able to see the full file extensions in File Explorer.
Was this guide helpful?

About the Author
Richard
Tech Writer, IT Professional
Richard, a writer for Geek Rewind, is a tech enthusiast who loves breaking down complex IT topics into simple, easy-to-understand ideas. With years of hands-on experience in system administration and enterprise IT operations, he’s developed a knack for offering practical tips and solutions. Richard aims to make technology more accessible and actionable. He's deeply committed to the Geek Rewind community, always ready to answer questions and engage in discussions.


No comments yet — be the first to share your thoughts!