This article explains removing an image background using the Photos app in Windows 11.
The Microsoft Photos app is a built-in image viewer and editor that allows users to view, edit, and organize their photos and images. You can include and display your photos stored on OneDrive within the app.
The updated Photos app can remove an image background without a third-party tool. This is a built-in feature that is available for all users.
Removing an image background can be useful for a variety of reasons. For example, it can help you create visually appealing images for presentations, social media posts, or other projects. Removing the background can isolate the photo’s subject and create a cleaner, more professional look.
The Photos app in Windows 11 makes this process easy and accessible to all users without additional software or technical knowledge.
Remove an image background using the Photos app
As mentioned above, users can use the Microsoft Photos app to remove an image background without using a third-party tool.
Here’s how to do it.
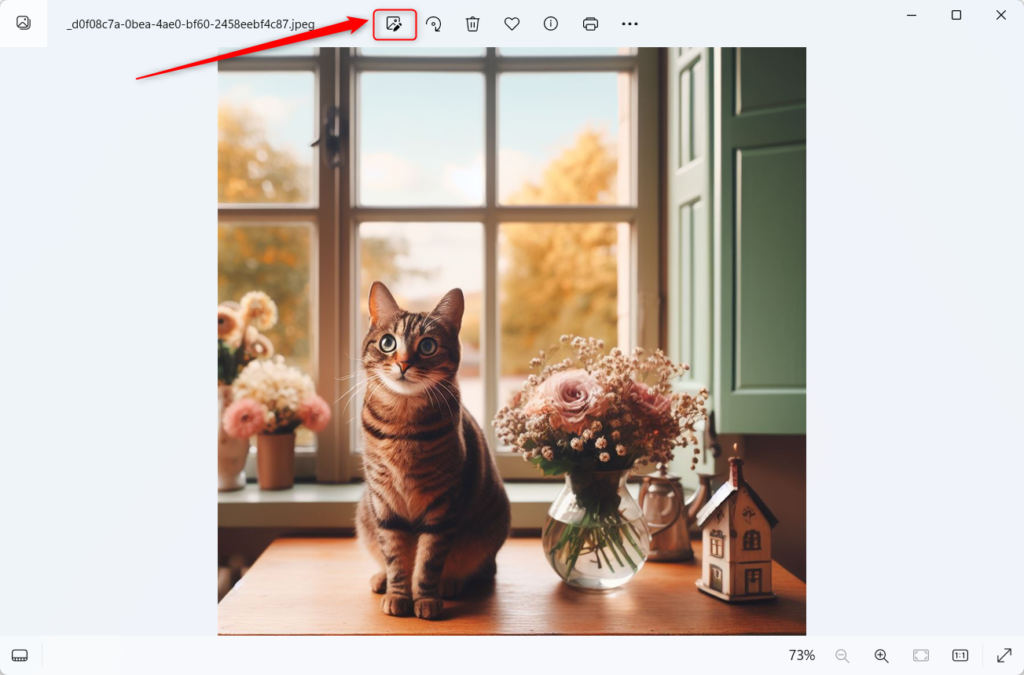
First, select the photo and open it using the Photos app. When the app opens, click the Edit image button on the toolbar or press the keyboard shortcut (Ctrl+E).

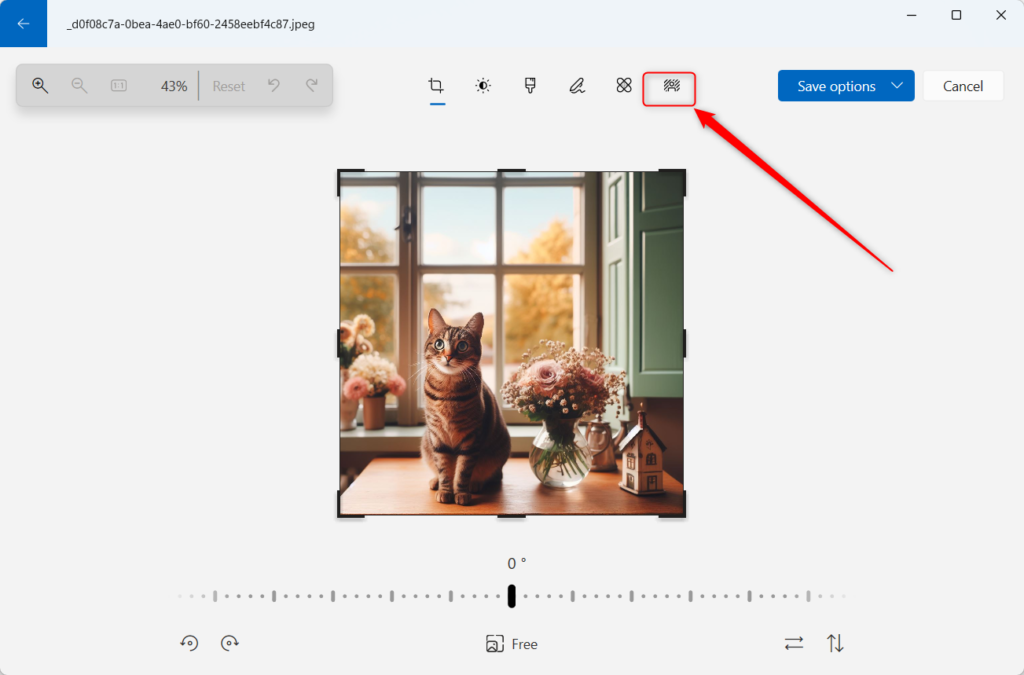
Next, on the Background tab on the toolbar.

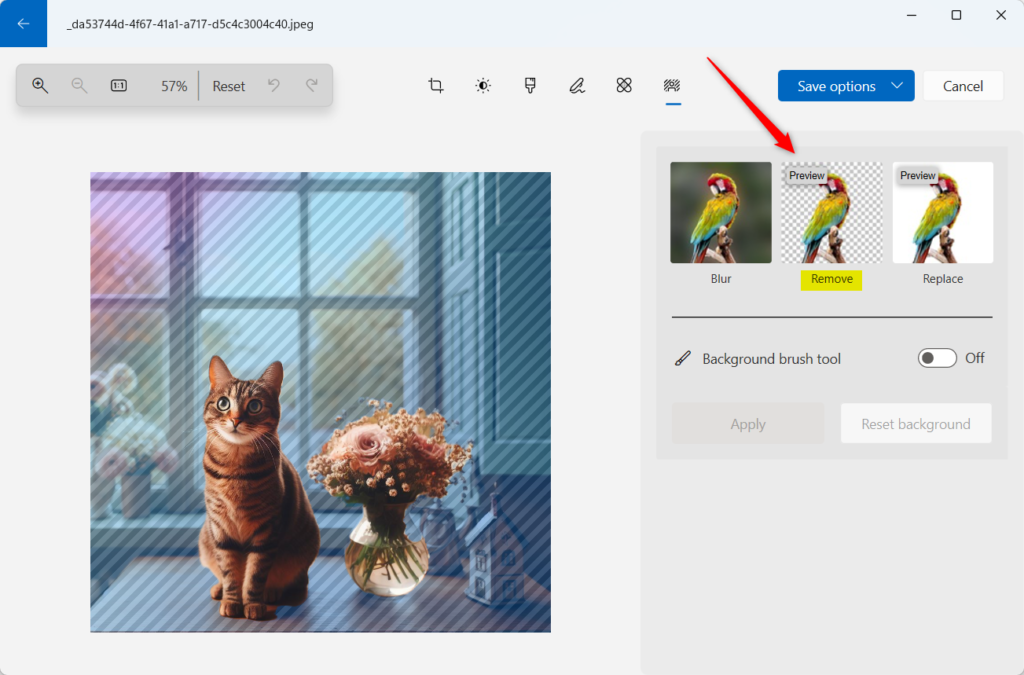
The Photos app will automatically start Finding the background of the image. When the image is in focus, click OK, then select Remove to remove the background.

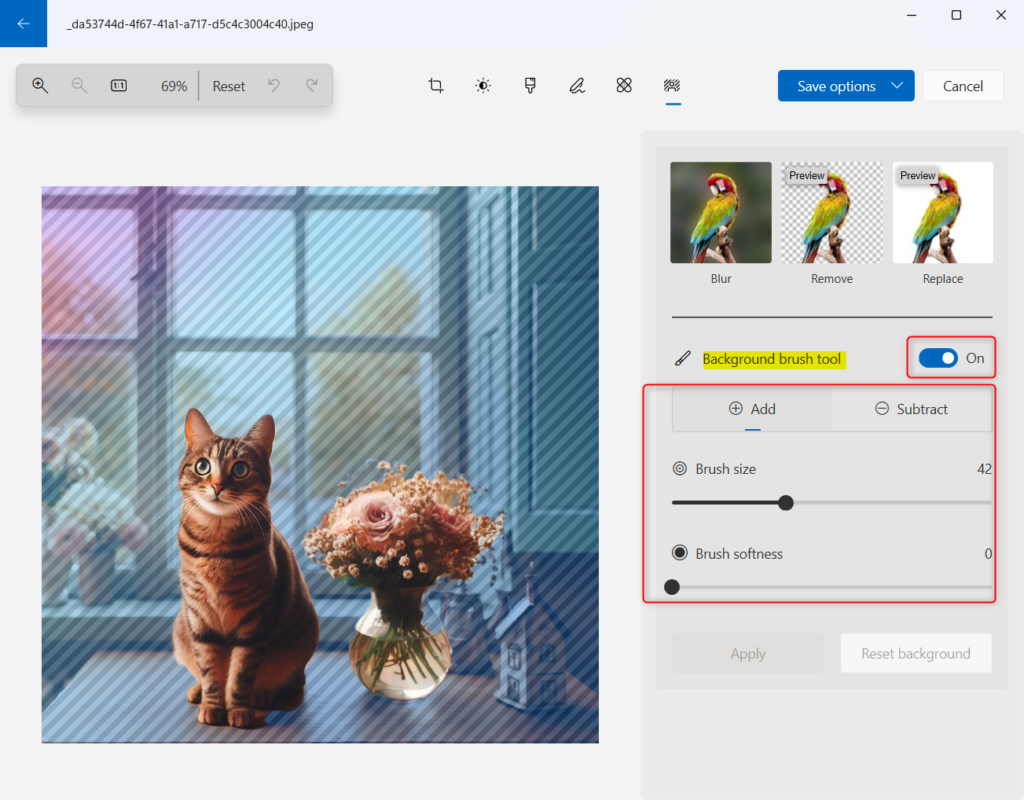
If you want to change the background area further, turn on the Background brush tool. Use the tool to Add or Subtract background areas and adjust the Brush size and softness level.

When you’re done, click the Apply button to save your changes. Finally, click the Save a copy to save your changes.
That should do it!
Conclusion:
- The Microsoft Photos app in Windows 11 offers a built-in feature to remove image backgrounds, eliminating the need for third-party tools.
- This functionality enables users to create visually appealing images for various purposes, such as presentations, social media, and other projects.
- With easy-to-follow steps, users can utilize the Photos app to isolate the subject of their photos and achieve a professional look without additional software or technical expertise.
- The process involves utilizing the Background tab, the Background brush tool, and the Apply and Save a copy buttons to make and save changes effectively.

Leave a Reply