How to Remove Image Backgrounds in Windows 11 Paint
Windows 11 Paint removes image backgrounds automatically using its AI feature.
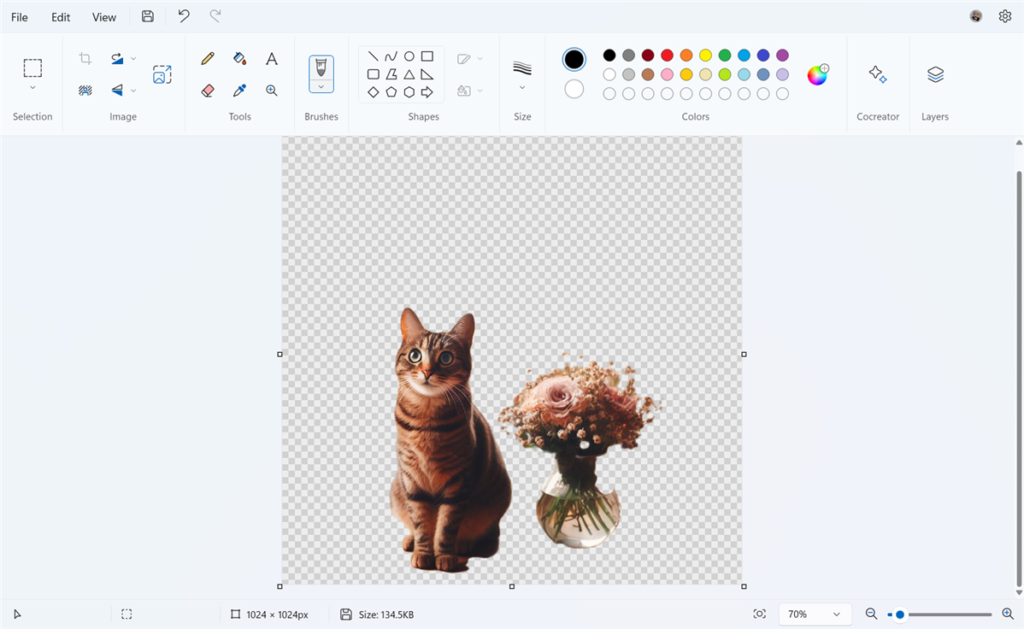
This tool finds and takes away the background of your pictures, leaving just the main subject with a clear, see-through area. This makes it easy to put your subject onto new backgrounds or use it in designs.
Microsoft added this smart background removal to Paint in late 2023. You no longer need complex programs to get a clean image, making quick edits simple.
Just open your picture in Paint, pick the Magic Wand tool, and click “Remove background.” Your image will be ready with a transparent background in a moment.
Open your image in Paint, then click the “Remove background” button on the top ribbon. Paint uses AI to automatically detect and erase the background. Save your image as a PNG to preserve transparency.
How to remove an image background
Removing an image background in Windows 11 Paint is possible using its handy ‘Remove background’ tool. Open your picture in Paint, click the ‘Remove background’ button on the top menu, and Paint will handle the rest automatically.
- Open the Paint app on your computer.
- Click on File and select Open. Choose your image file from File Explorer.
- Click the Remove background button on the top ribbon.
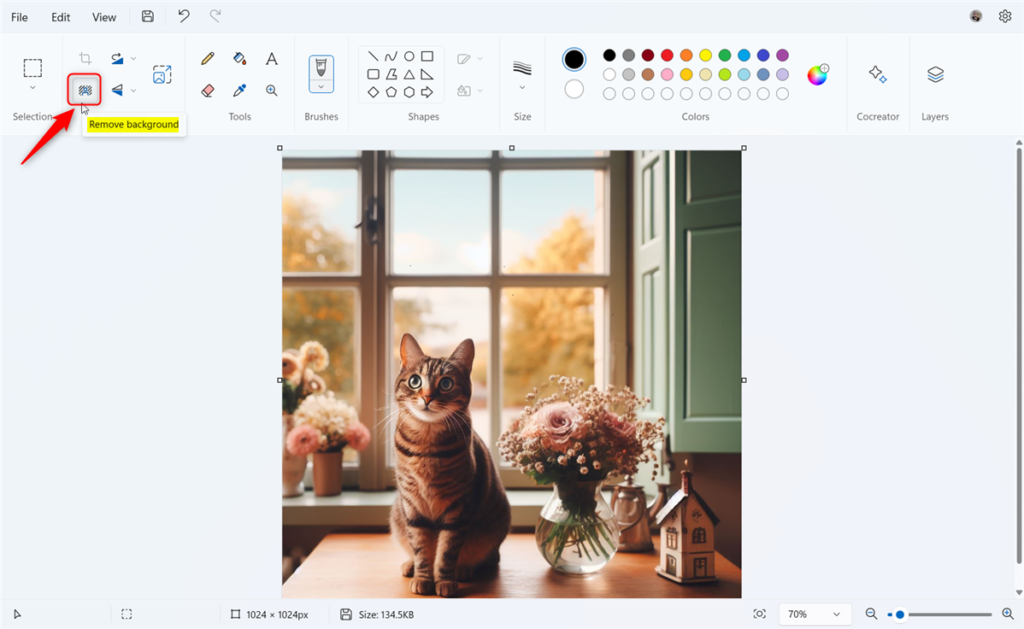
Paint will automatically detect and remove the background for you.
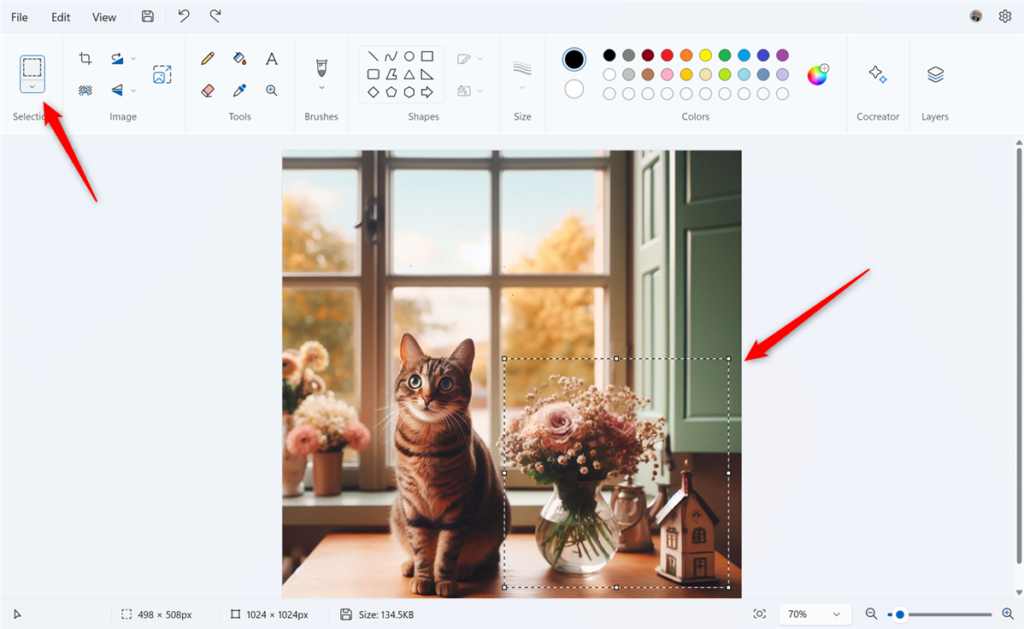
You can remove an image background from a specific part of an image by following these steps, ensuring only the desired section is affected.
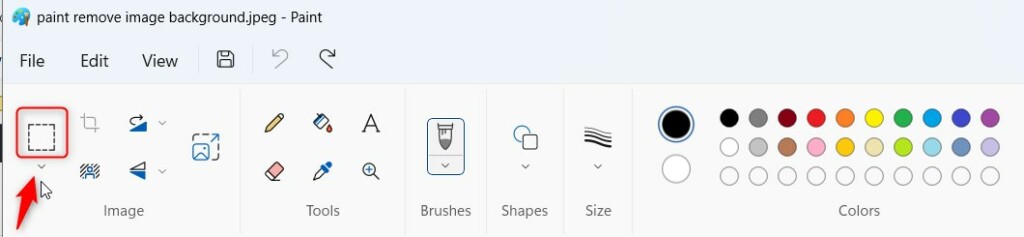
- Click the Select button on the ribbon.
- Draw a box around the object you want to keep.
- Click the Remove background button again.
Paint vs. Paint 3D and AI Tools
Windows 11’s Paint app offers a simple way to remove backgrounds. Paint 3D has a Magic Select tool for more detailed work, and AI tools can assist with image editing too.
Why PNG is Required for Transparency
Make sure you save your file as a PNG. JPG files don’t support transparency, which means saving as a JPG will turn your transparent background white. Always check your file format in the Save As menu.
Troubleshooting Common Errors
If the background removal button isn’t appearing in Paint, the most common fix is to ensure your app is updated through the Microsoft Store.
Summary
Removing backgrounds in Windows 11 Paint is a fast way to edit photos without expensive software. By using the Remove background button, you can cut out subjects instantly. Always save as a PNG to keep transparency. This feature makes creating professional graphics more accessible for every computer user.
Why does my transparent background turn white when saved?
This happens because you saved the file as a JPG. JPG files do not support an alpha channel for transparency. To keep the background transparent, you must select PNG as the file format when saving your image in Paint.
Does 🪟 Windows 11 Paint support AI background removal?
Yes, the latest version of Paint on Windows 11 uses built-in AI to detect the subject of your photo. It automatically identifies the foreground and removes the background with a single click, making it a free and efficient image editing software solution.
Was this guide helpful?

About the Author
Richard
Tech Writer, IT Professional
Richard, a writer for Geek Rewind, is a tech enthusiast who loves breaking down complex IT topics into simple, easy-to-understand ideas. With years of hands-on experience in system administration and enterprise IT operations, he’s developed a knack for offering practical tips and solutions. Richard aims to make technology more accessible and actionable. He's deeply committed to the Geek Rewind community, always ready to answer questions and engage in discussions.


No comments yet — be the first to share your thoughts!