How to Enable or Disable Pen Visual Effects in Windows 11

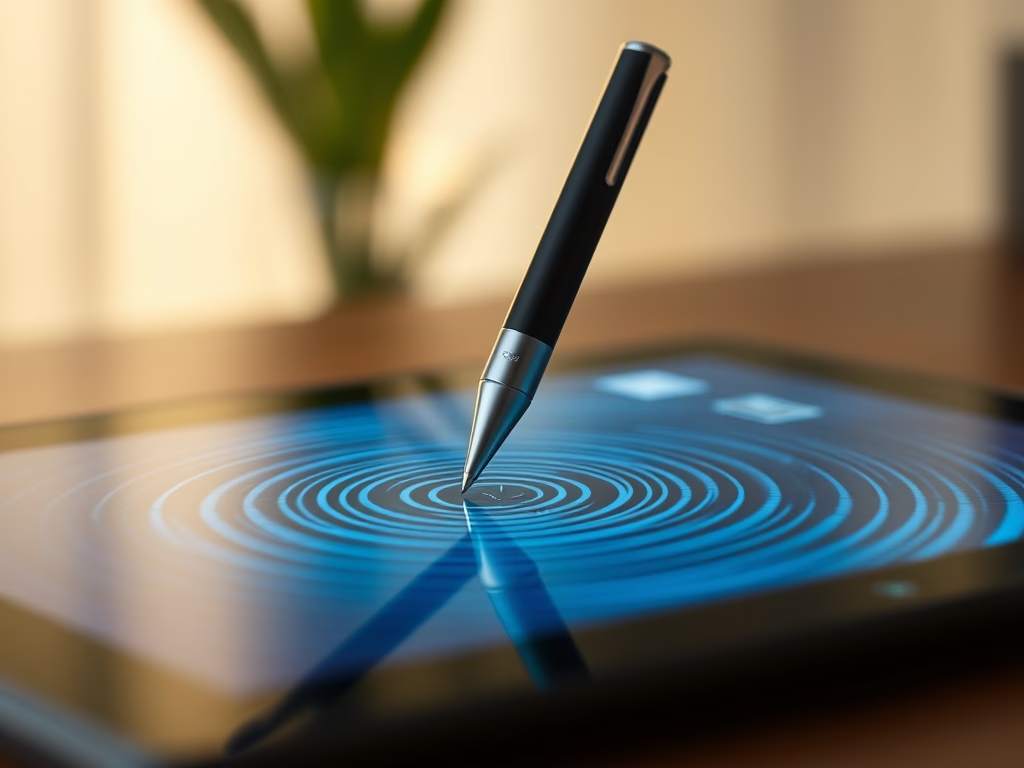
Pen visual effects in Windows 11 show a small circle animation and ripple on the screen whenever your stylus touches the display. These cues first arrived in Windows 11 build 22000 and show you exactly where the pen lands.
Some people find them useful for presentations, screen recordings and teaching. Others find them distracting when they write or draw and want a clean screen. You can switch the effects on or off in a few clicks in the Settings app, or with a command in Windows Terminal. Both methods are covered below.
Open Settings , go to Bluetooth & devices, click Pen & Windows Ink, then click Additional pen settings and check or uncheck Show visual effects. The change applies immediately without restarting.
Option 1Using Settings
The Settings app is the easiest method for most people. The setting sits under the Bluetooth & devices menu, in the options for your stylus pen. It works the same on Windows 11 Home and Pro, and you don’t need a restart.
- Press
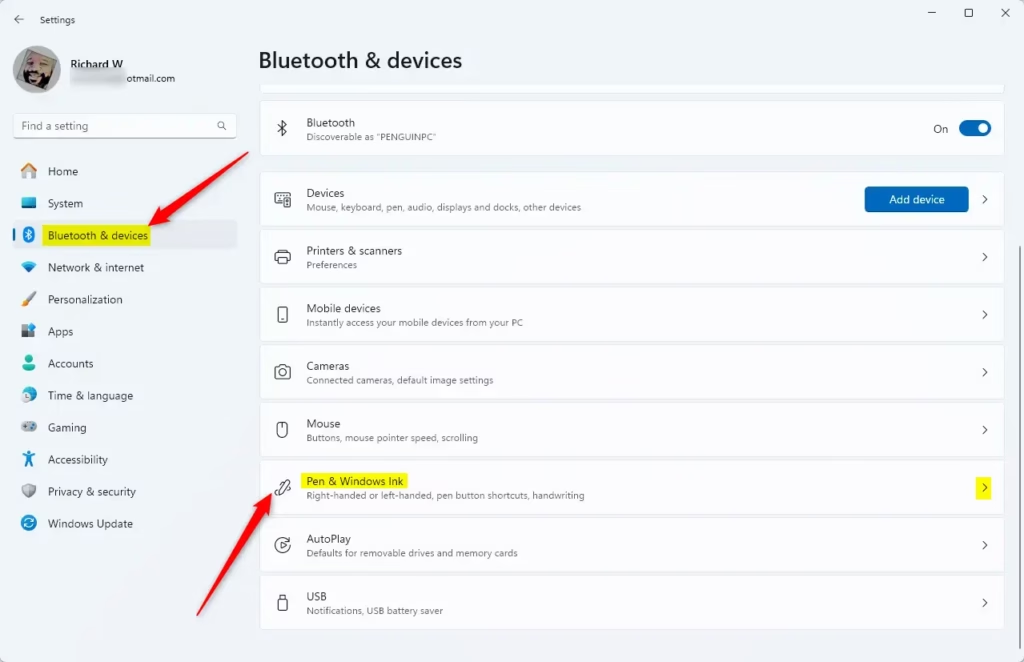
Win+Ion your keyboard to open Settings . The Settings window opens with a list of categories on the left. - Click Bluetooth & devices on the left side. The device options appear on the right.
- Click Pen & Windows Ink on the right side. You should see the pen settings page. Open Pen & Windows Ink settings
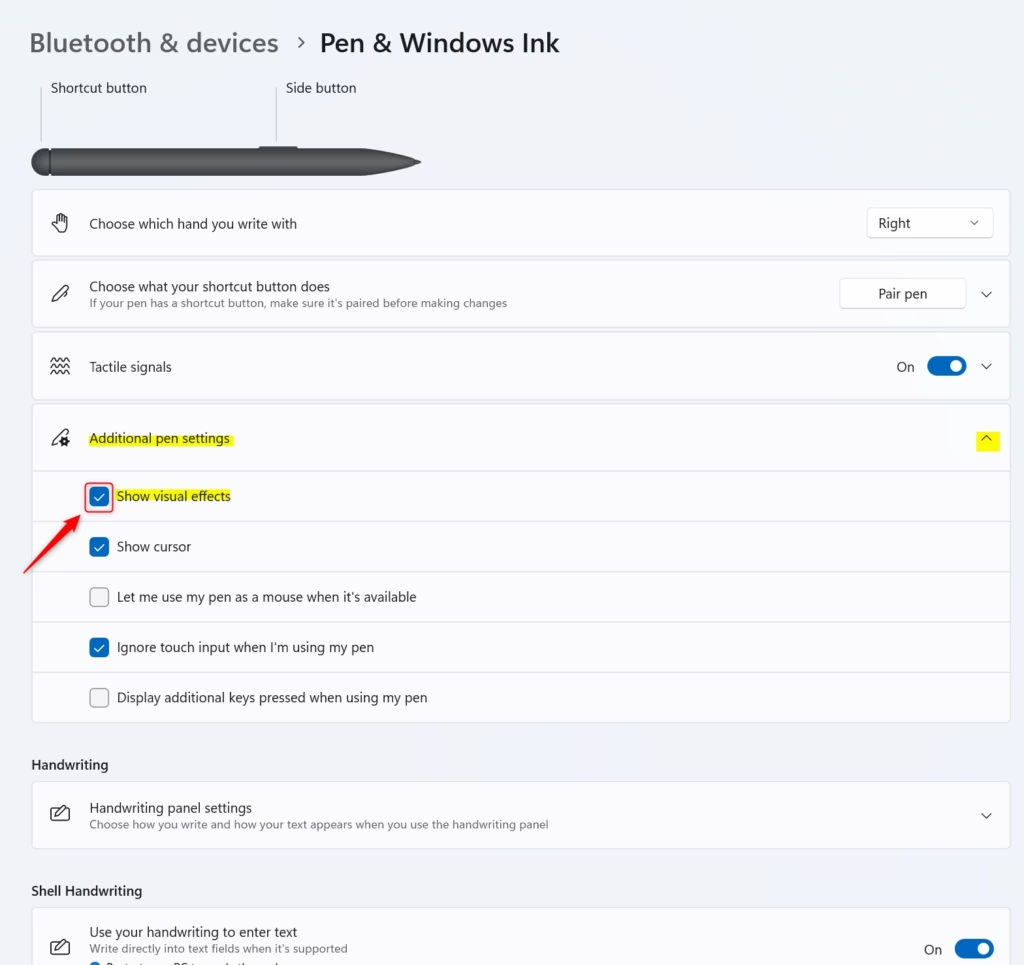
- Click Additional pen settings to expand the menu. The extra pen options now show below it.
- Find the Show visual effects option. Check the box to turn the effects on. Uncheck the box to turn them off. The change applies straight away, so you can touch the pen to the screen to test it.
- Close Settings when you’re done.
This is common on desktop PCs and laptops with no pen or touch support. Connect or pair your stylus and check again. To undo the change, go back to the same page and flip the checkbox.
Option 2Using Windows Terminal (Advanced)
This suits administrators who need to update several computers quickly, because you can run the same command on each machine or put it in a script.
Command-line changes are a faster way to adjust the setting across more than one computer. They also let you set the visual effects and the cursor separately, which is handy when you want one on and the other off.
Open Windows Terminal and run one of the commands below. Pick the one that matches the result you want. To undo a change, run the command for the setting you want back. The first command restores the default.
Turn On visual effects and cursor (default setting):
reg add "HKEY_CURRENT_USER\Control Panel\Cursors" /v PenVisualization /t REG_DWORD /d 35 /f
Turn Off visual effects and cursor:
reg add "HKEY_CURRENT_USER\Control Panel\Cursors" /v PenVisualization /t REG_DWORD /d 0 /f
Turn Off visual effects and keep cursor On:
reg add "HKEY_CURRENT_USER\Control Panel\Cursors" /v PenVisualization /t REG_DWORD /d 32 /f
Turn On visual effects and turn Off cursor:
reg add "HKEY_CURRENT_USER\Control Panel\Cursors" /v PenVisualization /t REG_DWORD /d 3 /f
After you run a command, touch the pen to the screen to check the result. If nothing seems to change, open the Pen & Windows Ink page in Settings to see the current state. Signing out and back in can also help.
Summary
You can configure Windows 11 pen visual effects through the graphical menus or through command-line scripts. Use Settings for a quick change on your own PC. Use the commands when you need to apply the same setting to many machines.
How do I disable Visual effects in 🪟 Windows 11?
To disable pen visual effects, press Win+I to open Settings, then go to Bluetooth & devices and click Pen & Windows Ink. Open Additional pen settings, then turn off the visual effects option. The circle and ripple will stop appearing when your pen touches the screen.
How do I turn off Visual effects?
To turn off pen visual effects, open Settings with Win+I, select Bluetooth & devices, then click Pen & Windows Ink. Choose Additional pen settings and turn off the visual effects option. Changes take effect right away, and you don't need to restart your PC.
How do I change the Visual effects in 🪟 Windows 11?
To change pen visual effects, open Settings and go to Bluetooth & devices, then Pen & Windows Ink. Select Additional pen settings and switch the visual effects option on or off. Choose on to show the circle and ripple when your pen touches the screen, or off to hide them.
How do I turn on Animation effects in 🪟 Windows 11?
Animation effects are a separate setting from pen visual effects. To turn them on, open Settings, go to Accessibility, then click Visual effects and switch Animation effects on. This controls window and menu animations across Windows, not the pen circle and ripple.
Have a question about this guide?
Answered by AI from this guide. Good questions may be added to this page — please don't include personal details.
Did this guide fix your problem?

About the Author
Richard
Tech Writer, IT Professional
Richard is a writer at Geek Rewind who turns complex IT tasks into clear, step-by-step guides. He draws on years of hands-on experience in system administration and enterprise IT operations, focusing on Windows, Linux and WordPress: the problems people actually run into, and the fixes that work. His server and WordPress guides come from systems he runs himself. Richard builds and maintains the platform behind Geek Rewind, from its Ubuntu servers and Nginx configuration to its custom WordPress plugins. Many new tutorials start with readers' questions, and he's always glad to answer them in the comments.
No comments yet — be the first to share your thoughts!