How to Turn On or Off Let Windows Keep Me Connected with Cellular Connection in Windows 11
Let Windows Keep Me Connected manages your cellular data usage in Windows 11.
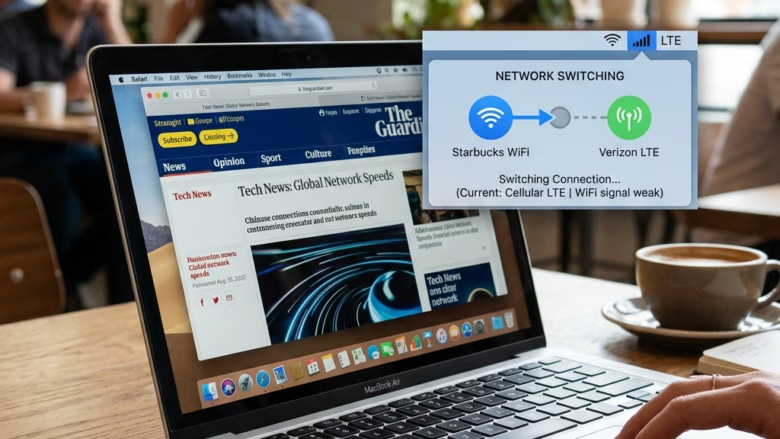
This feature lets your PC automatically connect to a cellular network when Wi-Fi is not available, similar to how your smartphone uses its mobile data.
For this to work, your PC needs a cellular modem and a SIM card or eSIM, often found on business laptops and tablets.
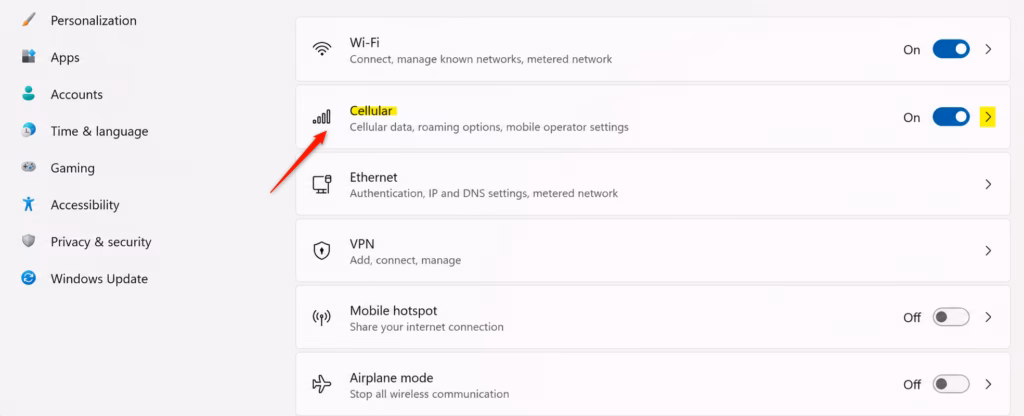
You can find this setting in Windows 11 under Network & internet settings.
It helps ensure you stay online by switching to cellular data if your Wi-Fi signal becomes weak.
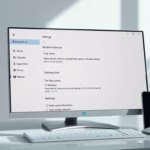
Manage cellular connection settings for Windows 11 by navigating to Network & internet settings, then selecting Cellular. To enable automatic connection, toggle “Let Windows keep me connected” to On. Turn it Off to manually connect when needed.
Step 1Find Your Cellular Settings
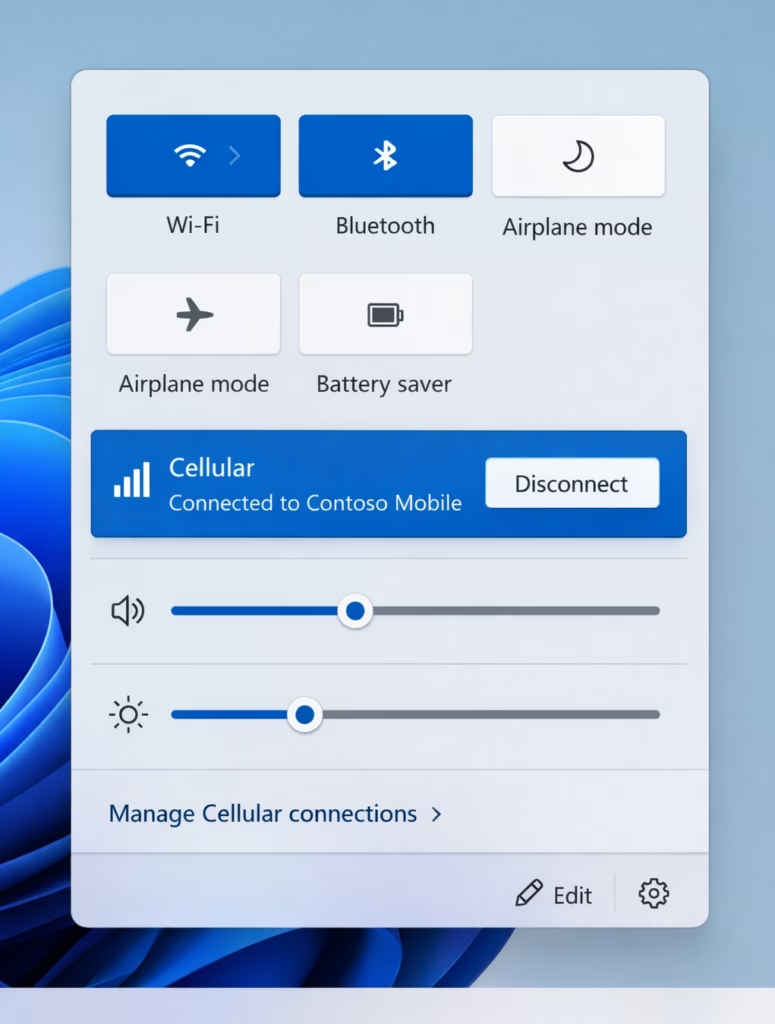
Find your Windows 11 cellular settings by clicking the network icon on your taskbar. This icon looks like a Wi-Fi signal or a globe and is located near the clock. This action opens the quick settings panel, where you’ll see the Cellular section to manage your connection.
- Look at the bottom right of your screen, near the clock. Click the icon that looks like a Wi-Fi signal or a globe. This opens the Network quick settings.
- In this panel, look for a “Cellular” section. If you don’t see it, click the small arrow (
>) next to “ Wi-Fi” or “Mobile hotspot” to see more options. - You should see the name of your mobile company listed under “Cellular.”
Step 2Turn On Automatic Connection
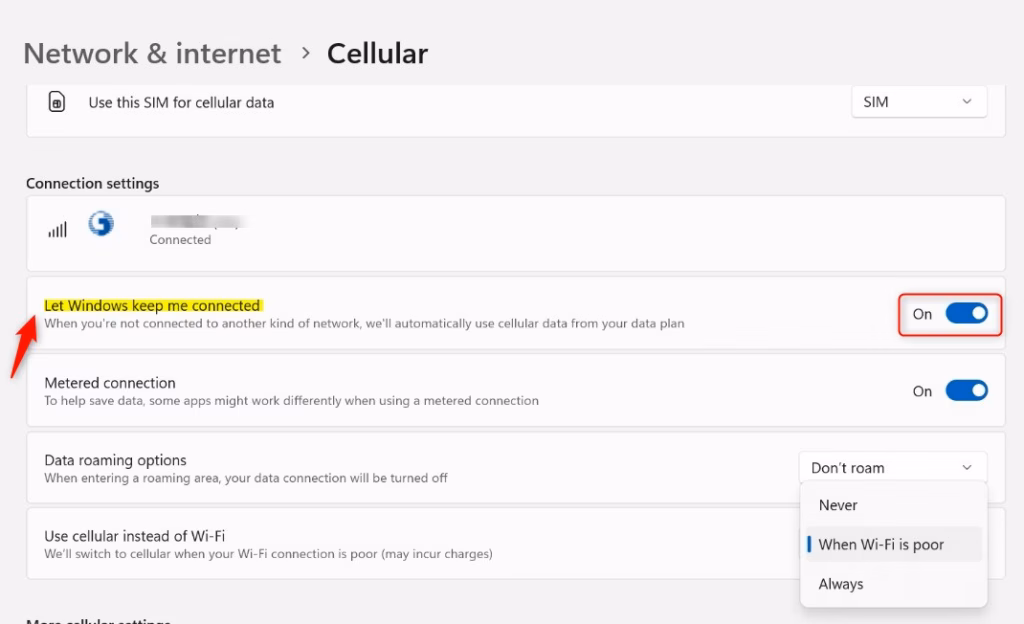
To turn on the automatic cellular connection in Windows 11, find the ‘Let Windows keep me connected’ switch within the Cellular quick settings. With this setting turned on, Windows automatically switches to using your cellular data if your primary Wi-Fi or wired internet connection fails.
- In the Cellular quick settings panel, find the switch for “Let Windows keep me connected.”
- If the switch is On, Windows will automatically use your cellular data when you are not connected to Wi-Fi or a wired internet cable. This is usually best for staying connected all the time.
- If you want to choose when to use your cellular data each time, turn this switch Off . If it’s off, you’ll need to click “Connect” in the Cellular settings yourself when you want to use it.
Helpful Tip: For most people, leaving ‘Let Windows keep me connected’ turned on is a good idea. It ensures you maintain internet access while you’re on the move or if your Wi-Fi signal falters. Just be mindful of your data consumption, which we’ll cover later!
Step 3Connect Manually (If “Keep Me Connected” is Off)
If you don’t want Windows 11 to automatically use your cellular data, you can choose to connect manually instead. Open the network quick settings again and look for the ‘Connect’ button within the Cellular section to manually start using your phone’s data connection.
- Go back to the Network quick settings panel (click the network icon on your taskbar).
- Find the “Cellular” section.
- If “Let Windows keep me connected” is off, you should see a “Connect” button. Click it.
- You might need to type in a username, password, and the Access Point Name (APN). This information is specific to your mobile company. It might have come with your SIM card, your device, or your modem.
Reference:
Summary
The ‘Let Windows keep me connected’ setting in Windows 11 automatically uses your cellular data if your Wi-Fi or wired internet connection fails, ensuring you stay online.
[Your Mobile Operator]How to enable cellular on 🪟 Windows 11?
To enable cellular on Windows 11, make sure your computer has a cellular modem and a SIM or eSIM, then go to Settings, Network & internet, and then Cellular.
How to fix no cellular connection?
To fix no cellular connection on Windows 11, first check your SIM card and data plan. Restart your PC. Then, go to Settings > Network & internet > Cellular. Ensure cellular is enabled, check for network availability, and verify APN settings are correct for your mobile provider.
Do I want cellular on or off?
You want cellular on if you need internet access when Wi-Fi is unavailable and your device has a cellular modem and SIM. The ‘Let Windows keep me connected’ feature automatically uses cellular data as a backup, ensuring continuous connectivity for essential tasks and browsing.
Where is the APN settings on 🪟 Windows 11?
You can find APN settings for your cellular connection in Windows 11 by going to Settings, then Network & internet, clicking Cellular, selecting your connection, and then choosing ‘Advanced options’.
Was this guide helpful?

About the Author
Richard
Tech Writer, IT Professional
Richard, a writer for Geek Rewind, is a tech enthusiast who loves breaking down complex IT topics into simple, easy-to-understand ideas. With years of hands-on experience in system administration and enterprise IT operations, he’s developed a knack for offering practical tips and solutions. Richard aims to make technology more accessible and actionable. He's deeply committed to the Geek Rewind community, always ready to answer questions and engage in discussions.

No comments yet — be the first to share your thoughts!