How to Reset Network Adapters in Windows 11
Resetting network adapters in Windows 11 fixes internet problems like slow speeds or connections that keep dropping.
Network adapters are the parts inside your PC that let you connect to networks, such as Wi-Fi or a wired Ethernet cable.
Sometimes these adapters get overloaded or messed up, causing your internet to act strange. A network reset replaces all your network adapters and their setup files with fresh ones, setting your network back to how it was when you first got Windows 11.
This action can fix many stubborn connection issues you might be having with your PC.
Open Windows 11 Settings, go to Network & internet, then Advanced network settings, and select Network reset. Click “Reset now” and confirm; your PC will restart to apply the changes, effectively reinstalling network adapters and settings.
Why reset your network adapter?
Resetting your network adapter in Windows 11 can fix internet connection problems by clearing out old or broken settings that prevent your computer from connecting properly.
What happens when you finish?
How to reset network adapters in 🪟 Windows 11
Resetting network adapters in Windows 11 fixes internet problems by returning your network settings to their original state from when Windows was first installed. If your Wi-Fi or wired internet connection malfunctions, this simple process restores it without requiring expert knowledge.
- Open the Settings app by pressing Windows key + I.
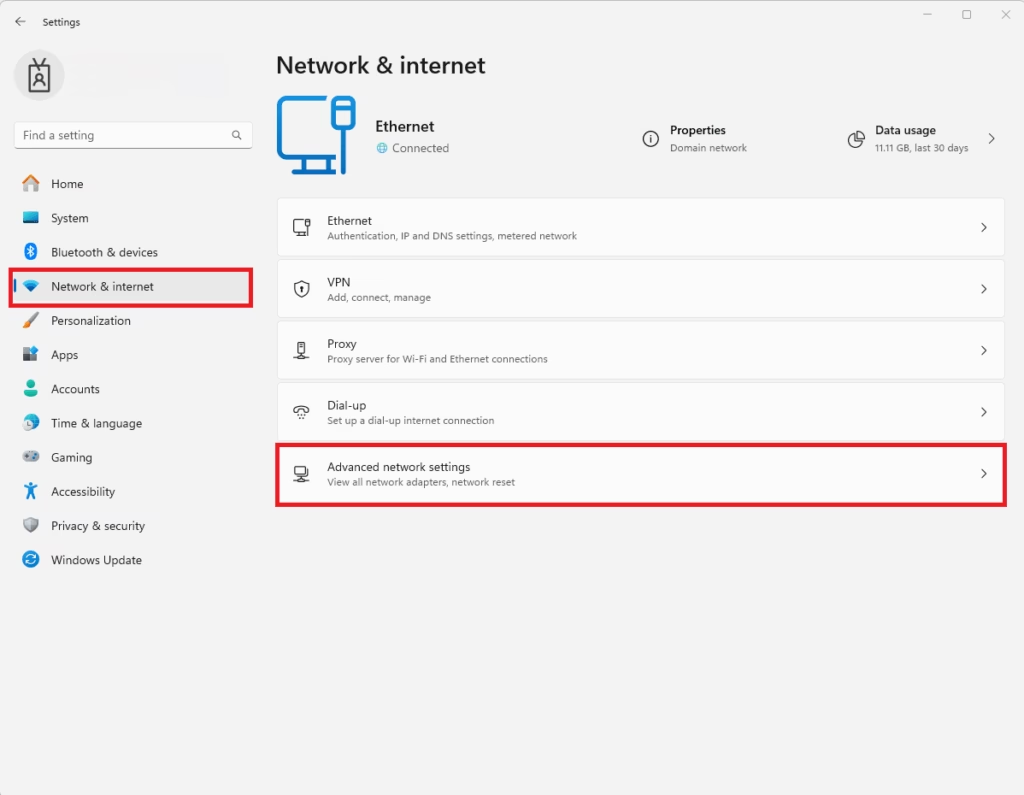
- Click on Network & internet in the left menu.
- Select Advanced network settings.
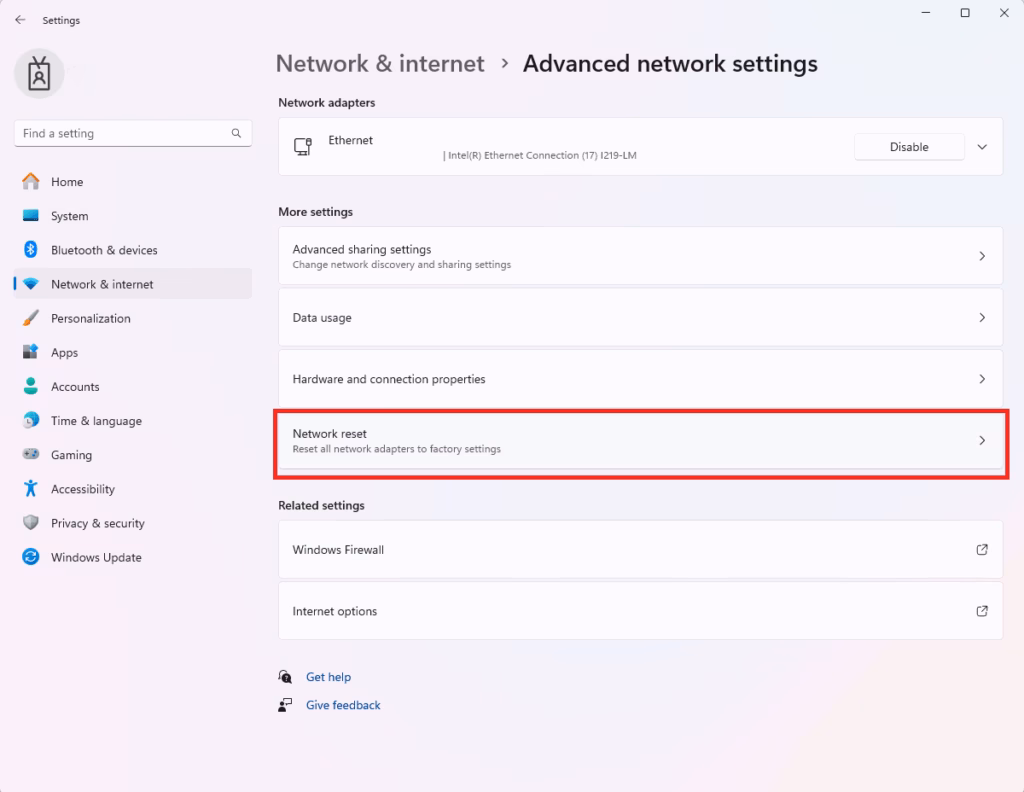
- Find Network reset under the “More settings” section.
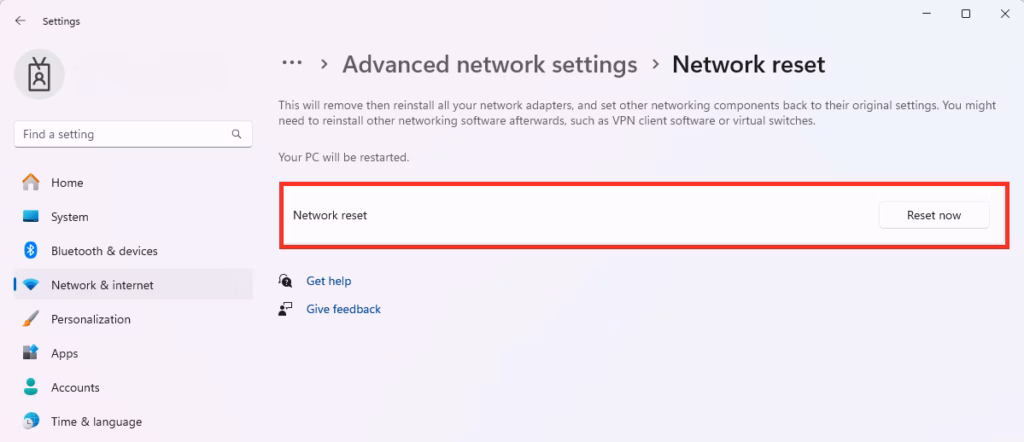
- Click Reset now and confirm your choice.

Advanced: Using the Command Line (CLI)
For advanced users, you can reset network adapters in Windows 11 using the Command Prompt by running specific commands like ‘netsh winsock reset’ after opening it as an administrator.
netsh winsock reset
netsh int ip reset
ipconfig /release
ipconfig /renew
ipconfig /flushdns
Troubleshooting: What if it still fails?
If resetting your network adapter in Windows 11 doesn’t fix the problem, you should troubleshoot by updating your adapter driver through Device Manager or checking power management settings.
Summary
Resetting your network adapter in Windows 11 is an effective way to solve connection errors and slow speeds by clearing out old network data, though you’ll need to re-enter Wi-Fi passwords afterward.
Will resetting my network adapter delete my saved Wi-Fi passwords?
Yes. A network reset removes all network adapters and restores them to factory defaults. This process clears your saved Wi-Fi profiles, meaning your computer will forget all saved passwords. You will need to manually reconnect to your wireless networks and re-enter your security keys after the computer restarts.
Why does my internet stop working after a network reset?
Your internet stops working because the reset process temporarily disables all network hardware to clear corrupted data. Once the computer restarts, Windows reinstalls the drivers. If you cannot connect afterward, ensure your router is powered on or try restarting your computer one more time to finalize the driver installation.
Was this guide helpful?

About the Author
Richard
Tech Writer, IT Professional
Richard, a writer for Geek Rewind, is a tech enthusiast who loves breaking down complex IT topics into simple, easy-to-understand ideas. With years of hands-on experience in system administration and enterprise IT operations, he’s developed a knack for offering practical tips and solutions. Richard aims to make technology more accessible and actionable. He's deeply committed to the Geek Rewind community, always ready to answer questions and engage in discussions.


No comments yet — be the first to share your thoughts!