How To Fix Windows 11 Wi-Fi Connection Issues
Wi-Fi problems usually happen because of a breakdown in communication between your computer’s software and your wireless hardware. This can be caused by outdated drivers, incorrect network settings, or a temporary glitch in your router. By following these steps, you are clearing out the “cobwebs” in your network settings to restore a stable connection.
You can fix Windows 11 Wi-Fi issues by running the Network Troubleshooter, checking Airplane Mode, and reinstalling your network adapter driver. Resetting your DNS and TCP/IP stack can also resolve connection problems.
What happens when you finish these steps?
Once you complete these fixes, your Windows 11 computer should reliably detect your network, establish a secure handshake with your router, and provide you with a stable, high-speed internet connection. You will no longer see those annoying “Limited Access” or “Disconnected” warnings.
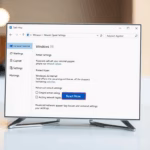
1Run the Network Troubleshooter
Windows 11 comes with a built-in “doctor” for your network. It can often find and fix problems automatically.
- Open the Start Menu and select Settings.
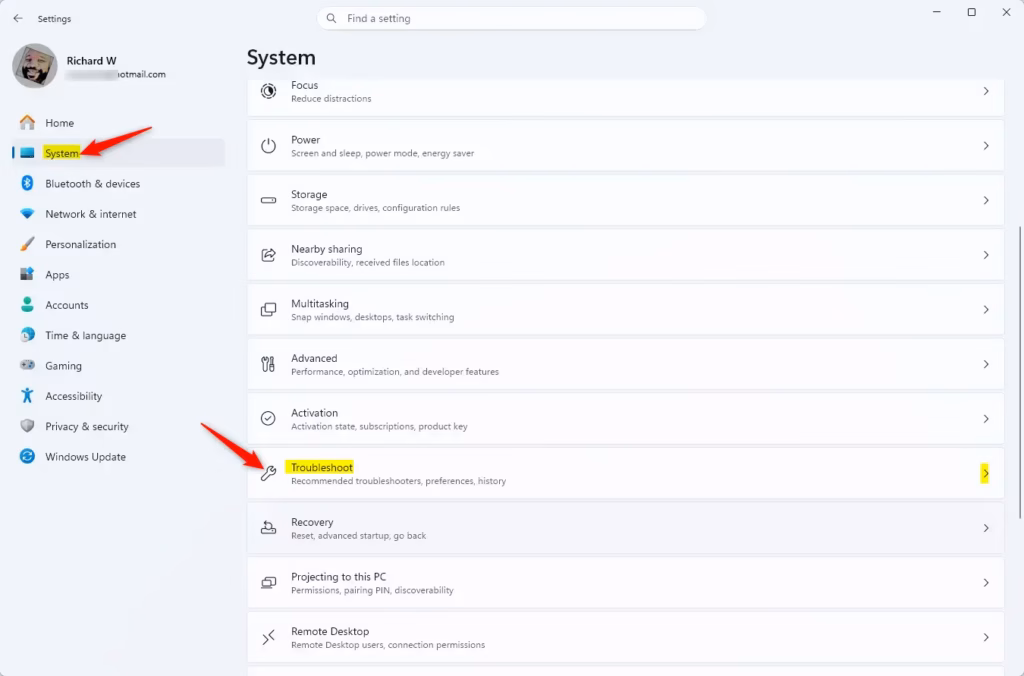
- Go to System > Troubleshoot.
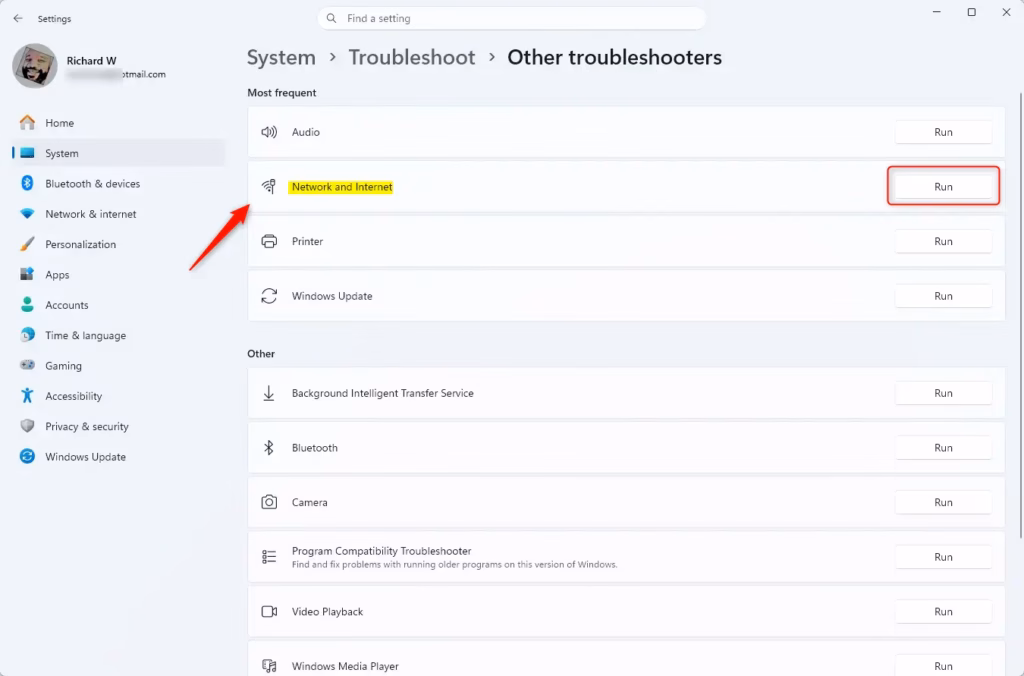
- Click Other troubleshooters.
- Find Network and Internet and click the Run button.
2Check Airplane Mode and Physical Switches
Airplane mode turns off all wireless radios on your device. Ensure it is off.
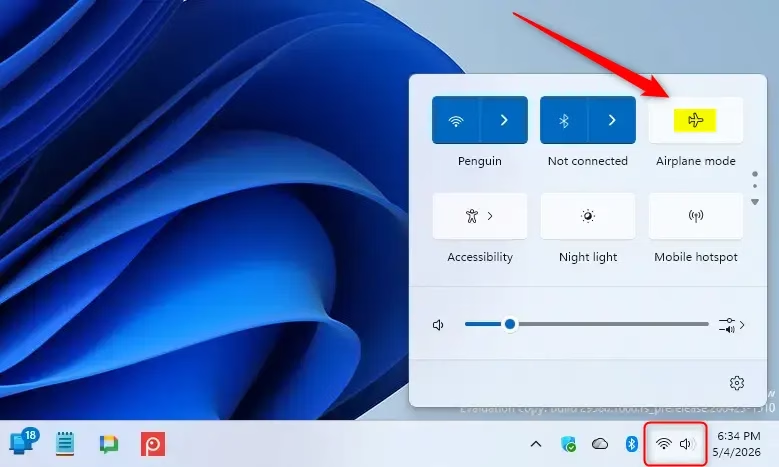
- Click the Quick Settings icon in the bottom-right corner of your taskbar.
- Ensure the Airplane mode button is not highlighted in blue.
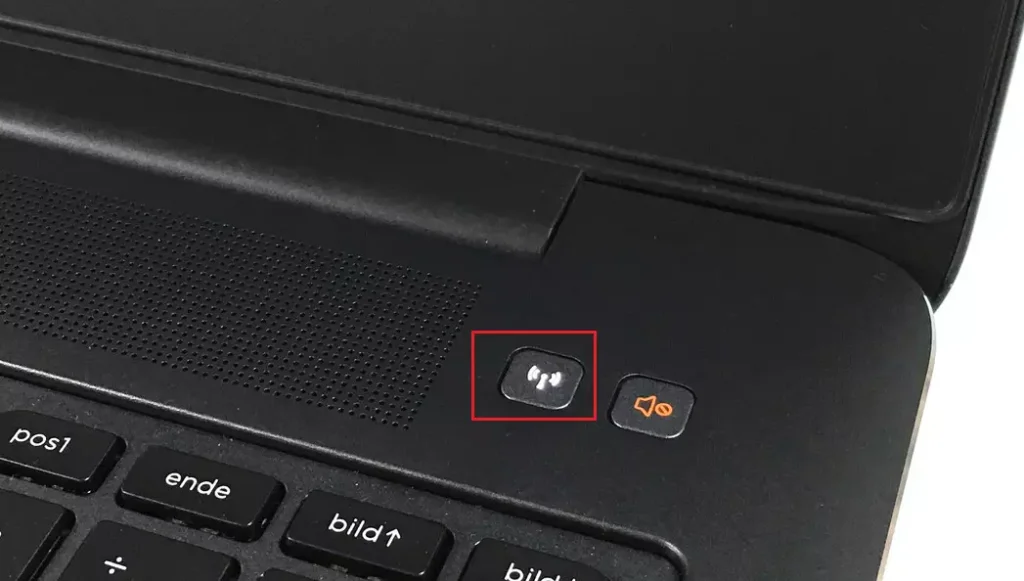
- Check the side of your laptop. Some devices have a physical switch or a function key (like F2 or F12) that toggles wireless hardware on or off.
3Generate a Wireless Network Report
If you need to see exactly what is happening, Windows can create a log. This is useful for advanced troubleshooting. You can learn more at the official Microsoft Wireless Network Report documentation.
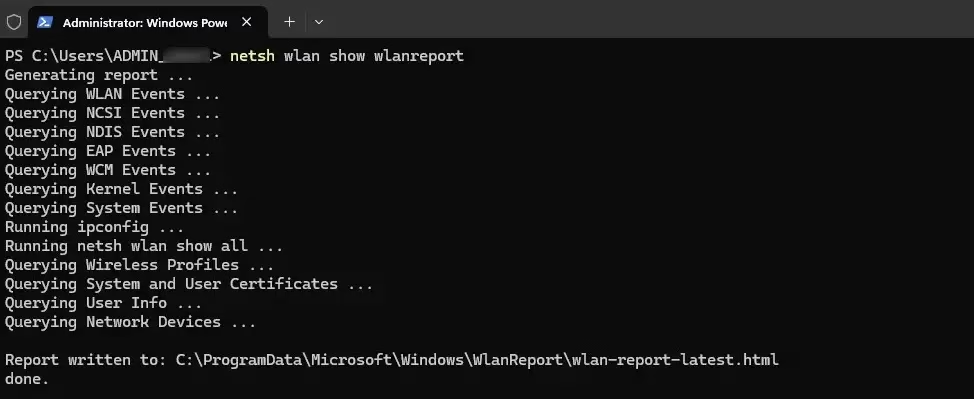
- Right-click the Start button and select Terminal (Admin).
- Type
netsh wlan show wlanreportand press Enter. - Open the file path shown in the results to view your report.
4Flush DNS and Reset TCP/IP Stack (Admin Privileges Required)
Sometimes your computer holds onto old network data. Clearing this cache often fixes connection errors.
- Press the Windows Key and type cmd.
- Right-click Command Prompt and select Run as administrator.
- Type these commands one by one, pressing Enter after each:Command Prompt
ipconfig /flushdns
netsh int ip reset
netsh winsock reset - Restart your computer.
5Check for Interference and Frequency Standards
6Uninstall and Reinstall the Network Adapter Driver
If your driver is corrupted, your computer cannot talk to your Wi-Fi card properly. Reinstalling it forces Windows to fetch a clean version.
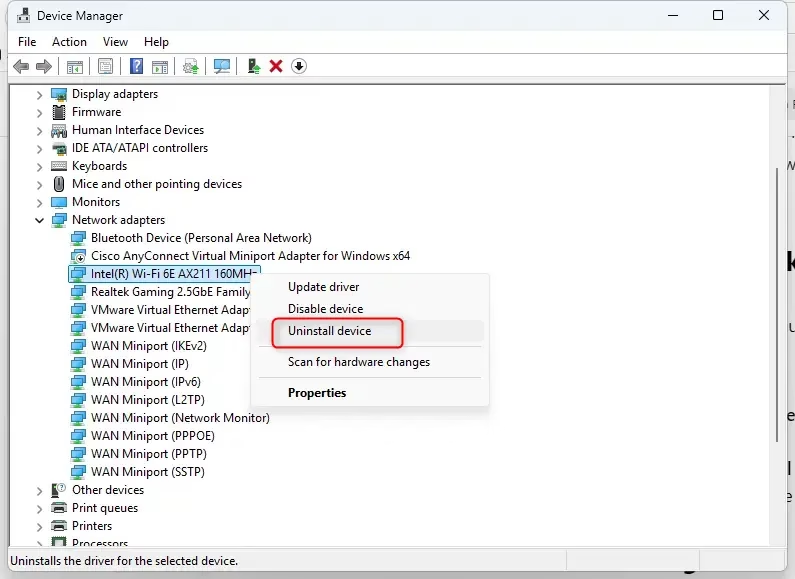
- Right-click the Start button and select Device Manager.
- Expand the Network adapters section.
- Right-click your wireless adapter and choose Uninstall device.
- Restart your PC. Windows will automatically detect the hardware and install a fresh driver.
7Disable Wi-Fi Power Saving Mode
Windows 11 sometimes turns off your Wi-Fi card to save battery, but it can be too aggressive.
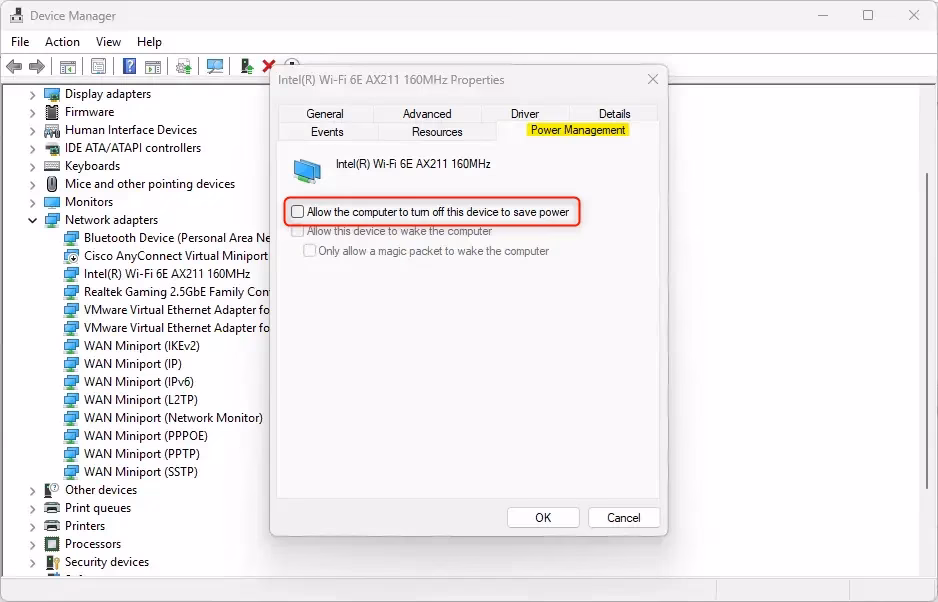
- In Device Manager, right-click your network adapter and select Properties.
- Go to the Power Management tab.
- Uncheck the box that says Allow the computer to turn off this device to save power.
- Click OK.
8Third-Party Antivirus Warning
Some antivirus programs act as a firewall that blocks your connection. If you have a third-party security suite, try disabling it temporarily to see if your Wi-Fi starts working again.
Summary
Fixing Wi-Fi issues in Windows 11 involves checking your hardware, resetting your network stack, and ensuring your drivers are healthy. We covered how to flush your DNS, reset your TCP/IP settings, and manage power settings to keep your connection stable. If you still have trouble, check your router settings or contact your internet provider.
Why does my Wi-Fi show ‘Disabled’ even when the switch is on?
This usually means the network adapter is disabled in Windows settings or the driver is malfunctioning. Check the Network Connections folder in the Control Panel to ensure your Wi-Fi adapter is enabled. If it is, try reinstalling the driver via Device Manager to fix the software conflict.
Does changing my DNS server help with Wi-Fi connectivity?
Yes, changing your DNS can help if your Wi-Fi connects but cannot load websites. By switching to public DNS providers like Google (8.8.8.8) or Cloudflare (1.1.1.1) in your network adapter settings, you can often bypass slow or broken DNS servers provided by your internet service provider.
Was this guide helpful?

About the Author
Richard
Tech Writer, IT Professional
Richard, a writer for Geek Rewind, is a tech enthusiast who loves breaking down complex IT topics into simple, easy-to-understand ideas. With years of hands-on experience in system administration and enterprise IT operations, he’s developed a knack for offering practical tips and solutions. Richard aims to make technology more accessible and actionable. He's deeply committed to the Geek Rewind community, always ready to answer questions and engage in discussions.


No comments yet — be the first to share your thoughts!