How to Find Your IP Address on Windows 11
Finding your IP address on Windows 11 is straightforward using either the Settings app or the Command Prompt.
Your IP address is a unique number given to your computer when you connect to the internet, like a home address for your device online.
For example, your Windows 11 computer might have a public IPv4 address that looks like 203.0.113.45. Knowing this number helps you fix network problems or set up ways to connect to your computer from elsewhere.
You might need your IP address for tasks like setting up your router for certain online games or applications.
You can find your IP address on Windows 11 through the Settings app by navigating to Network & internet, or via the Command Prompt by typing “ipconfig”. Both methods will display your IPv4 and IPv6 addresses.
Find your IP address using Settings
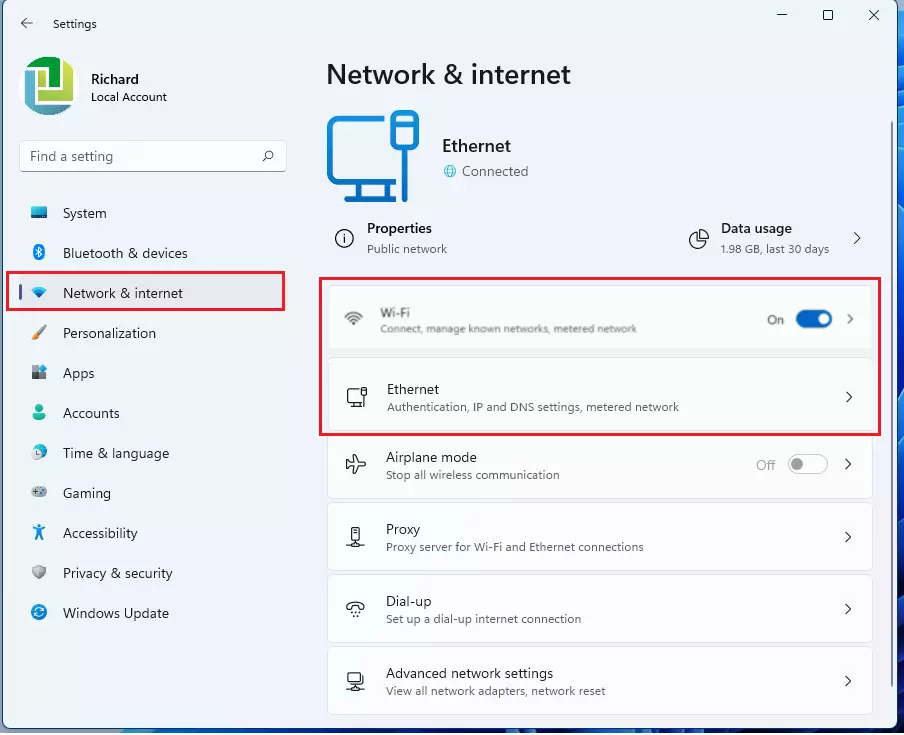
The Settings app offers a way to find your IP address on Windows 11. Open Settings, navigate to Network & internet, and then select either Wi-Fi or Ethernet, depending on your connection type. Your IP address will be listed there.

Once inside Settings, click on Network & internet. From there, select either Wi-Fi or Ethernet depending on how you are connected to the internet.
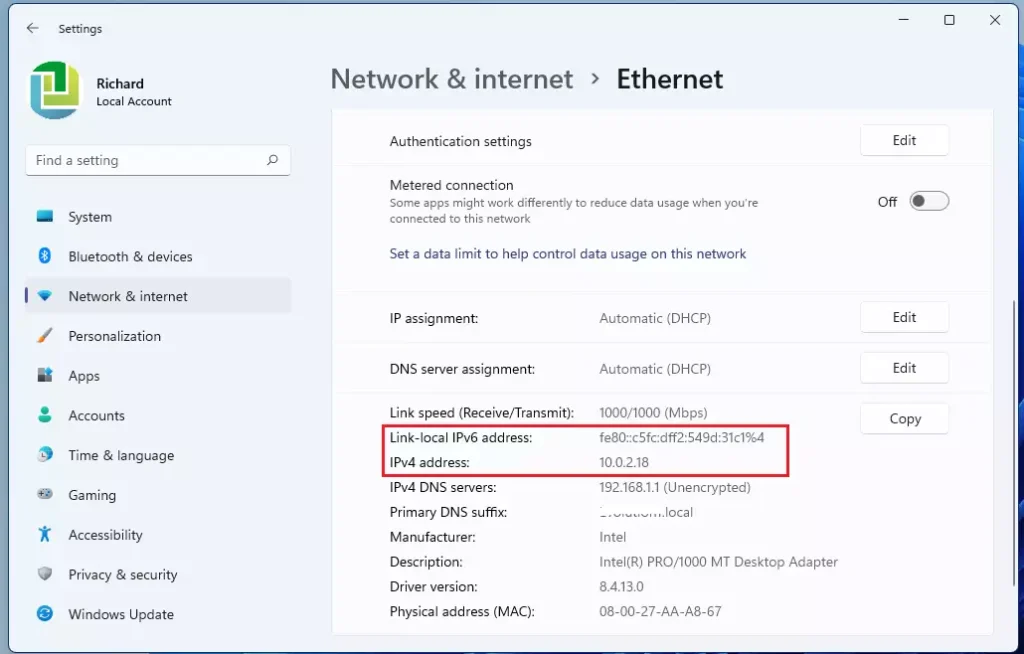
Click on the connection you are currently using. Scroll down to see your IP address information. You will see both IPv4 and IPv6 numbers. For most tasks, you only need the IPv4 address.
View advanced network details
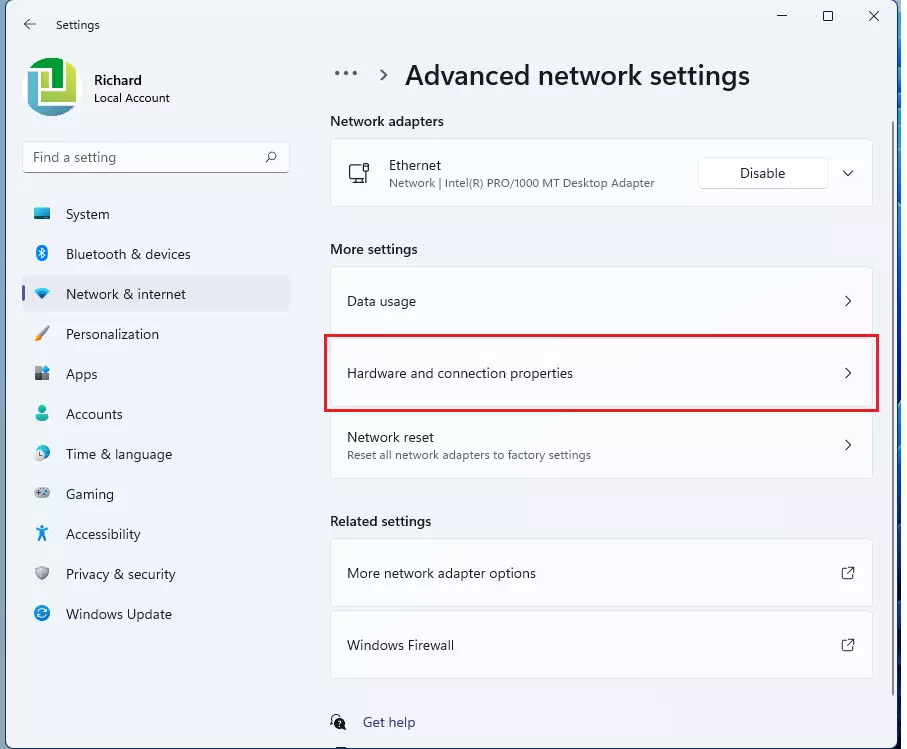
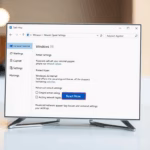
To see more detailed information about your network connection on Windows 11, check the Advanced network settings. This area lets you view specific hardware and connection properties for your network adapter. You can find details like your IP address and other important technical info here.
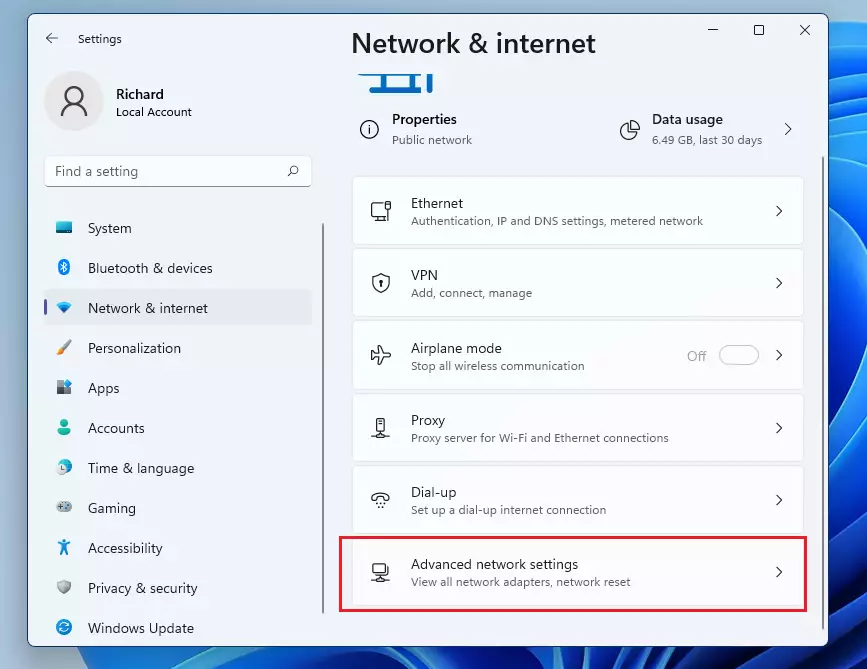
Next, click on Hardware and connection properties.
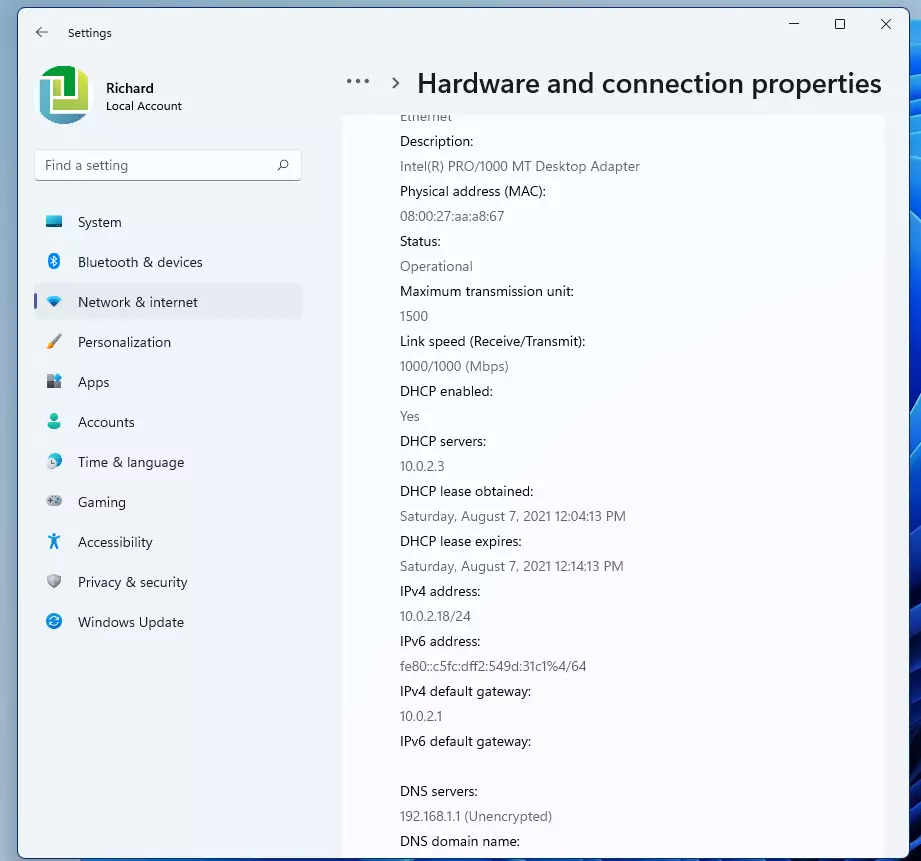
Select your network adapter from the list to see a full list of your connection details, including your subnet mask, default gateway, and DNS server settings.
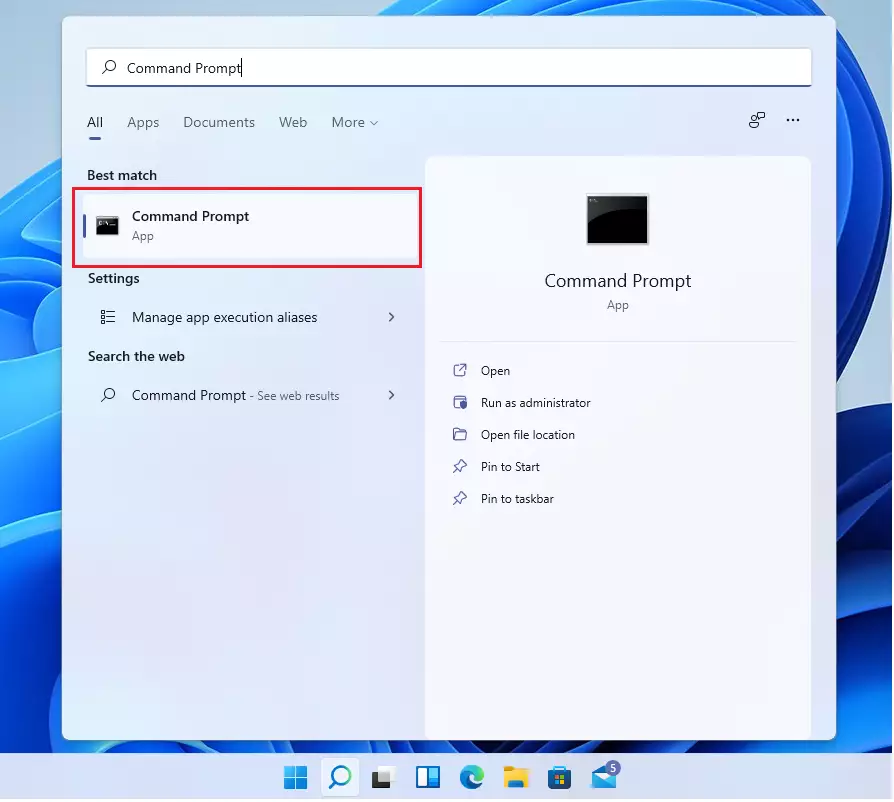
Find your IP address using the Command Prompt
Finding your IP address on Windows 11 using the Command Prompt is a fast method. Open the Command Prompt and type the command `ipconfig`, then press Enter. This will show you all your network information, including your IP address.
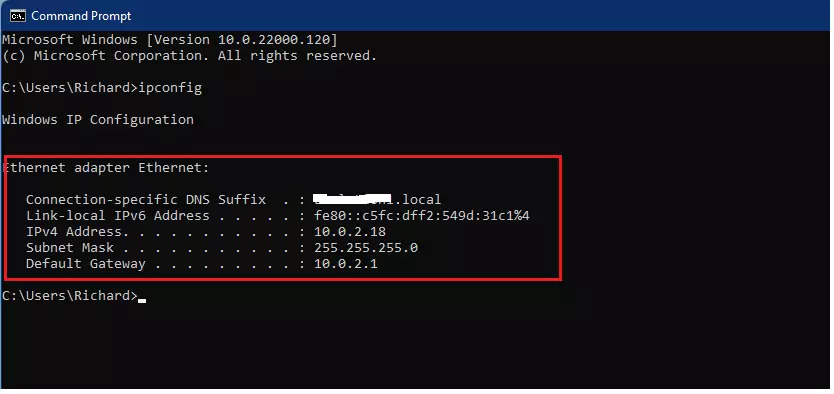
Type the following command and press Enter:
ipconfigTo copy your IP address directly to the clipboard, use: ipconfig /all | findstr IPv4. This saves the text so you can paste it elsewhere.
Understanding Network Entities
To better understand your network, it’s helpful to know what your IPv4 address, Subnet Mask, Default Gateway, DNS Server, and DHCP are and how they help your connection.
Troubleshooting Connectivity
Manual IP Configuration (Admin Required)
To set a static IP, go to Settings > Network & internet > Ethernet/Wi-Fi > IP assignment. Click Edit and change it from Automatic (DHCP) to Manual. You’ll need administrator permission to save these changes.
Summary
Finding your IP address on Windows 11 is accomplished using the Settings menu or the Command Prompt, and knowing this helps manage your network and fix connection problems.
Related Searches
- How to change IP address Windows 11
- What is my local IP address
- Check network adapter settings Windows 11
- How to release and renew IP address
What is the difference between a public and private IP address?
A private IP address is used for communication within your home network between your devices and your router. A public IP address is assigned by your internet service provider and acts as your identity on the global internet, allowing external servers to find your home connection.
Why does my IP address change frequently?
Most home networks use DHCP to assign IP addresses dynamically. This means your router periodically reassigns addresses to devices. If you need a permanent address for a specific device, you must configure a static IP address in your network adapter settings or reserve the address in your router.
How do I find my IP address if I am connected via VPN?
When using a VPN, your public IP address will reflect the location of the VPN server rather than your actual physical location. To see your VPN IP, simply search for your IP on Google while the VPN is active. Your local private IP remains unchanged on your computer.
Was this guide helpful?

About the Author
Richard
Tech Writer, IT Professional
Richard, a writer for Geek Rewind, is a tech enthusiast who loves breaking down complex IT topics into simple, easy-to-understand ideas. With years of hands-on experience in system administration and enterprise IT operations, he’s developed a knack for offering practical tips and solutions. Richard aims to make technology more accessible and actionable. He's deeply committed to the Geek Rewind community, always ready to answer questions and engage in discussions.


No comments yet — be the first to share your thoughts!