How to Find Other Computers on Your Windows 11 Network
Network Discovery in Windows 11 helps you find other computers and devices on your home network. This feature lets your PC see and connect with things like other PCs, printers, and smart TVs nearby.
To make this work, you need to turn on Network Discovery and File Sharing for your network. Most home networks use a ‘Private’ setting for this. You’ll usually need Windows 11 version 22H2 or a newer version.
When it’s set up, you can easily find these devices in File Explorer. They appear under a “Network” tab, letting you access shared files or printers on other computers.
Enable Network Discovery and File Sharing in Advanced sharing settings. Ensure your network profile is set to Private in Network & internet settings. Devices will then appear in File Explorer under the Network section.
How to See Other Devices on Your Network in 🪟 Windows 11
To find other computers on your network, follow these steps:
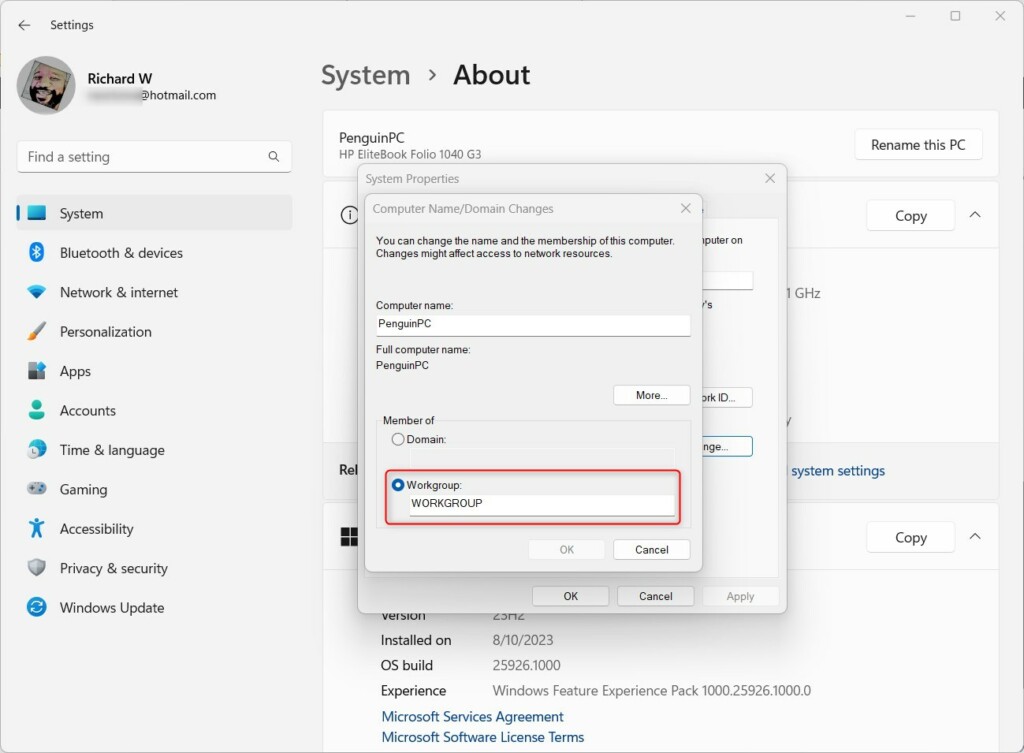
Step 1Make Sure All Devices Are in the Same Workgroup
Your Windows 11 PC needs to be in the same workgroup as other computers to find them on your network. This setting helps your computer identify which devices are part of your local network. Checking and setting the correct workgroup is the first step to seeing other computers.
What this achieves: When this is set up, your PC can look for other devices in that same workgroup.
Here’s how to check or change your workgroup:
- Click Start and open Settings.
- Go to System → About.
- Click Advanced system settings on the right.
- In the Computer Name tab, click the Change button.
- Under Workgroup, type the name you want (for example, WORKGROUP).
- Click OK and restart your PC if asked.
Learn more about changing the workgroup:
How to change workgroup in Windows 11
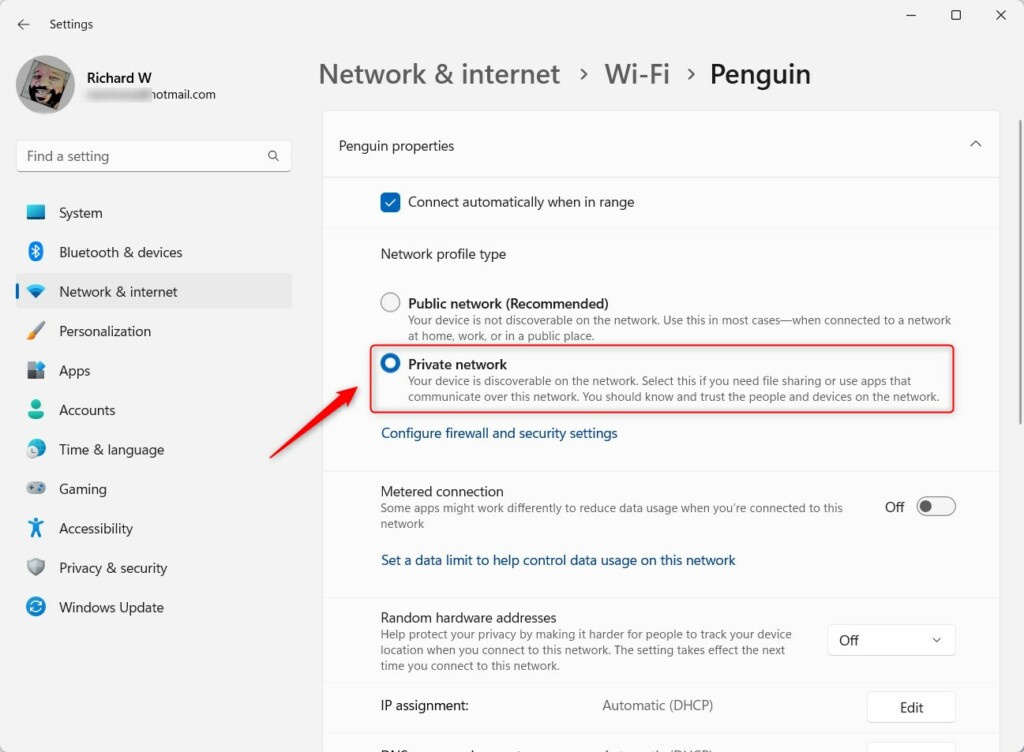
Step 2Set Your Network to Private
Setting your Windows 11 network connection to Private tells your PC that your network is safe and trusted, which is essential for finding other devices. This setting allows your computer to be visible and connect to other computers on your local Windows 11 network. Make sure your network is set to Private.
What this achieves: Your PC will be able to see and connect to other devices on your network.
Here’s how to change your network to Private:
- Click Start and open Settings.
- Go to Network & internet.
- Click on your network name (like your Wi-Fi network).
- Find Network profile type and select Private.
More details here:
Change network profile in Windows 11
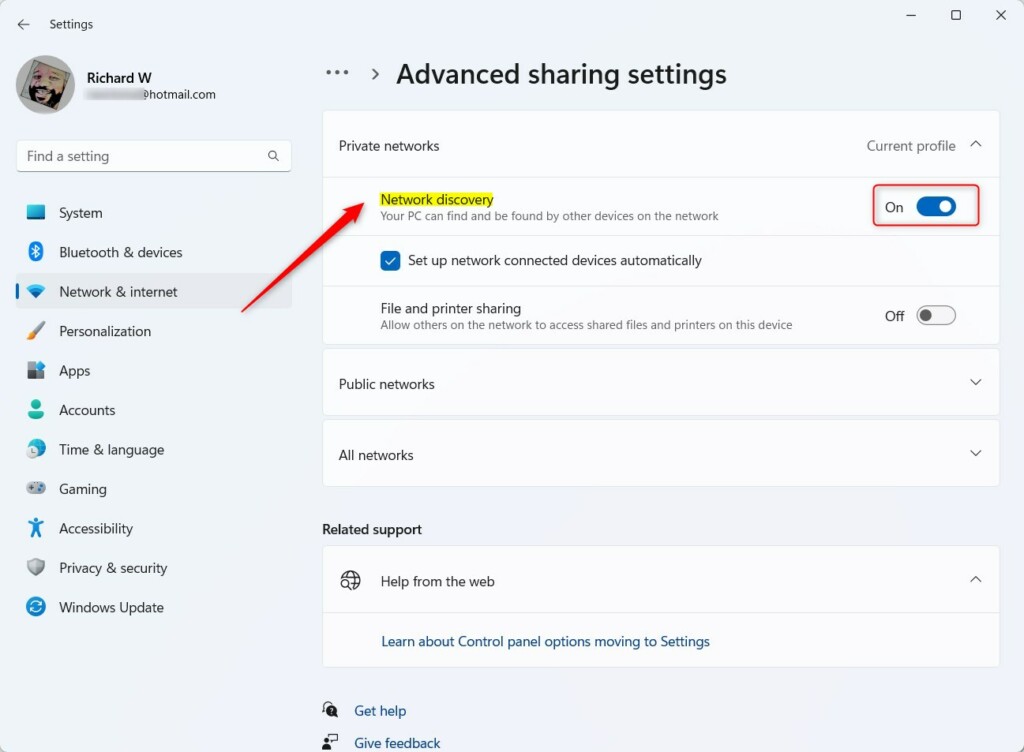
Step 3Turn On Network Discovery
Network Discovery in Windows 11 lets your computer find other devices on your network and makes your PC visible to them. This setting is a crucial step for your computer to show up when you search for Windows 11 network computers. Without Network Discovery turned on, other devices won’t be seen.
What this achieves: Your computer and other devices will be visible to each other on the network.
To turn it on:
- Open Settings.
- Go to Network & internet → Advanced network settings → Advanced sharing settings.
- Find Network discovery and turn it On.
Learn how to do this here:
Turn Network discovery On or Off in Windows 11
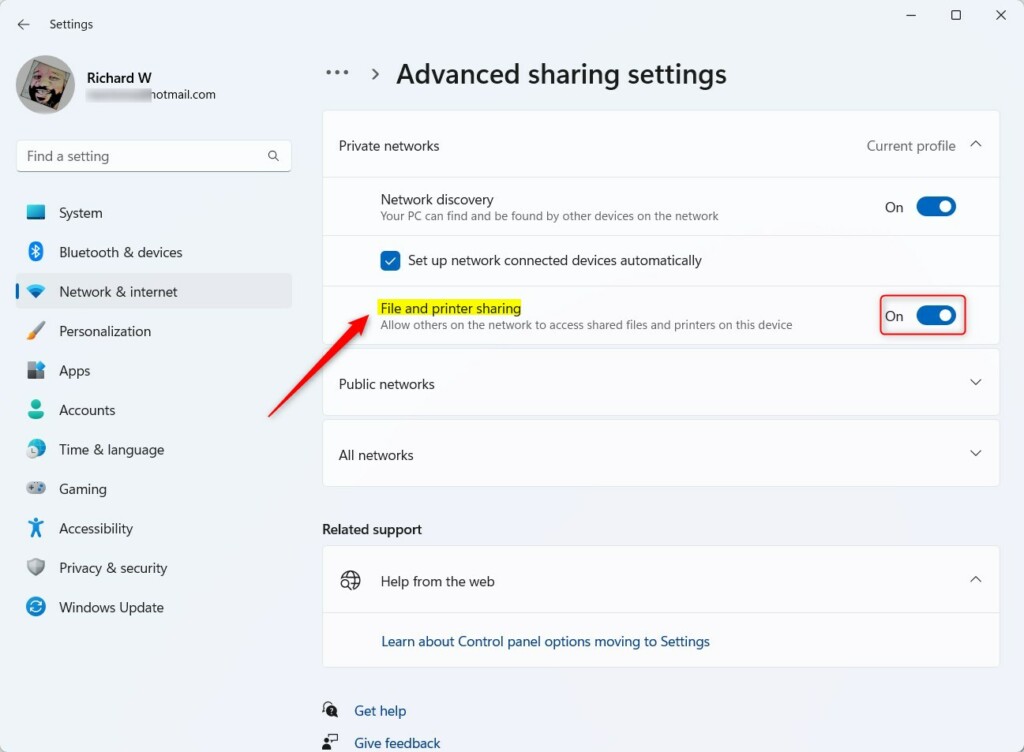
Step 4Turn On File and Printer Sharing
File and Printer Sharing in Windows 11 lets your computer share files and printers with other devices on your network. This sharing feature is important for interacting with other Windows 11 network computers after you find them. File and Printer Sharing lets you access shared resources from those computers.
What this achieves: You can share files and printers with other computers on your network.
To turn it on:
- Go to Settings → Network & internet → Advanced network settings → Advanced sharing settings.
- Turn on File and printer sharing.
More info:
How to turn File and printer sharing On or Off in Windows 11
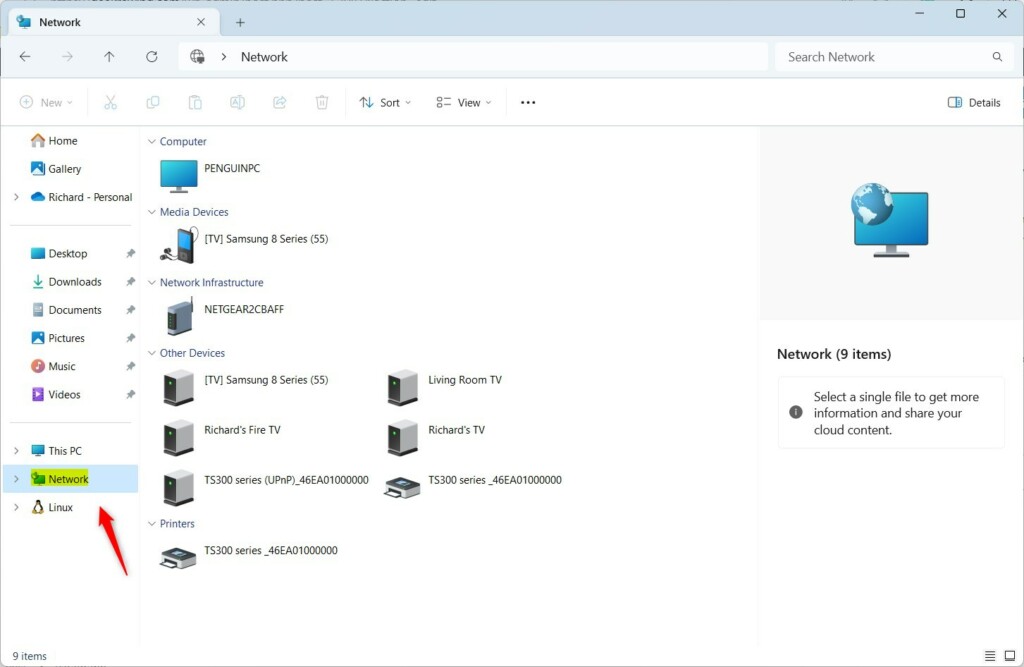
Find Devices in File Explorer
After you finish all these steps, open File Explorer and click Network on the left side. You should see all computers and devices connected to your network.
Summary
- Make sure all devices are in the same workgroup.
- Set your network to Private so devices can be found.
- Turn on Network Discovery so devices can see each other.
- Turn on File and Printer Sharing to share files and printers.
- Look in File Explorer under Network to find other devices.
To find other computers on your Windows 11 network, ensure all devices are in the same workgroup and set your network to Private. Then, turn on Network Discovery and File and Printer Sharing so devices can see and communicate with each other. You can then look in File Explorer under Network to find these devices.
How to fix network computers are not showing up in 🪟 Windows 11?
File and printer sharing should also be toggled on.
Was this guide helpful?

About the Author
Richard
Tech Writer, IT Professional
Richard, a writer for Geek Rewind, is a tech enthusiast who loves breaking down complex IT topics into simple, easy-to-understand ideas. With years of hands-on experience in system administration and enterprise IT operations, he’s developed a knack for offering practical tips and solutions. Richard aims to make technology more accessible and actionable. He's deeply committed to the Geek Rewind community, always ready to answer questions and engage in discussions.


No comments yet — be the first to share your thoughts!