How to Back Up and Restore Device Drivers in Windows 11
Backing up and restoring device drivers in Windows 11 lets you save copies of the software that lets your computer talk to hardware like printers and graphics cards.
These drivers are essential for everything to work correctly. Without them, your mouse might not move or your screen might not show pictures.
Saving your drivers before a Windows reinstall, for example when you update to a new version, means you won’t need to search for each one individually afterward.
This process helps ensure your hardware continues to function smoothly on your PC.
Back up drivers by opening Windows Terminal as administrator and using DISM, PnPUtil, or PowerShell commands with a destination folder. Restore drivers individually or all at once through Device Manager by browsing to your saved folder, or use PnPUtil to install all drivers from the folder.
Why Back Up Your Drivers?
Windows 11 device drivers enable hardware operation. A clean Windows installation removes all device drivers. Backing up Windows 11 device drivers allows users to quickly restore them after a clean install, preventing individual online searches. This driver restoration ensures devices function correctly after installation.
What You Need to Do First
Create a folder to store your drivers. For example:
C:\Users\YourName\Desktop\MyDrivers
Method 1Using the DISM Command
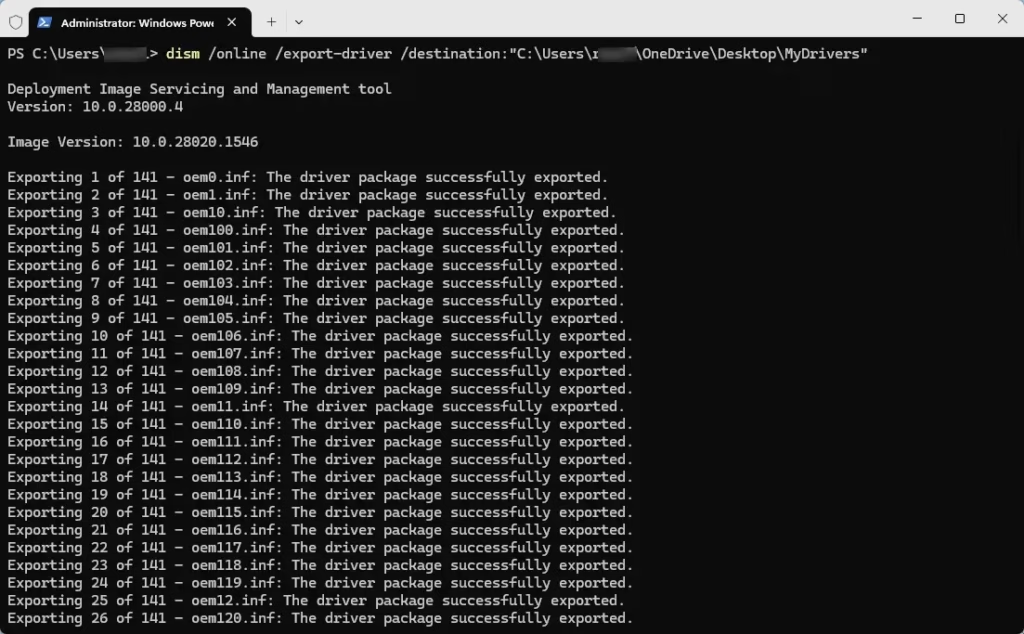
Back up your Windows 11 device drivers using the DISM command. The DISM tool lets you copy all your current drivers to a safe folder on your computer. Having this driver backup ready means you can restore your device drivers if needed, saving you time later.
Type this command, replacing the placeholder with the actual path to the folder you created:
dism /online /export-driver /destination:"C:\Users\YourName\Desktop\MyDrivers"Press Enter. DISM will copy all your third-party drivers to that folder.
Method 2Using the PnPUtil Command
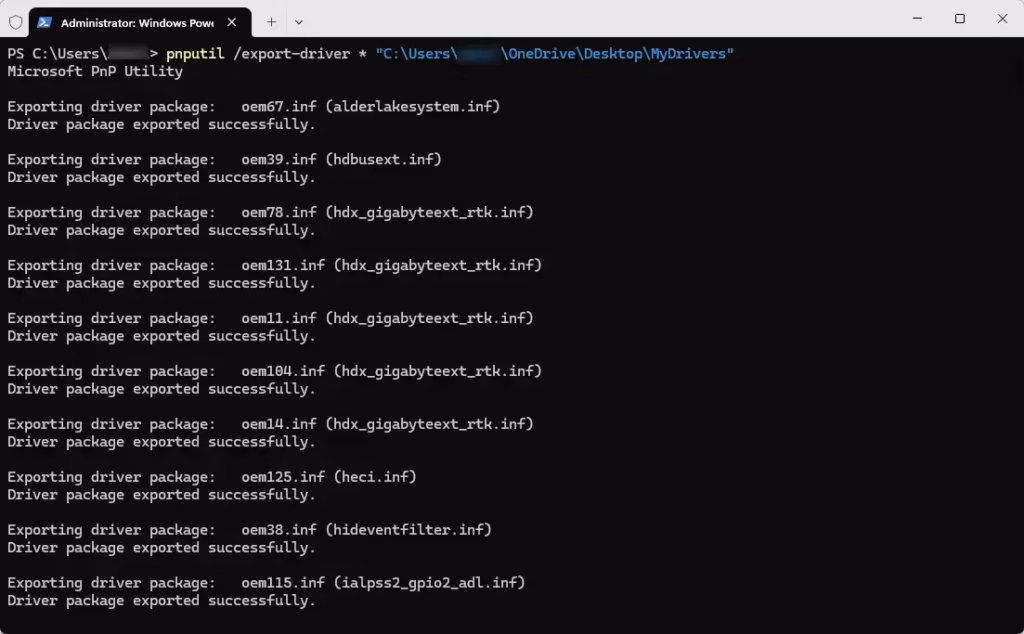
Open Windows Terminal as an administrator, just like you did for the first method.
Type this command. Replace the folder path:
pnputil /export-driver * "C:\Users\YourName\Desktop\MyDrivers"Press Enter to save the drivers.
Method 3Using PowerShell’s Export-WindowsDriver
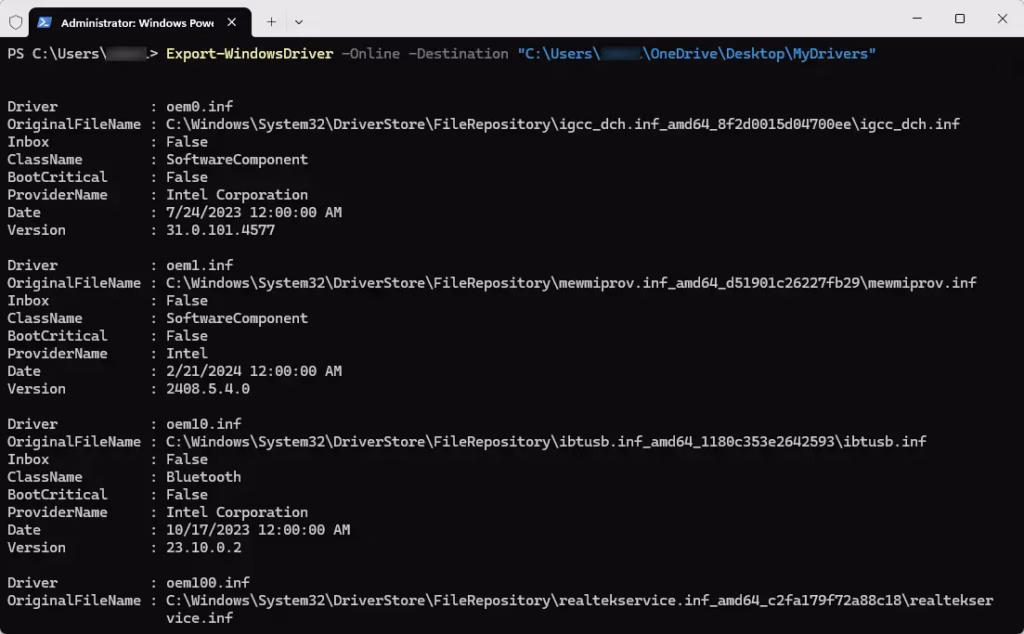
Open Windows Terminal (Admin). Ensure you’re in PowerShell, which is usually the default when you open Windows Terminal.
Type this command. Change the folder path as needed:
Export-WindowsDriver -Online -Destination "C:\Users\YourName\Desktop\MyDrivers"Press Enter. This saves your drivers to the folder.
How to Restore Device Drivers
Restore One Driver Using Device Manager
When you need to restore just one specific device driver in Windows 11, the Device Manager is the best tool. You can find and install a single driver from your backup folder for a particular piece of hardware, like your printer or webcam.
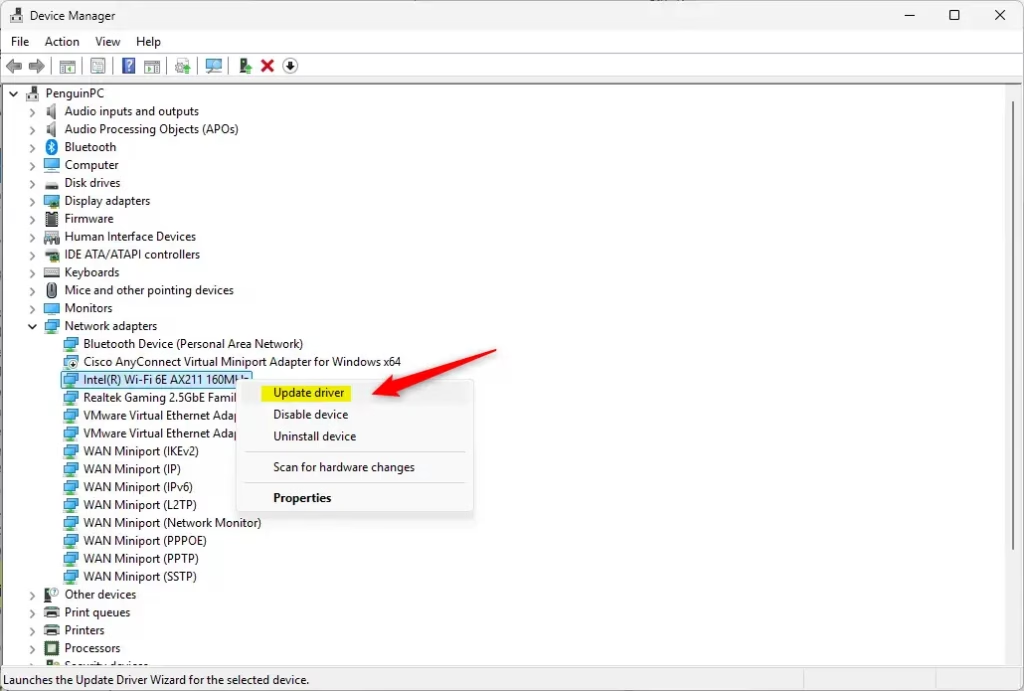
To update a device driver, first locate the specific hardware, such as a printer or webcam. Then, right-click the device name on your screen and choose the "Update driver" option from the menu that appears.
Choose Browse my computer for drivers.
Click Browse and navigate to your saved drivers folder (for example, C:\Users\YourName\Desktop\MyDrivers).
Check Include subfolders and click Next.
Windows searches your selected folder for the best driver for your hardware and installs that driver if it finds a match. This action ensures your device functions correctly by using updated or compatible hardware instructions.
Restore All Drivers Using Device Manager
Restore all your device drivers at once in Windows 11 using the Device Manager to save time. This method lets you point the tool directly to your backup folder and install all the drivers you previously saved from there.
Right-click the computer name at the very top of the list, or click ‘Action’ in the menu bar. Then, choose ‘Add drivers’.
Click Browse and choose your drivers folder.
Check Include subfolders. Then click Next. Windows will install all drivers it finds.

Restore All Drivers Using PnPUtil Command
To restore all your device drivers in Windows 11 at once, the PnPUtil command offers a quick solution. Use this command to automatically install all drivers from your backup folder without needing to go through each one individually.
Type this command. Replace the folder path:
The ` pnputil /add-driver * .inf /subdirs ` command installs all Windows device drivers found within the folder you specify and any subfolders. Following the driver installation, the computer restarts automatically if the operating system determines a restart is necessary for the new drivers to function correctly, ensuring proper hardware operation.
Summary
- Always back up your device drivers before reinstalling Windows or making big changes.
- Use one of the simple commands (DISM, PnPUtil, or PowerShell) to save your drivers to a safe folder.
- You can restore drivers one by one using Device Manager. Or restore all at once using Device Manager or the PnPUtil command.
- Keeping drivers backed up saves time and avoids driver hunting later.
- Make sure your drivers are up to date after restoring for best computer performance.
Always back up your device drivers before reinstalling Windows or making significant system changes. You can save drivers using DISM or PnPUtil, and restore them one by one with Device Manager or all at once using Device Manager or PnPUtil.
DISM Driver Servicing Commands
Export-WindowsDriver PowerShell Cmdlet
How to restore drivers from backup?
And you need to restore these drivers. Here’s how to get them back. Once again, open the command prompt as an administrator.
Will system restore restore drivers?
With System Restore, you can revert your PC’s state to a previous point in time. This can be particularly useful when troubleshooting issues caused by recent changes, such as software installations, driver updates, or system settings modifications.
Was this guide helpful?

About the Author
Richard
Tech Writer, IT Professional
Richard, a writer for Geek Rewind, is a tech enthusiast who loves breaking down complex IT topics into simple, easy-to-understand ideas. With years of hands-on experience in system administration and enterprise IT operations, he’s developed a knack for offering practical tips and solutions. Richard aims to make technology more accessible and actionable. He's deeply committed to the Geek Rewind community, always ready to answer questions and engage in discussions.


No comments yet — be the first to share your thoughts!