This article explains how to repair or reset Windows Subsystem for Linux (WSL) Ubuntu distribution in Windows 11.
Windows Subsystem for Linux lets developers run a GNU/Linux environment directly in Windows without setting up a virtual machine or dual-boot, including most command-line tools, utilities, and applications.
With WSL version 2 installed on Windows, you can repair or reset a Ubuntu distribution in a WSL environment if the app isn’t working correctly.
If you use Ubuntu Linux inside WSL, and the app isn’t working right, you can repair it without losing the app’s data and most settings.
On the other hand, if repairing doesn’t resolve or fix the app’s issues, you can reset the Ubuntu Linux app. Doing this will reset all settings, and data will be lost.
Below is how to use the repair or reset function with WSL Ubuntu Linux.
Repair WSL Ubuntu Linux
As mentioned above, the repair and reset function can fix WSL Ubuntu Linux app issues.
When you use the repair function, the apps will restore some default settings without losing data created within the Ubuntu Linux distribution.
Here’s how to repair the WSL Ubuntu Linux app.
Here’s how to do that.
First, open the Windows Settings app.
You can do that by clicking on the Start menu and selecting Settings. Or press the keyboard shortcut (Windows key + I) to launch the Settings app.
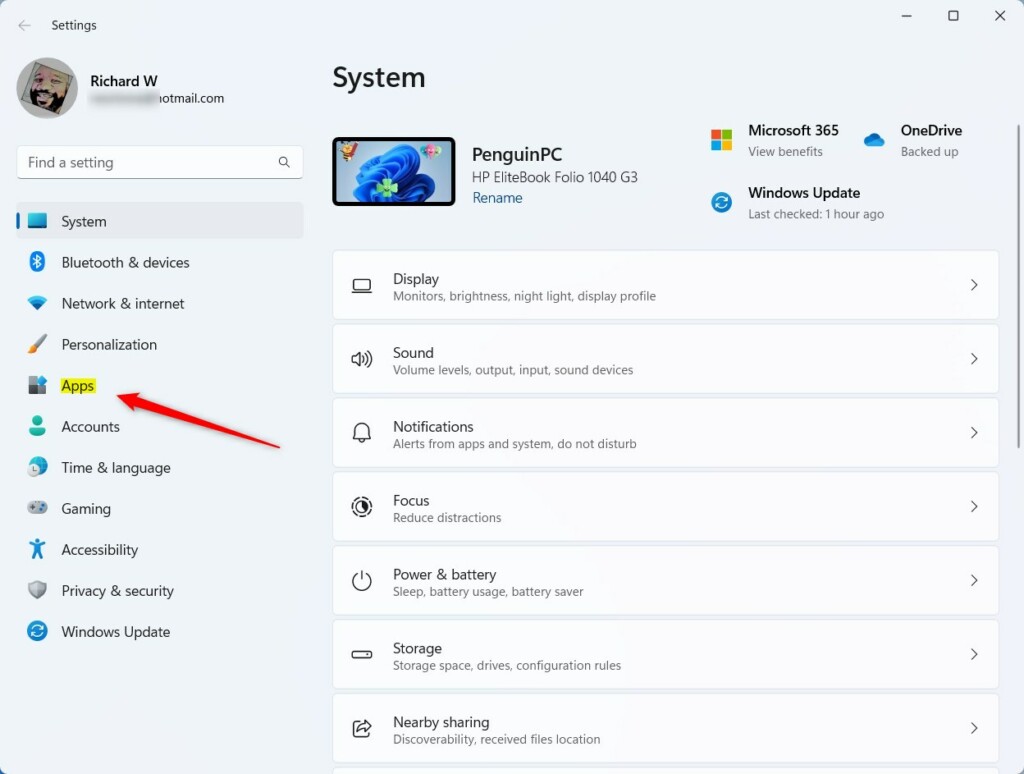
When the Setting app opens, click the Apps button on the left.
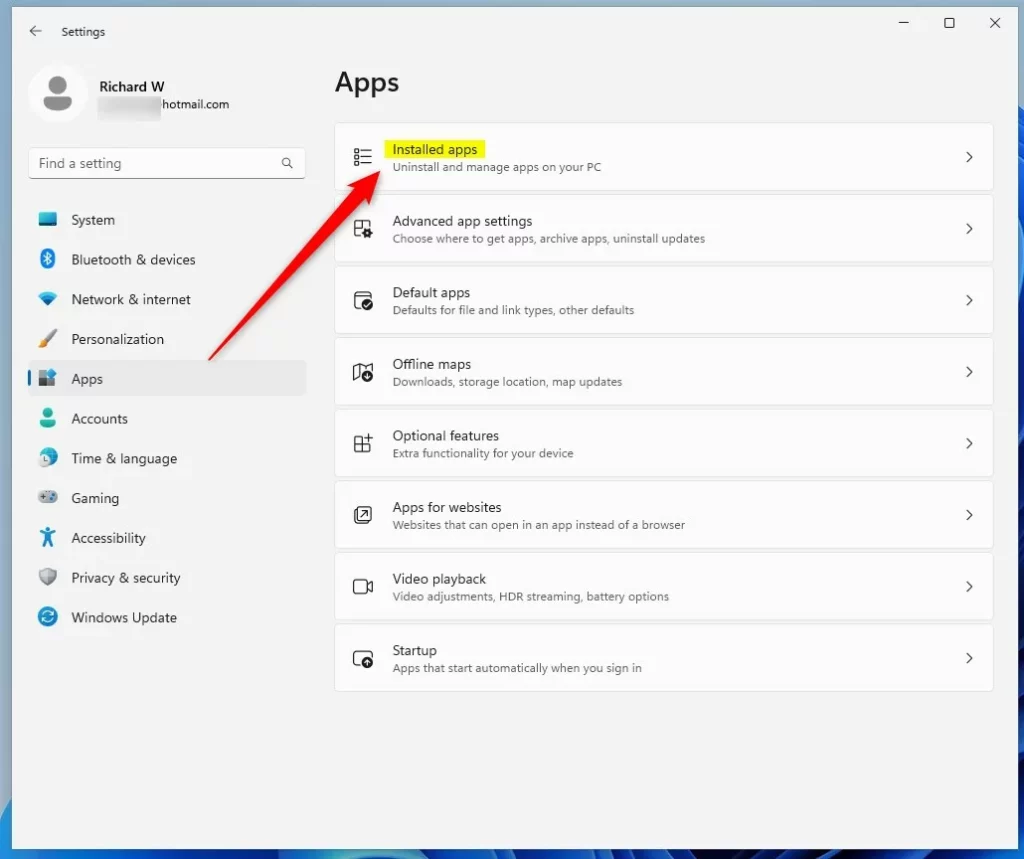
Select the Install apps tile on the right to expand it.
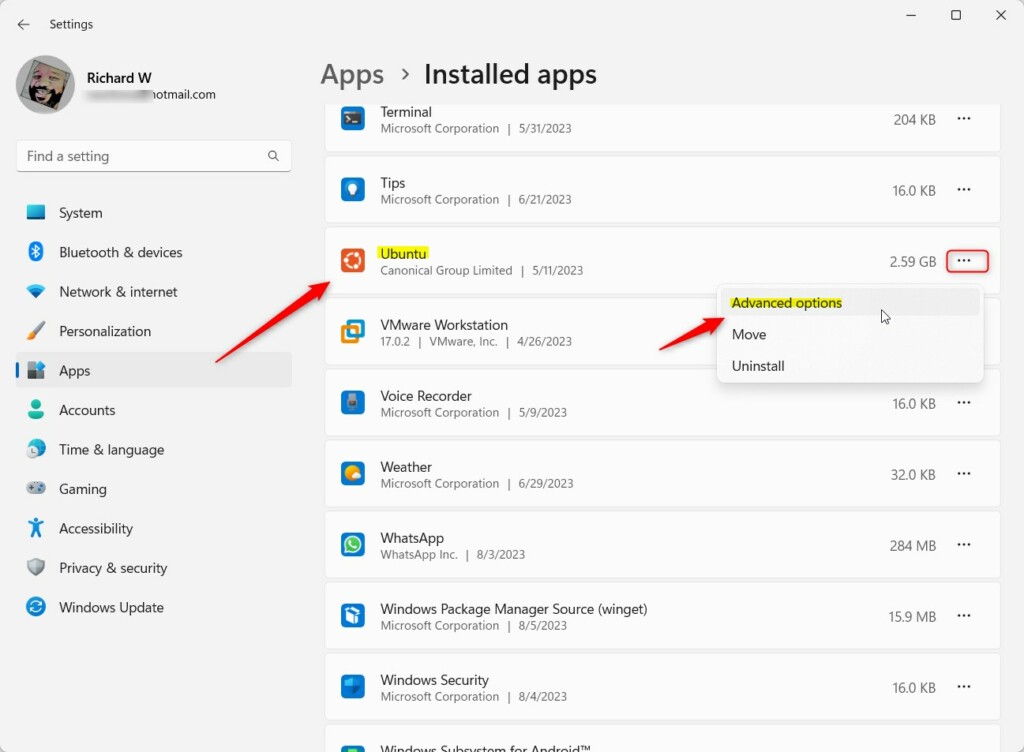
On the Apps -> Install apps setting pane, scroll down the list and select the Ubuntu Linux app tile. Next, click the menu (three-dotted) button, and click on Advanced options.
On the Advanced options pane, click the Repair button.
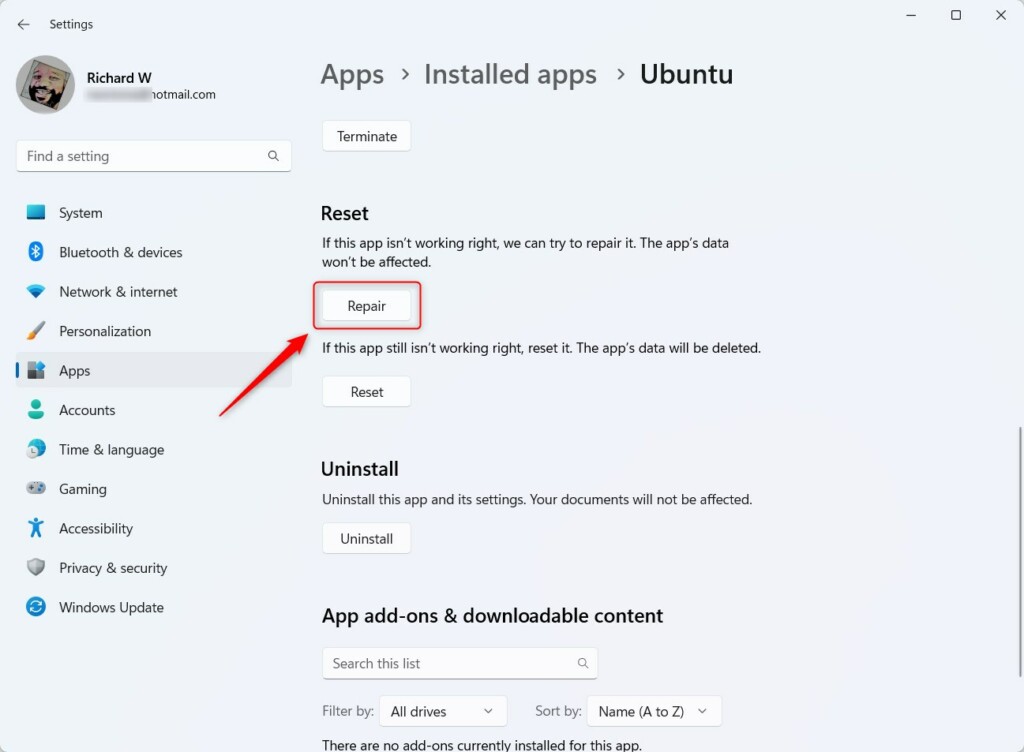
Wait for the repair process to complete, then try the use the app again to see if the issues are resolved.
Close the Settings app when done.
Reset the WSL Ubuntu Linux app
If the repair function didn’t resolve the WSL Ubuntu Linux app issues, you can use the reset future to restart all settings and delete all the apps’ data.
To do that, follow the Repair steps above by going to Settings -> Apps -> Installed apps and opening the Advanced options of the Ubuntu Linux app.
On the Advanced options pane, click the Reset button to reset the WSL Ubuntu Linux app.
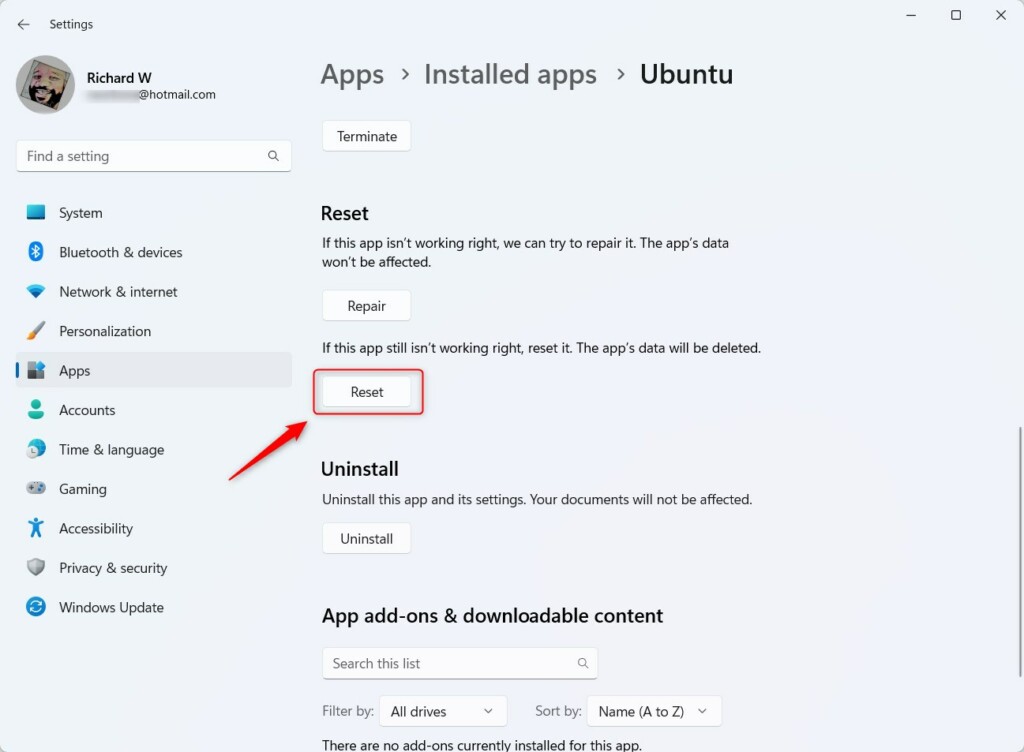
Wait for the reset process to complete, then try the app again to see if the issues are resolved.
Close the Settings app when done.
Alternatively, the Windows Terminal app can reset WSL Ubuntu Linux.
First, open the Windows Terminal app as administrator.
Then run the commands below to list all installed, then unregister (reset) WSL Linux distributions
wsl --list
wsl --unregister Ubuntu
That should do it!
Conclusion:
- Repair and reset functions solve WSL Ubuntu Linux app issues in Windows 11 without losing app data and settings.
- The repair function restores default settings, while the reset function restarts all settings and deletes app data.
- The Windows Settings app is used to access the repair and reset options for the WSL Ubuntu Linux app.
- An alternative method involves using the Windows Terminal app as an administrator to reset WSL Ubuntu Linux.

Leave a Reply