How to Reset Windows Terminal to Default Settings in Windows 11
You reset Windows Terminal to its default settings by deleting its configuration file.
Windows Terminal is a modern, powerful application that consolidates Command Prompt, PowerShell, and WSL environments into one tabbed interface. It offers advanced features like custom themes, key bindings, and split panes.
Resetting Windows Terminal to default settings offers the quickest fix when application configuration changes, perhaps within the `settings.json` file found at `📂%LocalAppData%\Packages\Microsoft.WindowsTerminal_8wekyb3d8bbwe\LocalState\`, cause issues. This action returns Windows Terminal to its original state, mirroring the application immediately after installation.
Resetting removes all your personalized settings, profiles, and customizations.
Open Settings, click Apps, then Installed apps. Find Terminal, click the three dots, and select Advanced options. Click the Reset button to restore default settings. Alternatively, delete the settings.json file via Command Prompt, PowerShell, or File Explorer.
Method 1Use the Settings App
You can reset Windows Terminal settings to their defaults using the Windows Settings app on your PC. This method lets you undo any custom changes you've made, returning the Windows Terminal to its original, out-of-the-box state.
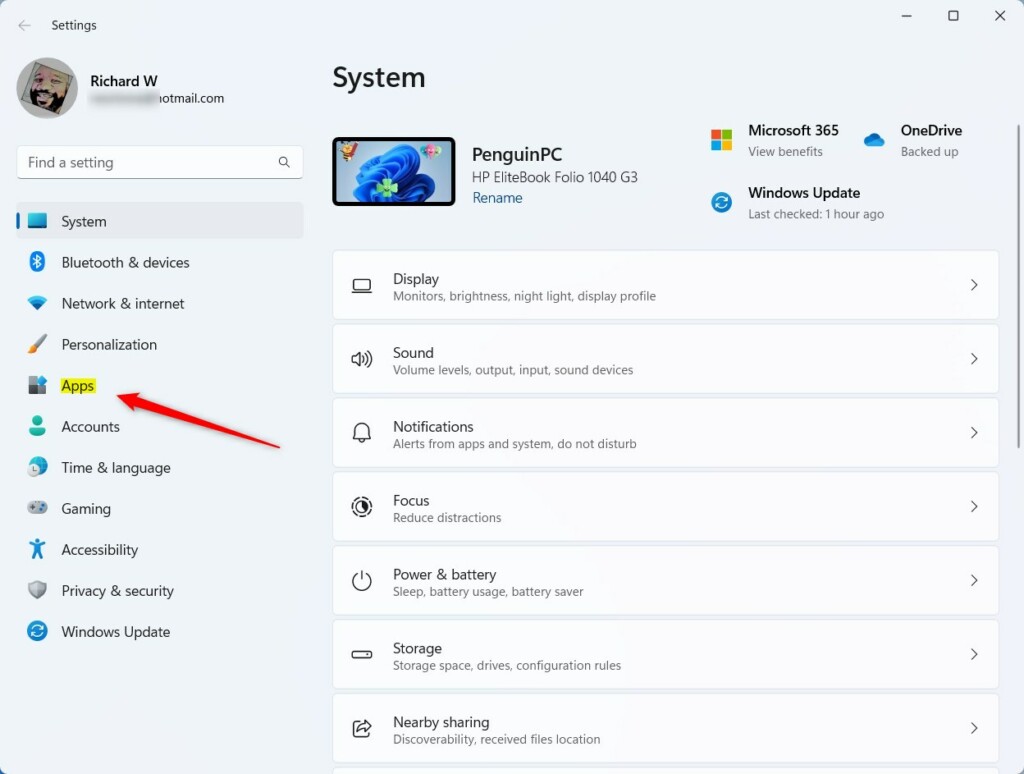
When Settings opens, click the Apps button on the left side.
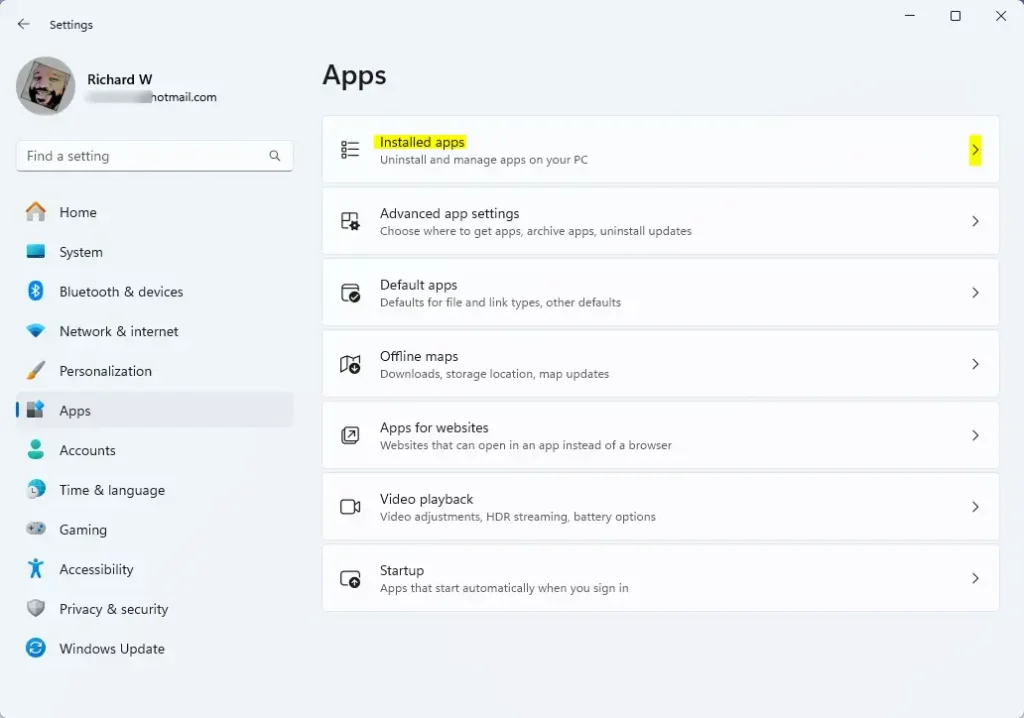
On the right side, select Installed apps to expand the list.
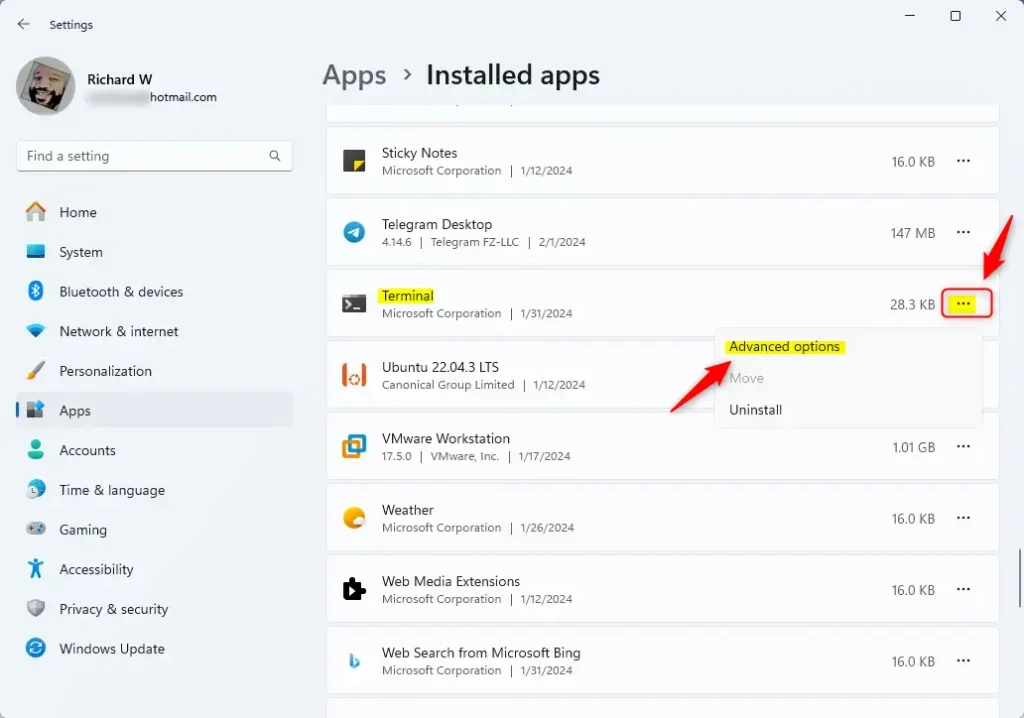
Windows Terminal, a powerful command-line application, requires specific steps for resetting its settings. To reset Windows Terminal, locate the application in your list of installed programs. Click the three dots that appear next to Windows Terminal, then select "Advanced options" from the dropdown menu to access the reset controls.
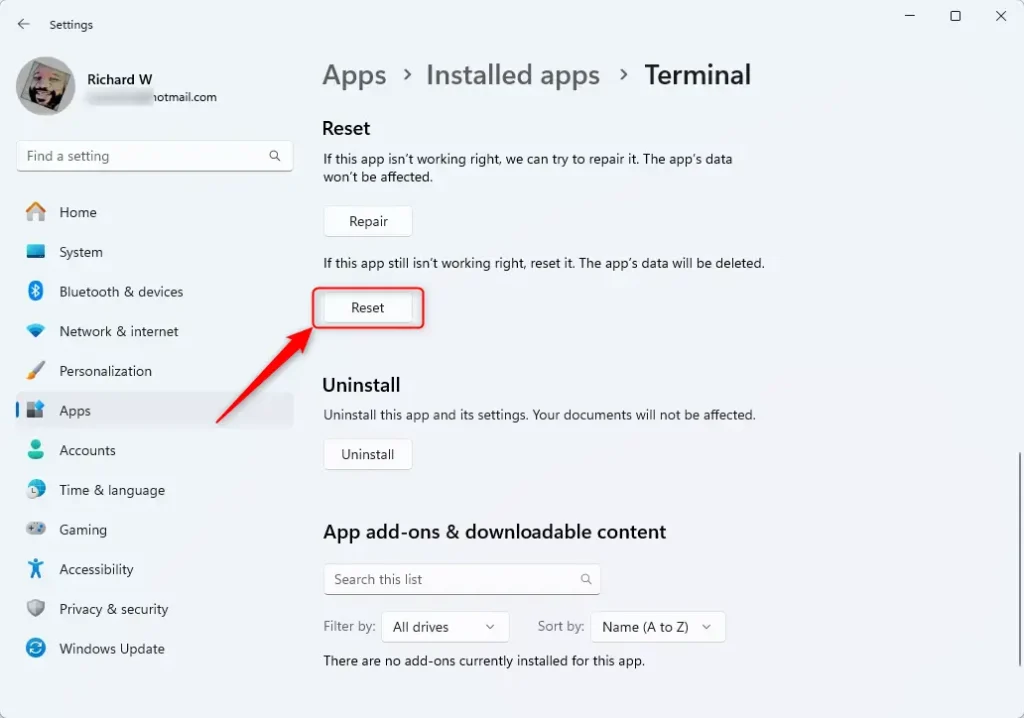
On the Windows Terminal settings page, clicking the Reset button restores all default settings for the application. This action returns the Windows Terminal to its original configuration, undoing any customizations you may have made.
When you're done, close the Settings app.
Method 2Use Command Prompt or PowerShell
You can reset Windows Terminal settings using a command in either Command Prompt or PowerShell. This method involves deleting the settings file with a quick command, restoring the terminal to its default configuration without needing to open its graphical settings.
Using Command Prompt:
Open Command Prompt as an administrator. Run this command:
del /f /s /q /a "%LocalAppData%\Packages\Microsoft.WindowsTerminal_8wekyb3d8bbwe\LocalState\settings.json"
Using PowerShell:
Open PowerShell as an administrator. Run this command instead:
Remove-Item -Path "$env:LOCALAPPDATA\Packages\Microsoft.WindowsTerminal_8wekyb3d8bbwe\LocalState\settings.json" -Force
Method 3Use File Explorer
You can reset Windows Terminal settings by manually finding and deleting its settings file using File Explorer. This approach lets you directly access and remove the configuration file, ensuring the program reverts to its default state.
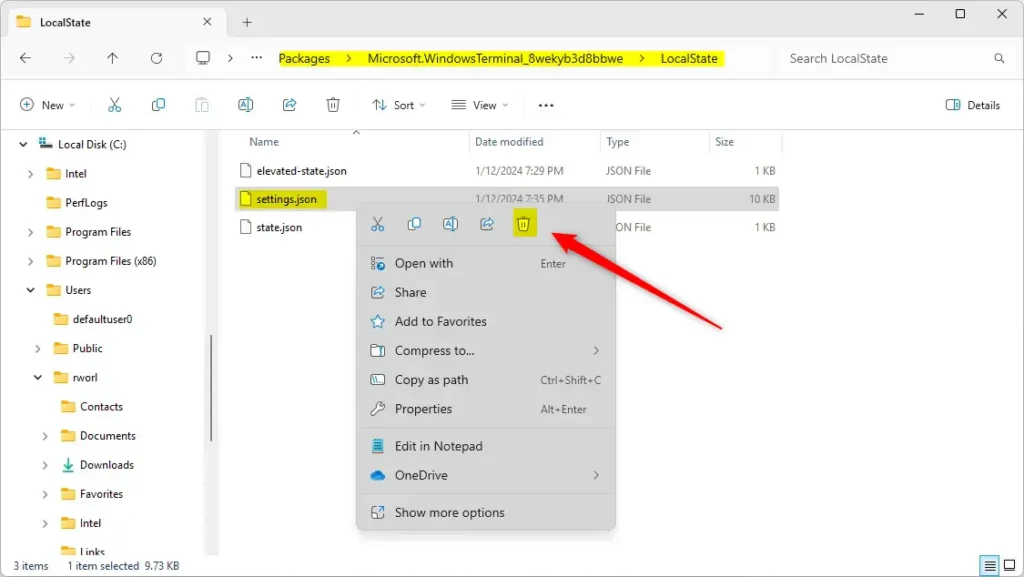
Open File Explorer. Click the address bar at the top and type this path:
%LocalAppData%\Packages\Microsoft.WindowsTerminal_8wekyb3d8bbwe\LocalState
Press Enter to go to that folder.
Find the file named settings.json. Right-click it and select Delete.
That's it! Windows Terminal is now reset to default.
Summary
Resetting Windows Terminal settings is simple, with three main methods available: the Settings app for ease of use, the command line for speed, or File Explorer for a visual approach.
Was this guide helpful?

About the Author
Richard
Tech Writer, IT Professional
Richard, a writer for Geek Rewind, is a tech enthusiast who loves breaking down complex IT topics into simple, easy-to-understand ideas. With years of hands-on experience in system administration and enterprise IT operations, he’s developed a knack for offering practical tips and solutions. Richard aims to make technology more accessible and actionable. He's deeply committed to the Geek Rewind community, always ready to answer questions and engage in discussions.


No comments yet — be the first to share your thoughts!