
This article explains how to choose which app icons are displayed in the Taskbar, taskbar corner, and taskbar overflow in Windows 11.
Some application icons are automatically added to the Windows taskbar, which can become cluttered after installing many applications. In Windows 11, you can choose which app icons are displayed in the taskbar areas, including the corner or overflow.
Organizing the app icons on your Windows 11 Taskbar can help you maintain a clutter-free workspace. By selecting only the most important and frequently used app icons, you can easily access the apps you need without having to sift through a multitude of icons.
Select which Icons Show the Taskbar on Windows 11
There are several ways to set Windows 11 as the default speaker. You can quickly choose the system-wide speakers for all applications using the Windows system settings.
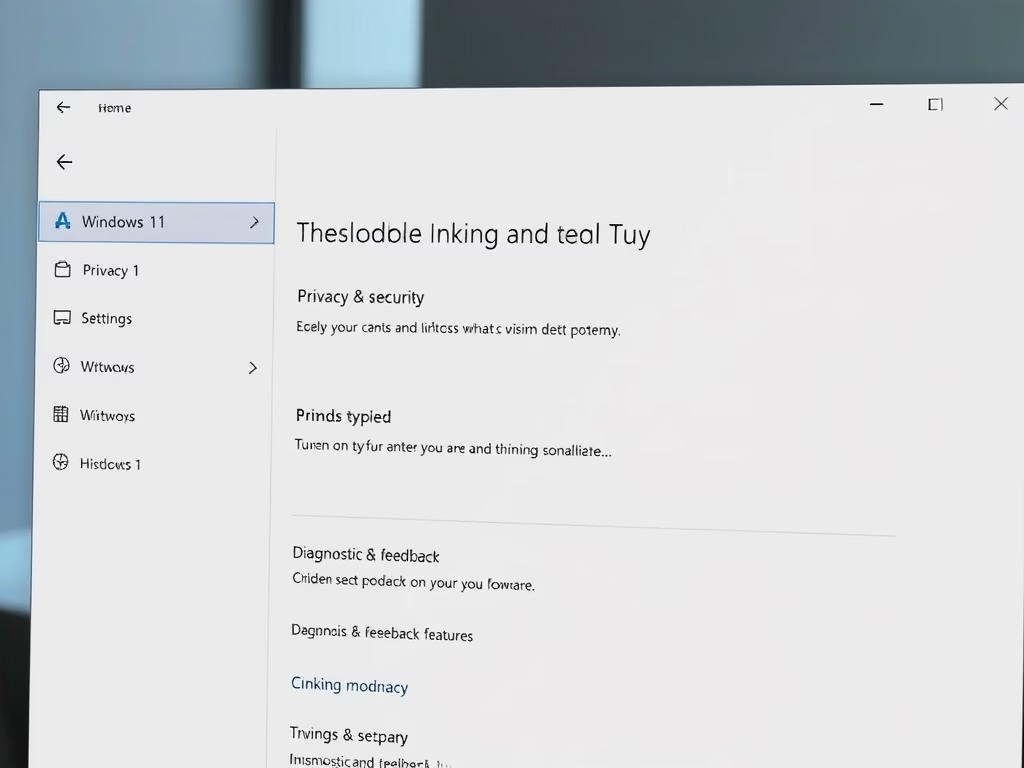
Windows 11 has a centralized location for the majority of its settings. Everything can be done, from system configurations to creating new users and updating Windows from its System Settings pane.
To get to System Settings, you can use the Windows key + I shortcut or click on Start ==> Settings, as shown in the image below:

Alternatively, you can use the search box on the Taskbar and search for Settings. Then select to open it.
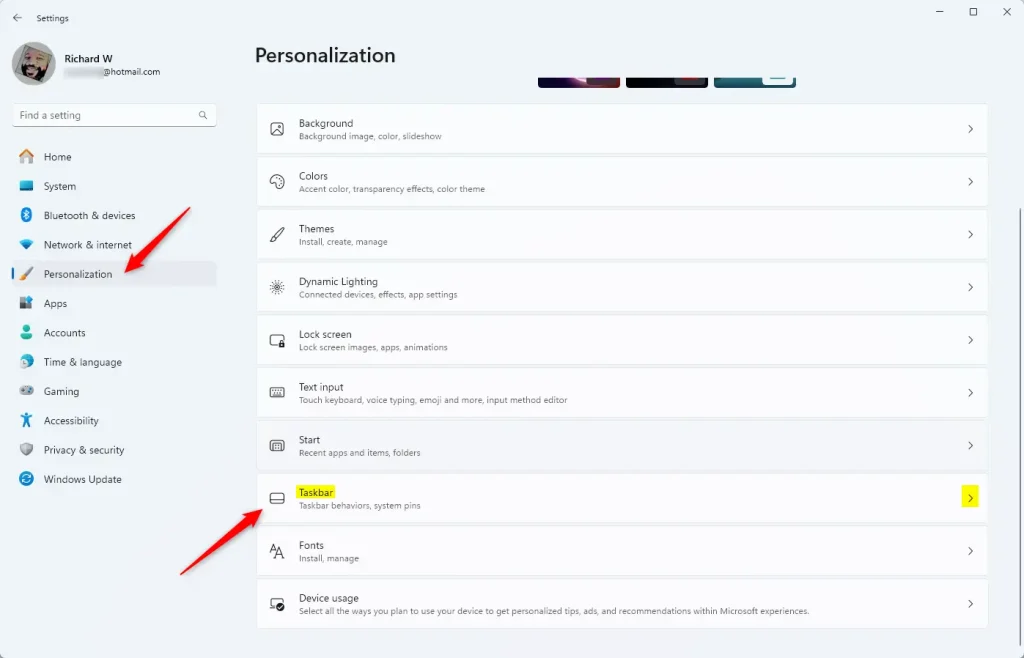
The Windows Settings pane should resemble the image below. In Windows Settings, click on Personalization and select Taskbar from the right pane.
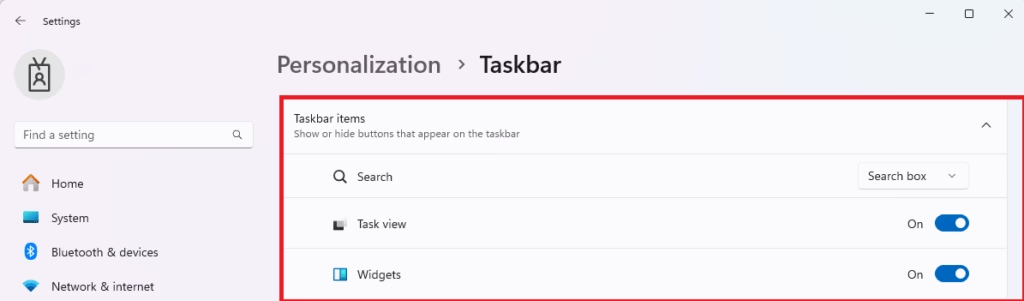
In the Taskbar settings panel, you can find options for Taskbar items, System tray icons, and Other system tray icons. Expand each section to select which app icons appear in these different areas.
Show or hide items on the Taskbar in Windows 11
In the Taskbar settings, you can show or hide buttons. Windows 11 comes with default buttons, but you can also add or remove other apps from the Taskbar as needed.
To hide buttons on the Taskbar, toggle the buttons off in the highlighted section below.
These are the Taskbar buttons that you can show or hide.

Show or hide icons in the System tray
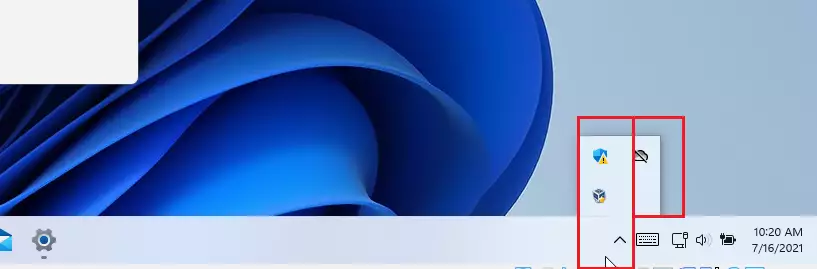
You can hide the app icons in the corner of the Taskbar in Windows 11. The corner items are located on the right side of the Taskbar.
You’ll find a long list here if you have installed more apps that are automatically added to the corner taskbar. You can stop showing items by toggling the buttons in the highlighted section of Off.
There are the Taskbar corner items. The more applications you install automatically added to the Taskbar, the more icons you’ll see here.
Show or hide Other system tray icons
You can select which icons will show in the taskbar corner and overflow area. The overflow menu contains additional icons that are not displayed in the taskbar corner.
The overflow area of the Taskbar is for app icons that cannot be pinned to the Taskbar corner.
This is the Taskbar overflow area. The top arrow exposes items hidden in the Taskbar’s overflow section.
The Taskbar has different sections you can configure to show or hide icons. Use the steps above to ensure important app icons are shown in the Taskbar so you don’t miss important messages.
That should do it!
Conclusion:
- Customizing the Taskbar in Windows 11 allows for a more organized workspace.
- Selecting essential app icons improves accessibility to frequently used applications.
- Reducing clutter on the Taskbar can enhance your computer’s performance.
- Utilize the Taskbar settings to hide or show items based on your preferences.
- Keeping your Taskbar tidy helps prevent missing important notifications and messages.

Leave a Reply