
This brief tutorial shows students and new users how to choose what icons appear in the system tray or notification area of Windows 11.
Regarding Windows, the System Tray and Notification Area, which we can find on the right side of the Windows Taskbar, are the same. System Tray features different types of notifications, like your volume control and Internet connection.
Windows 10 improves the notification area to include more programs and applications that can notify and alert you about potential issues or warnings, as well as basic information like event reminders.
Choosing what icons appear on the system tray or notification area in Windows 11 can help you personalize your desktop and streamline your workflow. You can reduce clutter and increase productivity by displaying only the icons you need.
Additionally, it allows you to keep an eye on important system notifications, such as your Internet connection and volume control, without having to open separate windows or applications. Customizing your system tray can make your Windows 11 experience more efficient and enjoyable.
When you’re ready to learn how to configure the Windows notification area, follow the steps below:
System Settings
Windows 10 has a centralized location for most of its settings, from system configurations to creating new users and updating Windows. All can be done from its System Settings pane.
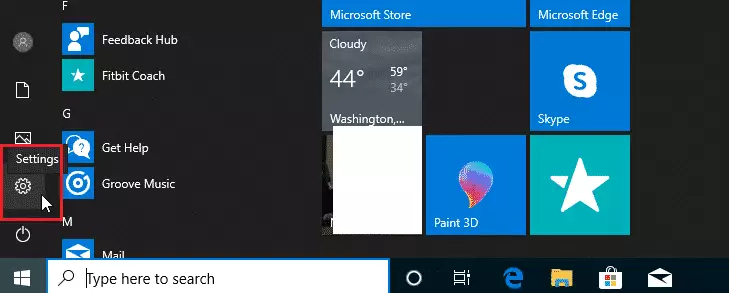
To get to System Settings, click on Start ==> Settings as shown in the left bottom corner of the image below:
Alternatively, you can use the search box on the Taskbar and search for Settings. Then open it.
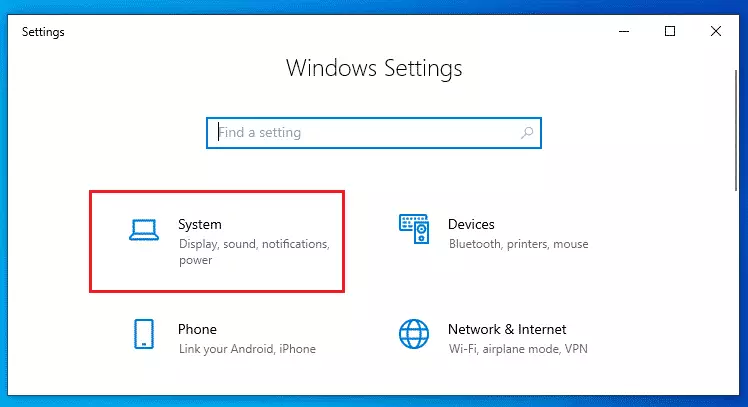
Windows Settings pane should look similar to the image below. In Windows Settings, click System.
Personalization
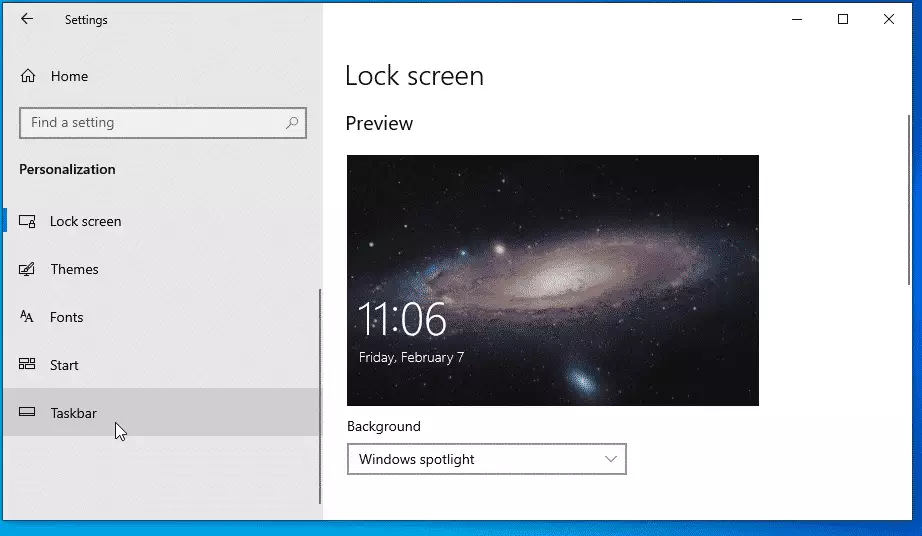
When you select System, it should open the System pane.
From there, select Personalization and click the Taskbar at the bottom left corner of your screen, as shown in the image below.
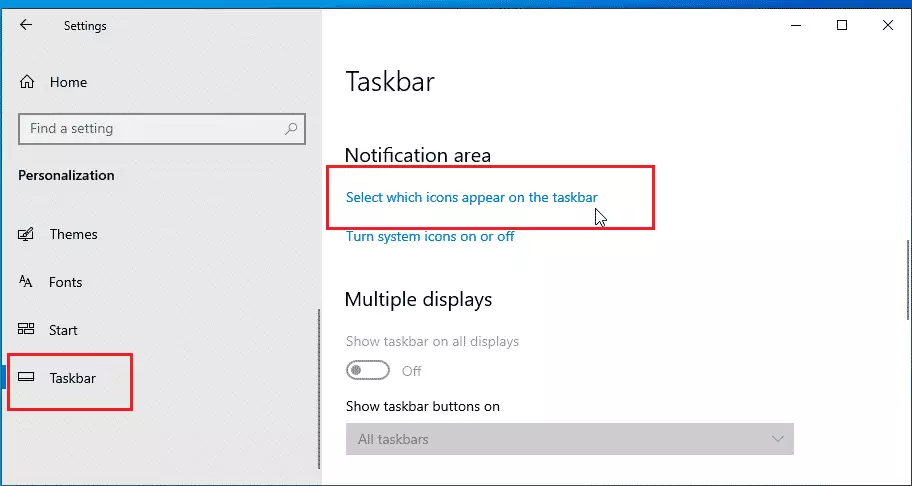
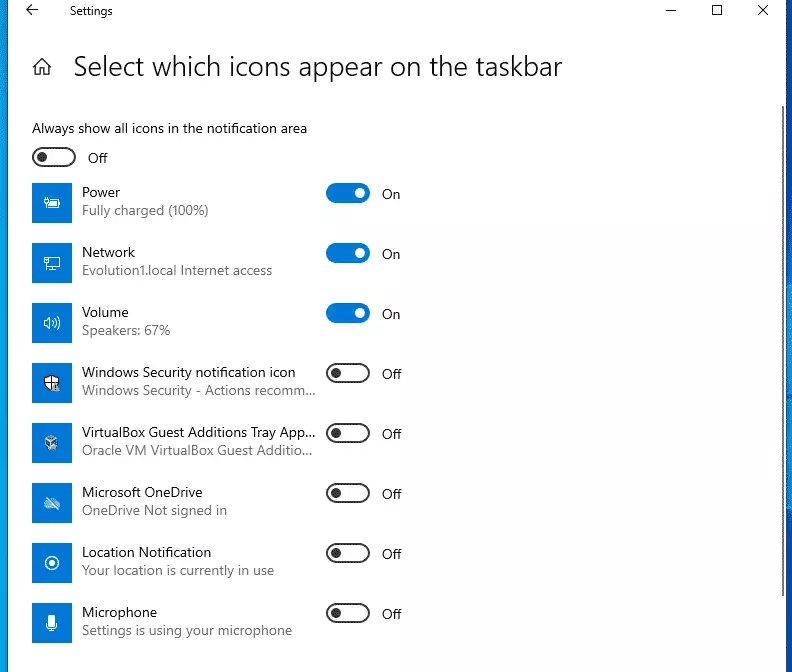
From the Taskbar window, select the option that reads Select which icons appear on the Taskbar.
Choose Icons
You can turn on or off the icons you want to appear or remove from the Windows taskbar.
That should do it!
Conclusion:
This post shows you how to select which icons to display on the Windows taskbar. If you find any error above, please use the form below to report.
Thanks,
Leave a Reply