This article explains how to share your calendar in the new Outlook app on Windows 11.
The new Outlook for Windows brings the latest features and a modern and simplified design with support for Exchange-backed Microsoft 365 work or school, Outlook.com, Hotmail, and Gmail accounts.
The app has many features, including support for email signatures, external email accounts, setting out-of-office automatic replies, email sorting, subscription management, email forwarding, setting default From address, backing up your mailbox, changing the reading pane, opening a new window for a message, language translations, turn text predictions on or off, switch primary account, and more.
Users can also share a calendar in Outlook with other people and choose whether to let them view or edit the calendar.
Sharing your calendar in Outlook can be helpful in many situations, such as when you want to schedule a meeting with someone and need to check their availability or when you want to share your upcoming schedule with a colleague or friend. By sharing your calendar, you can allow others to view your schedule and even make changes to it, depending on the level of access you grant them.
This can help ensure everyone is on the same page and can help avoid scheduling conflicts.
Share your calendar in Outlook
As mentioned above, users can share their calendar in Outlook with others and choose whether to let them view or edit it.
Here’s how to do that.
First, open the new Outlook app on Windows 11.
You can do that by clicking Start -> All app -> Outlook app. Or use the Start menu search box to search for Outlook and open it.

When the app opens, click the Settings button (gear on the top right) to proceed.

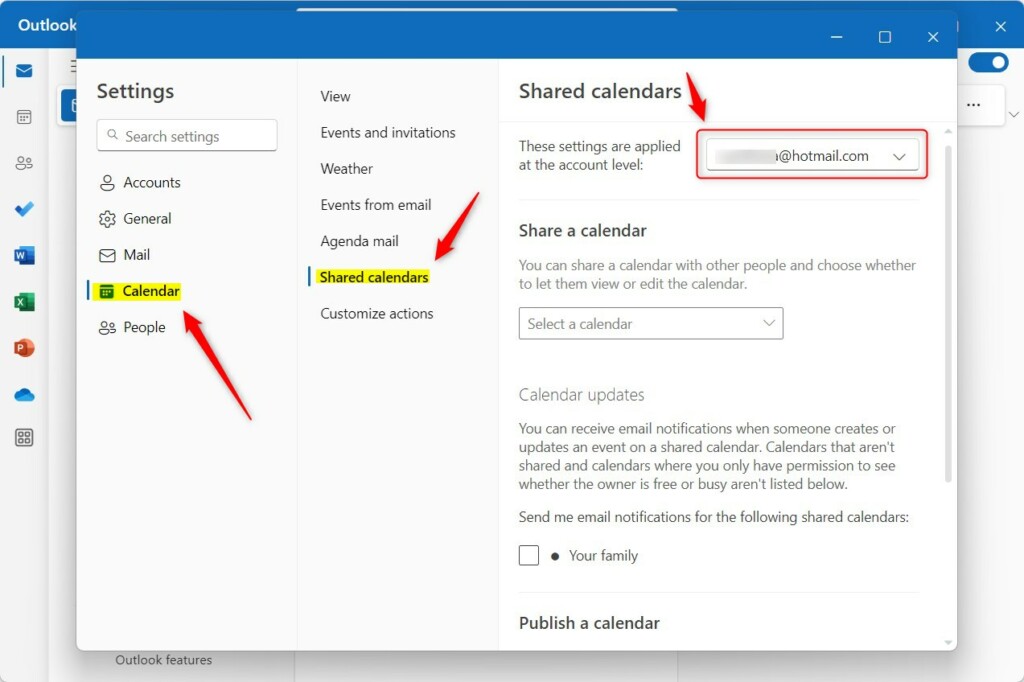
On the Settings page, click the Calendar tab on the left sidebar and select Shared calendars on the right.
Next, select the email account you want to apply message format settings if you have multiple accounts in Outlook.
This is an account-level setting that will apply only to the selected account. Please do this for each account you want it to apply.
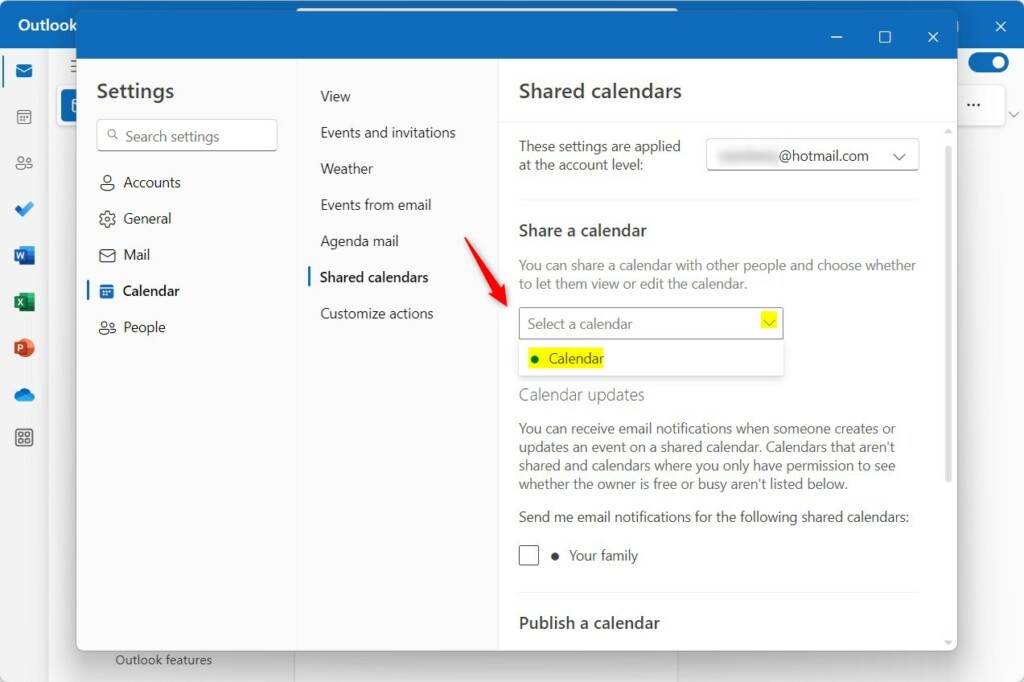
On the Shared calendars setting page, under “Share a calendar,” select the calendar you want to share with others using the drop-down caret.
On the pop-up window, type in the email address of the recipient(s) you want to share with, then press Enter.
Next, choose what the receipt can see or do with your calendar.
- Can view all details
- Can edit
Make your selection and send a sharing invitation in an email. You can choose how much access to allow and change access settings anytime.
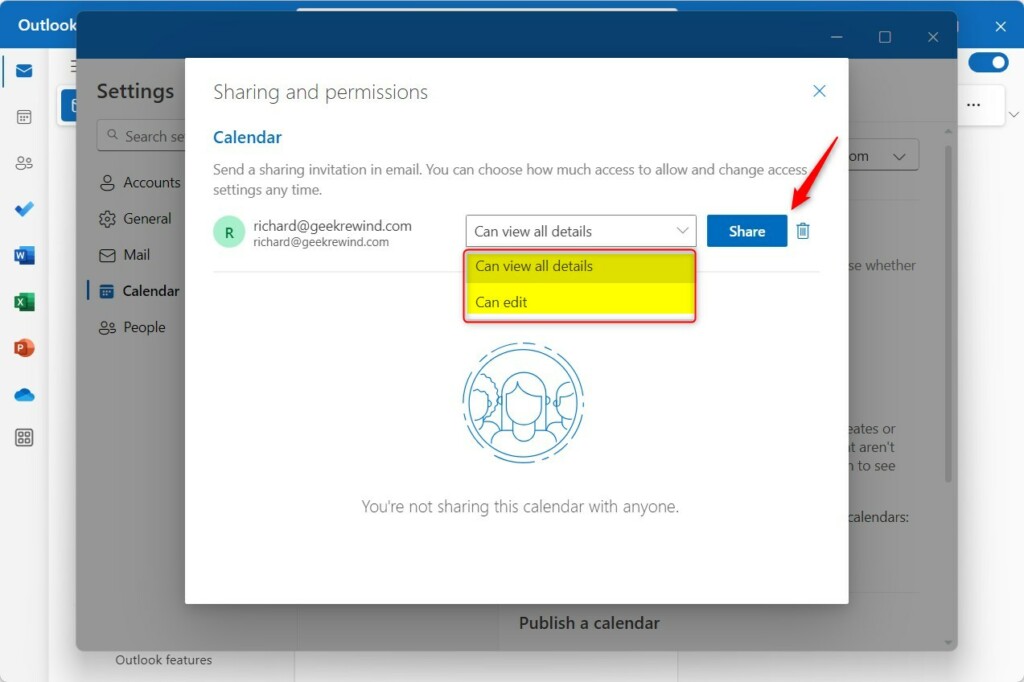
When you’re done, click the “Share” button to send the invitation to the recipient. When the recipient accepts the invitation, they can view your Outlook calendar.
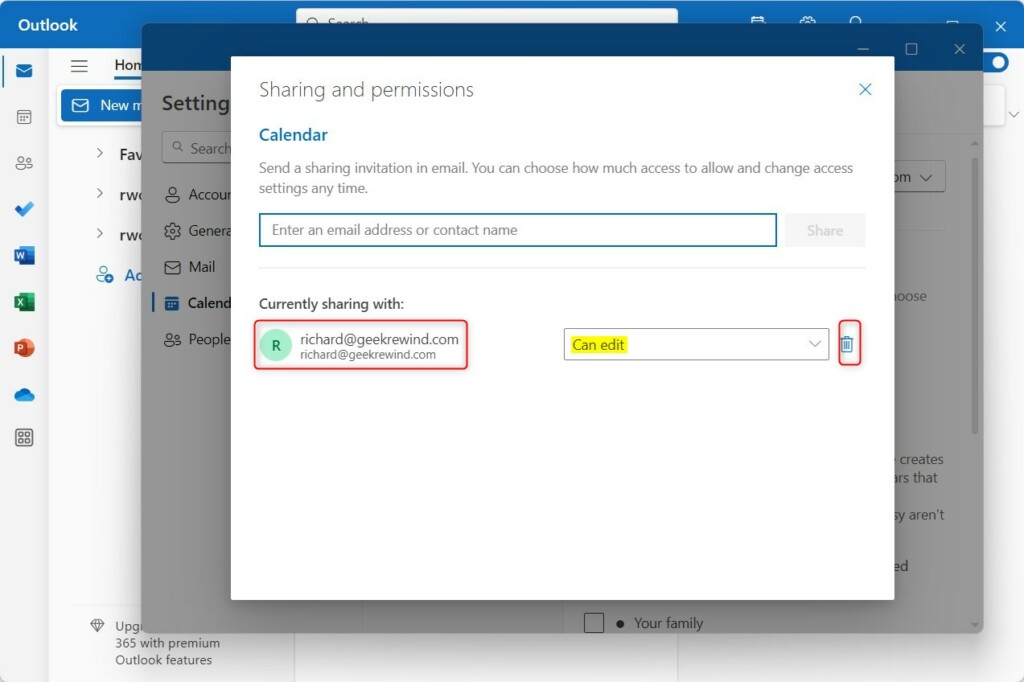
Change or remove calendar access
If you want to change the access settings for the shared calendar, return to the Outlook Settings pane. Then click Shared calendar and select the calendar.
Next, change what access the users should have or click on the delete trash bin to remove access to your calendar.
That should do it!
Conclusion:
- Sharing your calendar in Outlook on Windows 11 is an efficient way to collaborate with colleagues or friends by allowing them to view or edit your schedule.
- By following simple steps in the new Outlook app, you can share your calendar and choose the level of access for the recipients.
- Shared calendars enable better coordination and help prevent scheduling conflicts, ensuring everyone stays on the same page.
- Additionally, managing access to shared calendars is straightforward, providing the flexibility to alter or revoke permissions.
- Utilize these features to streamline communication and enhance coordination within the Outlook app for Windows 11.


Leave a Reply to How to use the Safe Senders feature to decide who can send mail to your inbox in Outlook – Geek Rewind Cancel reply