This article explains how to respond to requests for read receipts in the new Outlook app on Windows 11.
The new Outlook for Windows brings the latest features and a modern and simplified design with support for Exchange-backed Microsoft 365 work or school, Outlook.com, Hotmail, and Gmail accounts.
The app has many features, including support for subscription management, email forwarding, setting default From address, backing up your mailbox, changing the reading pane, opening a new window for a message, language translations, turning text predictions on or off, switch primary account, sharing a calendar, changing language, date and time format, publishing a calendar, and more.
Using Outlook on Windows, you can configure how to respond to requests for read receipts using the app. There are three choices for responding to such requests: Ask me before sending a response, Always respond, and Never send a response.
In email communications, it’s common for people to send emails and request read receipts to ensure that their messages are being seen and read by the recipients.
By always responding, you let the sender know you have received their email and read it. On the other hand, if you choose never to send a response, the sender won’t be notified when you open their message.
The “Ask me before sending a response” option allows you to decide on a case-by-case basis whether or not you want to send a read receipt.
Some people prefer to send a read receipt to let the sender know they have received and read their email. Others may not want to send a read receipt as they consider it an invasion of privacy, or they simply don’t want to be bothered with the request.
Choose to respond or never respond to read receipts in Outlook
As mentioned above, the new Outlook app allows users to choose how to respond to requests for read receipts.
If you feel like it’s an invasion of privacy, you can choose not to respond. Or choose always to respond if you want to use it.
Here’s how to turn it on or off.
First, open the new Outlook app on Windows 11.
You can do that by clicking Start -> All app -> Outlook app. Or use the Start menu search box to search for Outlook and open it.

When the app opens, click the Settings button (gear on the top right) to proceed.

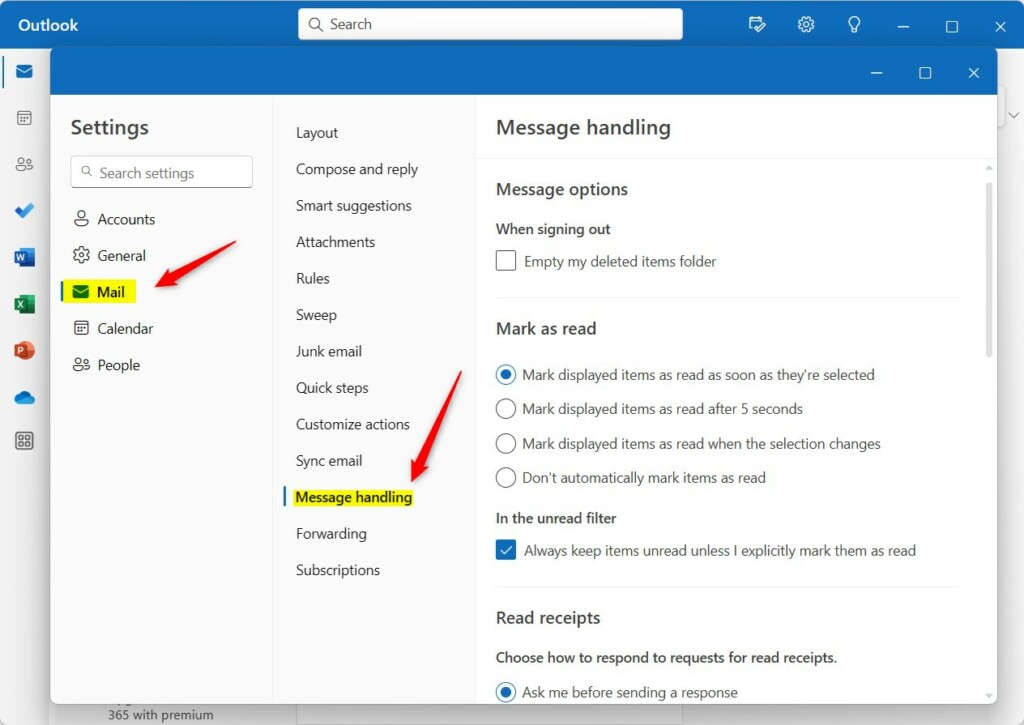
On the Settings page, click the Mail tab on the left sidebar and select Message handling on the right.

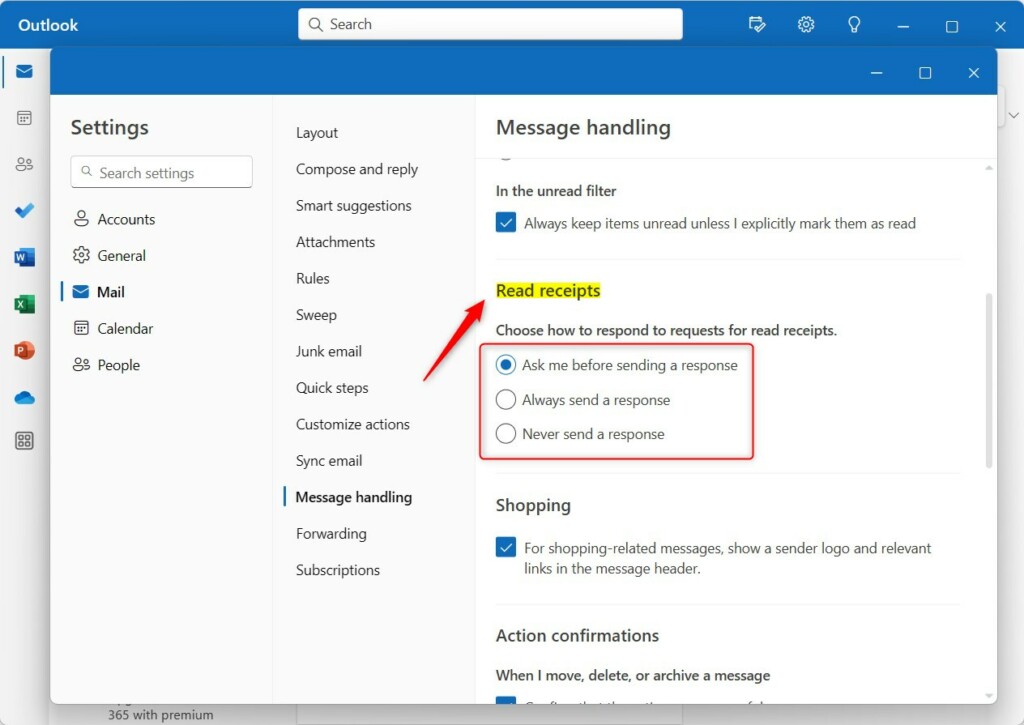
On the Message handling setting page, under “Read receipts,” select one of the choices of how to respond to requests for read receipts:
- Ask me before sending a response
- Always send a response
- Never send a response

Make your choice and save your changes. Then restart Outlook.
That should do it.
Conclusion:
- This article explained how to respond to requests for read receipts in the new Outlook app on Windows 11.
- Users were guided through the process of accessing the necessary settings and selecting from the available options: Ask me before sending a response, Always respond, and Never send a response.
- The guide provided a comprehensive, step-by-step walkthrough, complete with visual aids, to ensure a seamless experience for users.
- Additionally, readers were encouraged to engage with the content by providing feedback and contributions in the comments section.

Leave a Reply