How to Publish Your Calendar in Outlook for Windows 11
You publish your Outlook calendar in Windows 11 to generate a shareable web link for viewing your schedule publicly.
Your calendar becomes accessible to anyone, even people without a Microsoft account. This calendar sharing feature lets others see your availability without needing a login.
Publishing your Outlook calendar gives viewers read-only access, allowing them to see your appointments but not change them. You control the level of detail shared, safeguarding your privacy.
For instance, you can publish your calendar for a specific duration, like 7 days, or indefinitely, offering significant flexibility.
Go to Settings, then Calendar, and Shared calendars. Select the calendar you want to share and choose your permission level. Click Publish to generate an HTML or ICS link for sharing.
What happens when you are done?
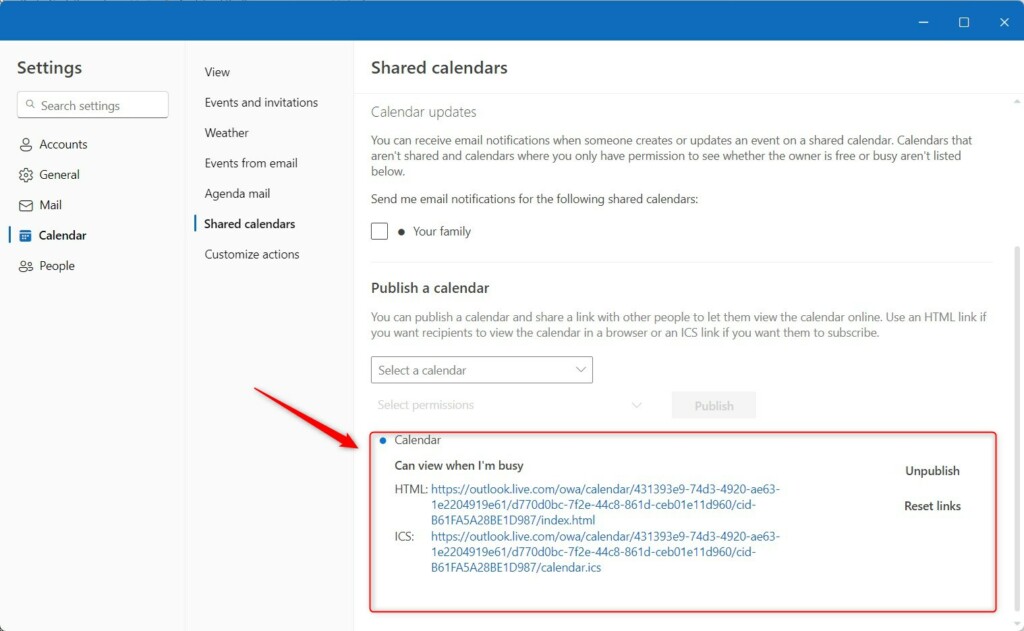
Once you publish your calendar in Outlook, you’ll receive two important links: an HTML link to view your schedule in a web browser and an ICS link to subscribe to it in other calendar apps.
Prerequisites and Permissions
The publish calendar option may be disabled for some accounts, especially those managed by a workplace or school. If you do not see the publish option, your IT administrator likely turned the publish calendar feature off for security reasons. You cannot bypass this restriction without administrative access to your organization's Exchange Online settings.
How to publish your calendar
Publishing your calendar in Outlook for Windows lets you share your schedule with others. This feature is useful if you want people to see when you’re busy or free without needing to ask. You can control who sees what and for how long, making it a convenient way to manage shared availability.
1. Open the Outlook app on your computer.

2. Click the Settings gear icon in the top right corner.

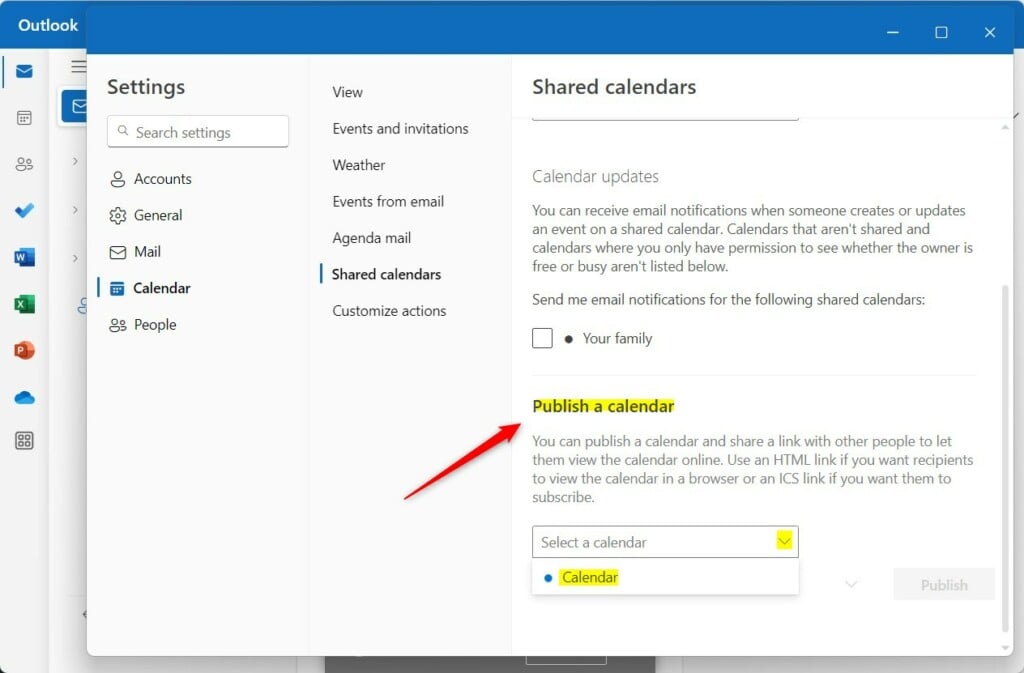
3. Select Calendar, then click Shared calendars.

4. Choose the account you want to share.
5. Under Publish a calendar, pick the specific calendar you want to share.
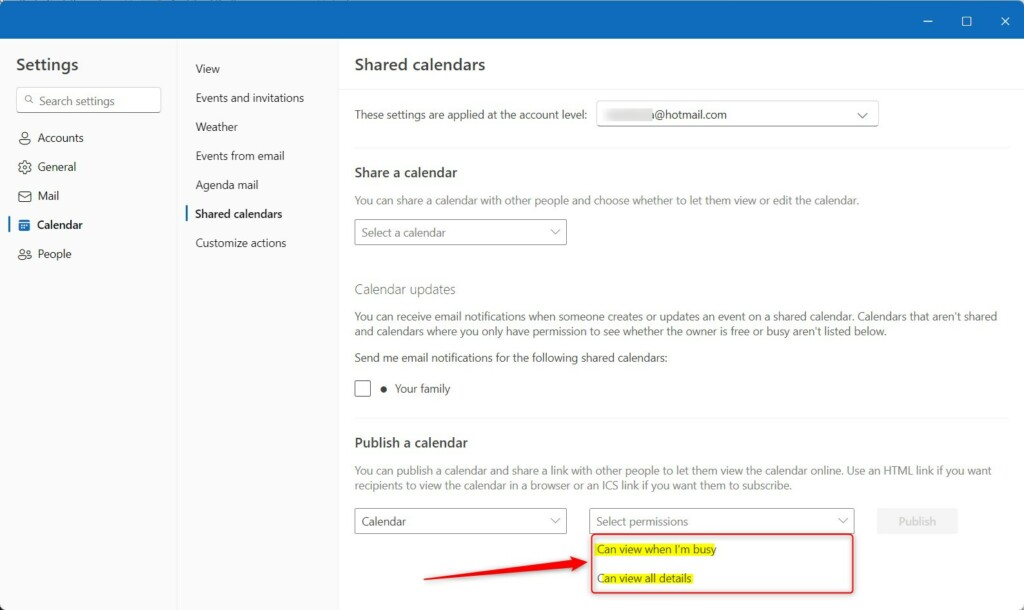
6. Select the permission level: Can view when I’m busy or Can view all details.
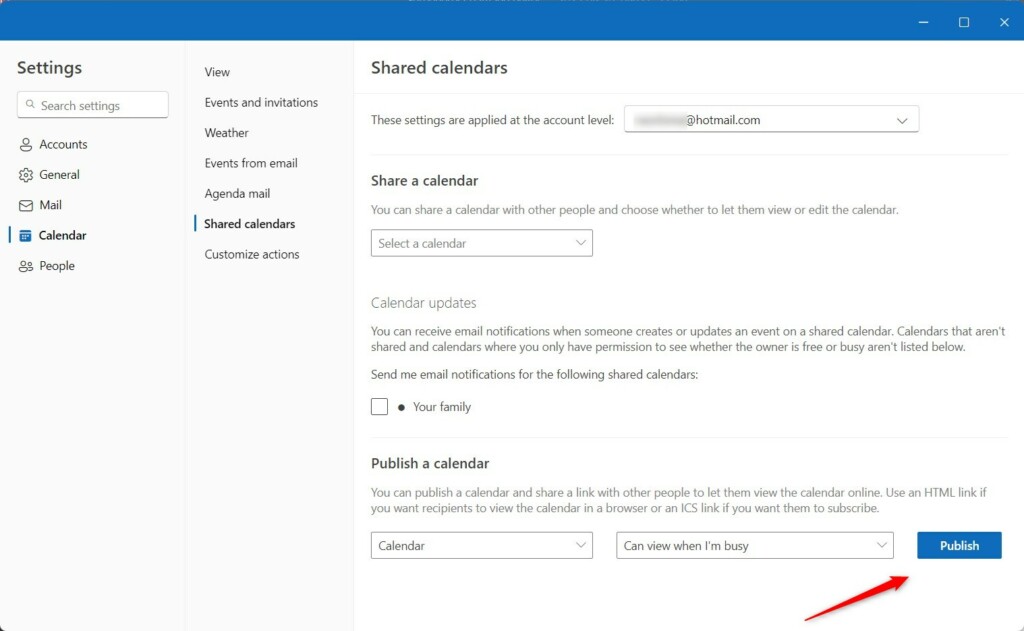
7. Click Publish to generate your links.
8. Copy the HTML or ICS link to share with others.
Difference between sharing and publishing
Sharing a calendar usually requires the other person to have a Microsoft account so they can see it inside their own Outlook app. Publishing creates a public link that anyone with a web browser can open. Publishing is better for broad, view-only access, while sharing is better for collaboration.
Troubleshooting Common Issues
If your Outlook publish calendar links aren’t working, the easiest fix is to reset them. Go to the Shared calendars menu and click ‘Reset links’ to generate a new URL, which often resolves the problem.
Summary
Publishing your calendar is a quick way to share your availability. By generating an ICS or HTML link, you let others view your schedule without needing special software. Always remember to check your privacy settings and unpublish the calendar if you no longer want it to be accessible online.
Why can’t I see the publish option in my Outlook settings?
You might not see the publish calendar option in Outlook settings if you’re using a work or school account, as IT admins often disable it for security. For personal accounts, ensure your Outlook app is updated to the latest version.
Is my published calendar secure?
Your published calendar’s security depends on who has the link; it’s public to anyone with the URL, though not indexed by search engines. Treat the link like a password and consider using the ‘Can view when I’m busy’ setting for better privacy.
How do I remove a published calendar link?
To stop sharing, return to the Shared calendars section in your Outlook settings. Select the calendar you previously published and click the Unpublish button. This immediately invalidates the HTML and ICS links, ensuring that no one can access your calendar information through those URLs anymore.
Was this guide helpful?

About the Author
Richard
Tech Writer, IT Professional
Richard, a writer for Geek Rewind, is a tech enthusiast who loves breaking down complex IT topics into simple, easy-to-understand ideas. With years of hands-on experience in system administration and enterprise IT operations, he’s developed a knack for offering practical tips and solutions. Richard aims to make technology more accessible and actionable. He's deeply committed to the Geek Rewind community, always ready to answer questions and engage in discussions.


[…] primary account, sharing a calendar, changing language, date and time format, public a calendar, show week numbers in Outlook calendar, deleting your search history, export your […]
[…] or off, switch primary account, sharing a calendar, changing language, date, and time format, public a calendar, show week numbers in Outlook calendar, deleting your search history, export your search […]
[…] primary account, sharing a calendar, changing language, date and time format, public a calendar, show week numbers in Outlook calendar, deleting your search history, export your […]
[…] primary account, sharing a calendar, changing language, date and time format, publishing a calendar, and […]
[…] primary account, sharing a calendar, changing language, date, and time format, public a calendar, show week numbers in Outlook calendar, deleting your search history, export your […]